
Manage the Elements API
The Elements API (Application Programming Interface) is one of the two methods by which the Elements system interacts with other systems within your institution (the other being the reporting database). API interactions may feed information into Elements (e.g. feeding user details from the HR system) or pull information from Elements (e.g. pulling publications information to display on a website).
System Administrators for Elements may have to carry out a small number of administrative tasks to maintain and check the API, and to allow access.
This guide is designed to be read in conjunction with the Elements API Administrator Guide and the API User Guide.
Making sure the API service is running
To make sure that the API is running, navigate to System admin > Jobs & scheduling > Scheduled jobs. You will find the API service at the bottom of the screen:
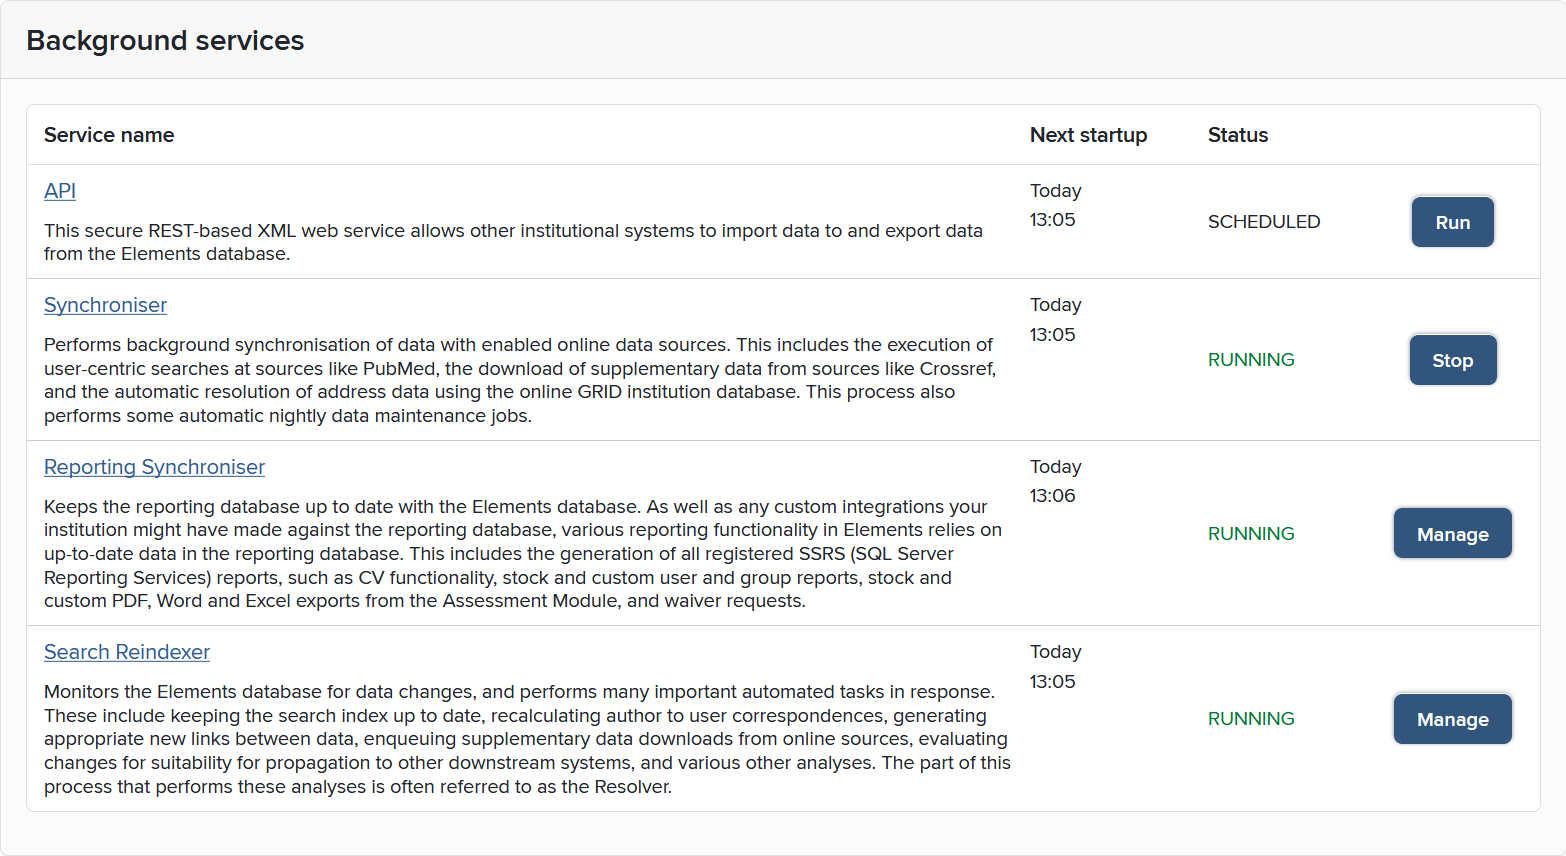
Click on the 'API' link to enter the API screen, where you can alter its schedule. The API should always be running to be available to respond to queries. Setting it to run hourly will ensure it is restarted to be available to users if the service is ever interrupted (e.g. by a server reboot).
Turning off the API when needed
If you need to turn off the API, you need to complete two steps:
Uncheck the 'Active' box on the API screen (System admin > Jobs & scheduling > Scheduled jobs; in the 'Background services' box, click on 'API'). This will prevent the API being restarted automatically once it has been stopped.
Return to the Scheduled Jobs screen and click on the ‘stop’ button next to the API.
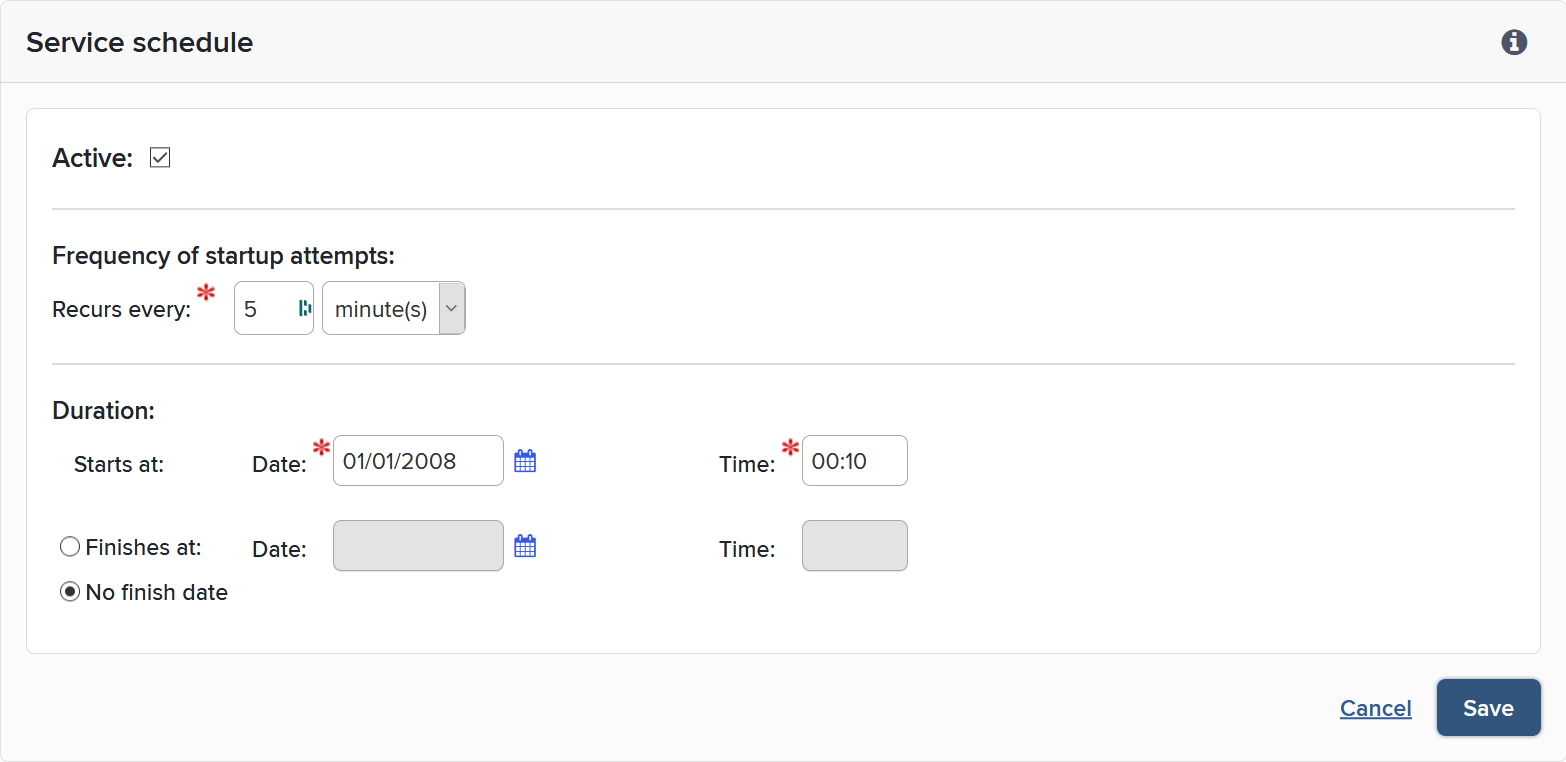
To allow the API to run again, check the 'Active' box on the API screen, save the new settings, then click the 'Run' button on the Scheduled Jobs page to start the API again immediately.
Manage API
Note: Any changes to the Elements API (everything below) will not take effect before the API Service is restarted

API Configuration
Navigate to System admin > Authentication & access > API configuration to manage the permissions for external systems.
Only users/external systems who have specifically been given access can use the Elements API. The administrators of systems within your institution who need access to the API will therefore contact you to arrange permission.
Access is given to specific IP addresses, rather than individuals, so these administrators will need to supply you with the IP address of their computer. Where computers are assigned IP addresses dynamically within a certain range, this range can also be entered into the field (see note below).

To set up a new user/external system, go to System admin > Authentication & access > API configuration and enter the IP information, along with a name to help you with future identification of the user.
Note: For IP ranges, the format supplied should be a.b.c.d/e (CIDR spec). This standard has been implemented for IPv4 addresses only (not IPv6). For example, 155.198.210.0/25 represents the range of addresses from 155.198.210.0 to 155.198.210.127.
As well as whitelisting the public IPs of these users on the API Configuration page you will also need to ask the Symplectic infrastructure team to whitelist these same IPs in the cloud firewall (which only Symplectic has access to). To do so please raise a support ticket or, if you are part of an active implementation, raise it with your Symplectic project manager and provide the list of public IPs / range to whitelist.
API Endpoints
For hosted clients, please raise a ticket, and Symplectic will create an endpoint for you.
Navigate to System admin > Authentication & access > API endpoints. The API can be configured by you to offer different endpoints, each of which is served at a different URL and offers clients a different level of backwards compatibility or functionality.
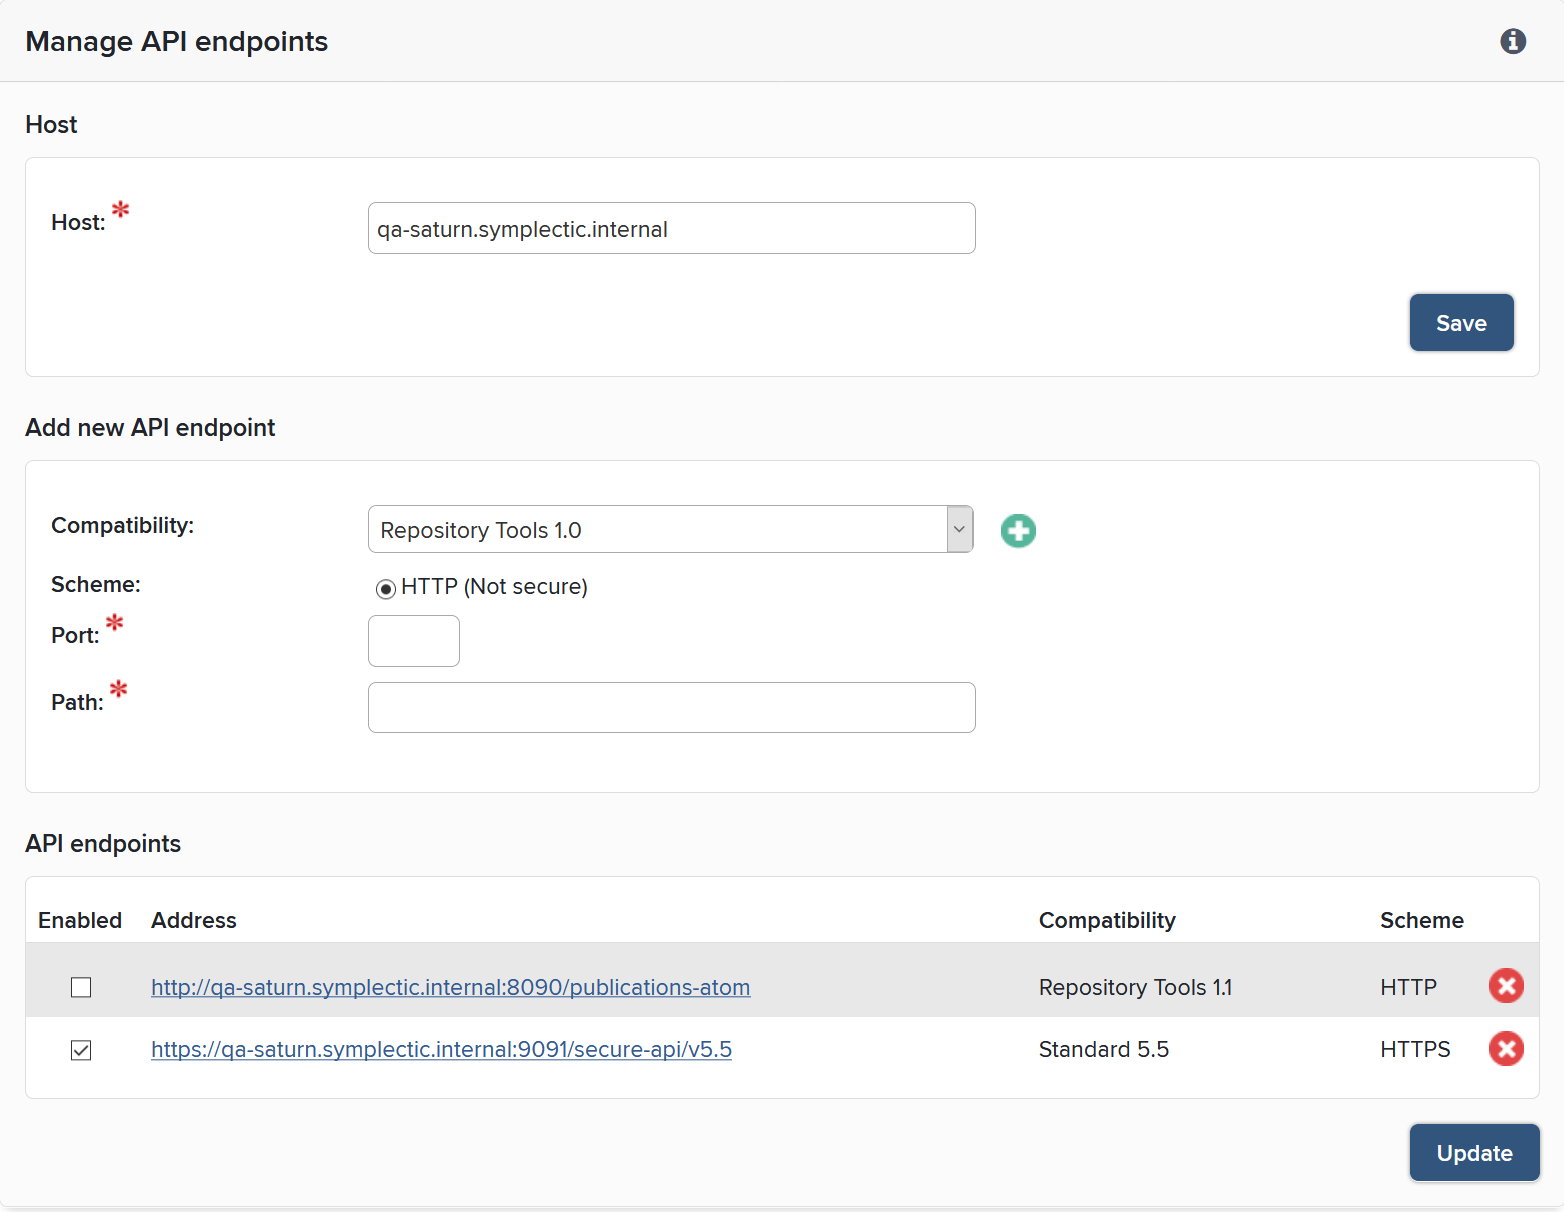
Edit API Endpoint

API Accounts
Navigate to System admin > Authentication & access > API accounts to add and edit user accounts. The accounts configuration screens allow you to define accounts, set access and modification permissions and allow updates to the database.
Note: Here, HR data is Human resources data and RA data is Research Assessment data.
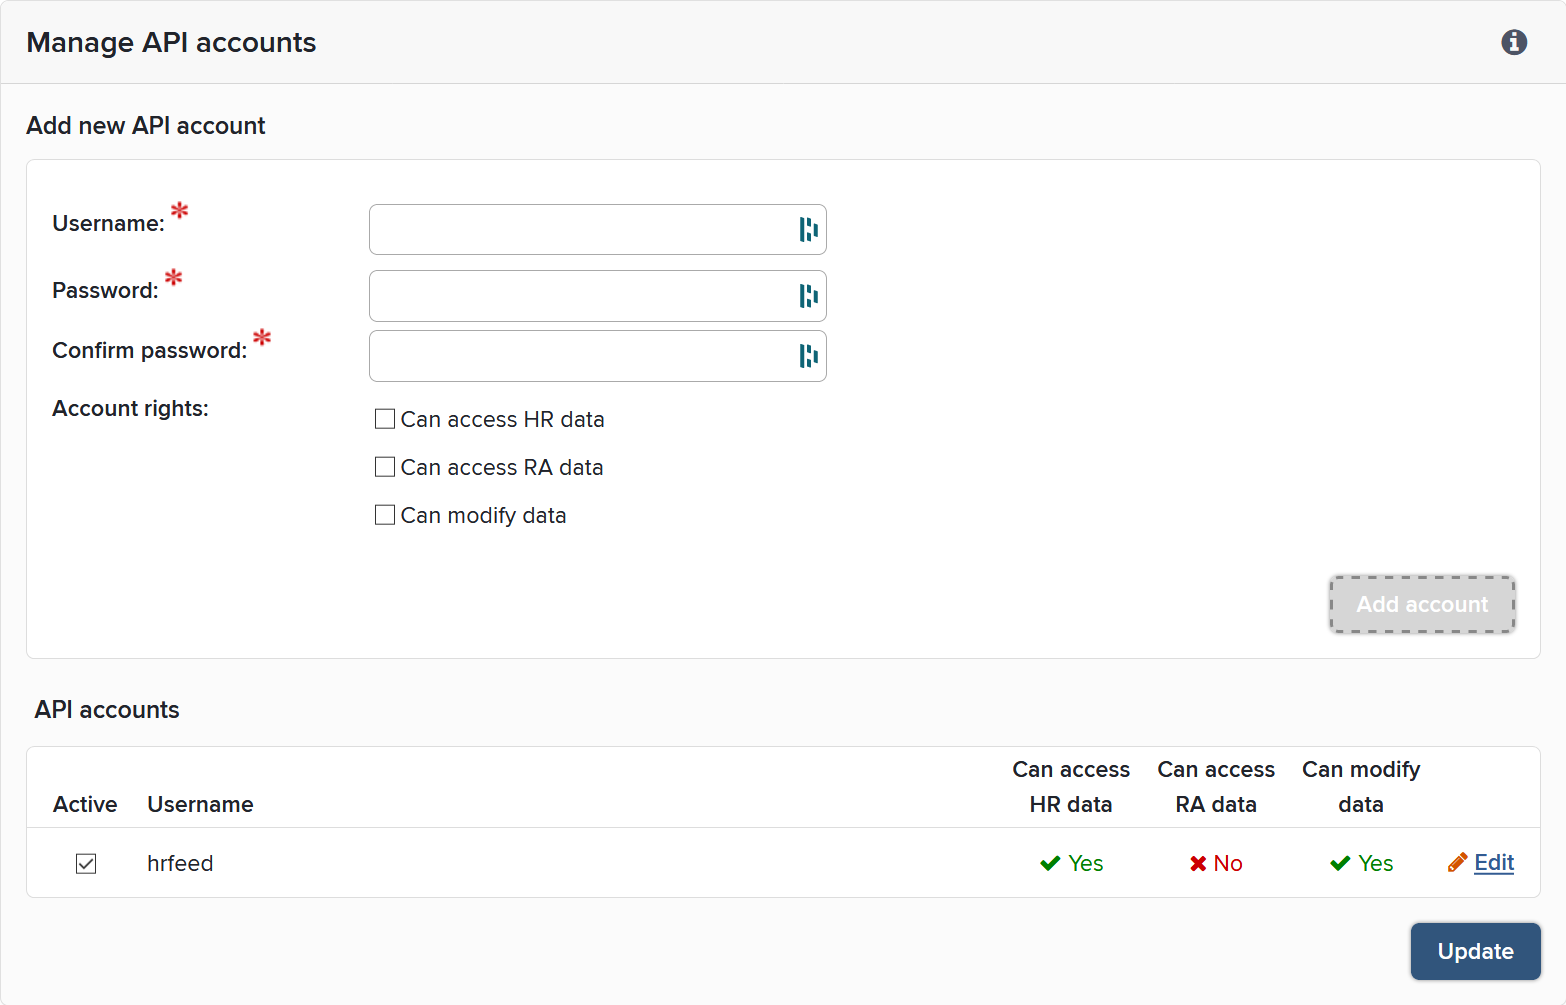
Edit existing accounts
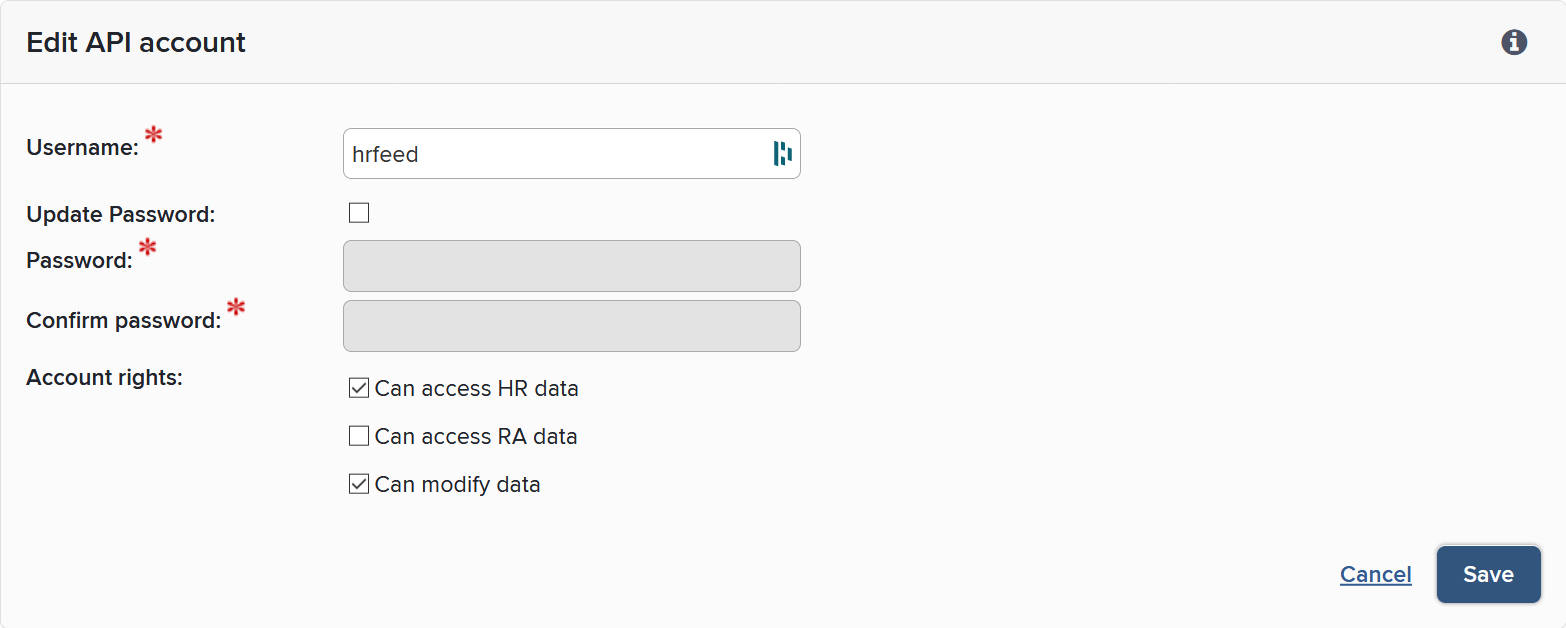
You can give write access to users by checking the 'Can modify data' box on this screen. However, you should only allow this for the user/external system providing the feed of user information.
When the new information has been added, the API service will have to be restarted for the new user to be given access.