
How to uninstall Elements
This article provides a step-by-step description of how to uninstall an instance of Elements.
Step 1
Download or, if you retained it, locate the Elements Upgrade Pack that corresponds to the version of Elements you wish to uninstall.
Note: It might be necessary to "Unblock" the ZIP file before expanding. This can be done by right clicking the file and selecting Properties.
Step 2
Run the Elements Setup utility, Setup.exe, which can be found in the Setup directory of the expanded Elements install kit.
Step 3
The “Setup Rules” page runs checks to ensure your system is correctly configured to run the utility. If a “Warning” or “Failed” status appears you can select this to determine the source of the error.
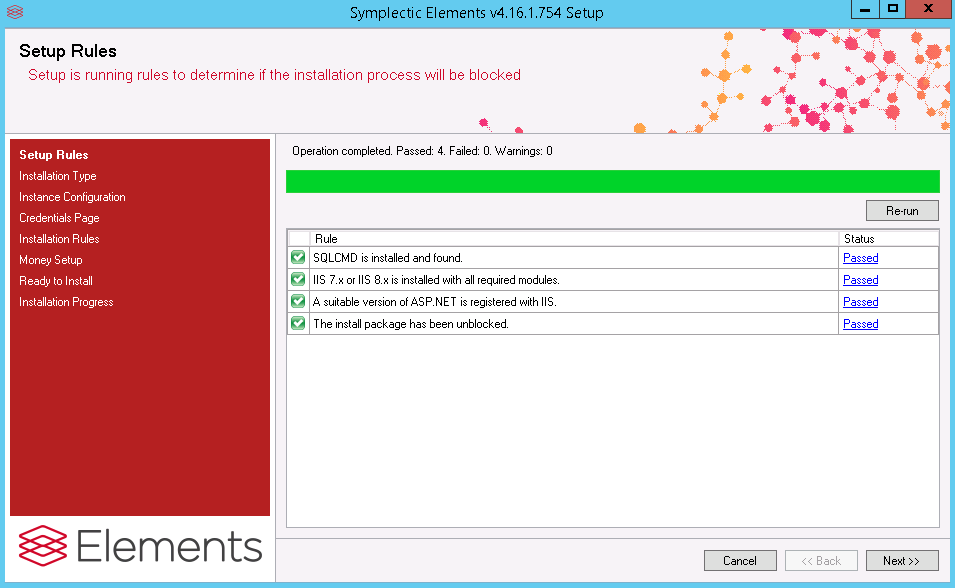
Note: Please note that for all rules pages, you will be able to proceed with the upgrade if a “Warning” status appears for a given rule, as this identifies an issue that may be valid but must be heeded to in the eventuality of a failed installation. A “Failed” status will not allow you to proceed and the issue must be resolved before you can upgrade your system.
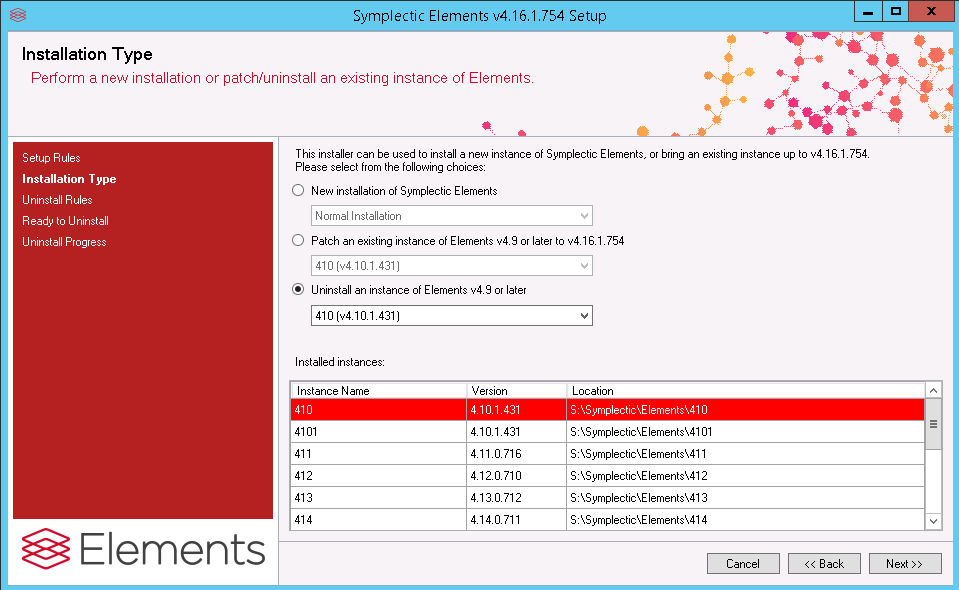
Step 4
Select "Uninstall an instance of Elements v4.9 or later". Should several instances of Elements exist on the same server, please ensure that you select the correct instance to upgrade from the drop-down list.
Step 5
The “Uninstall Rules” page will run a series of checks on your system to ensure the upgrade can be completed successfully. Please click on any “Warning” or “Failed” status messages that might appear.
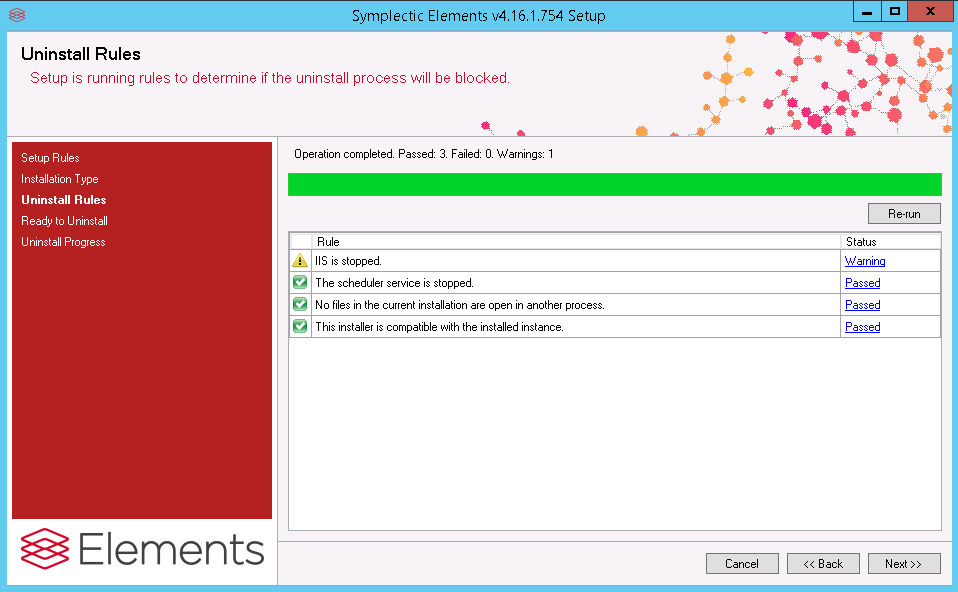
In order to successfully upgrade the system, a number of programs may need to be shut down such as Internet Information Services (IIS) and the Elements scheduler service. You will be prompted to do this by the utility. In particular when stopping IIS, you will be presented with the following window:

If you only host one Elements instance on your server, it is safe to select “Yes” and proceed.
If however, you host more than one Elements server on the same server, shutting down IIS will shut down all access to all instances. For this reason, the option “No” allows you to proceed with the install without shutting down IIS. However, it is absolutely necessary to ‘stop’ the website of the instance you are upgrading in IIS Manager before proceeding further.
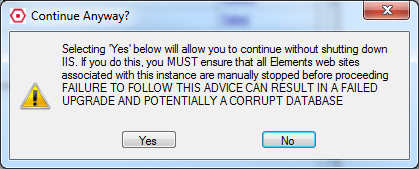
Note: If you are uncertain about any of the above, please raise a support ticket.
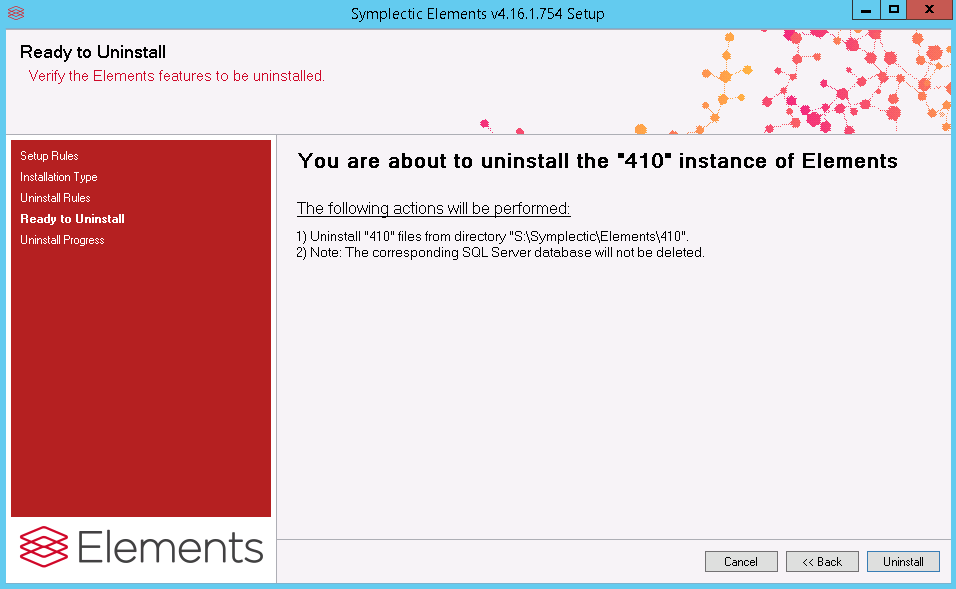
Step 6
Once you have successfully passed all the rules, you will be presented with a confirmation page that you must review before proceeding. Once you are satisfied with the actions the utility will perform please select “Uninstall”.
Step 7
Once the uninstall has completed, you should delete the corresponding SQL Server database
Step 8
Once you have deleted the SQL Server database, you should delete the corresponding directory (e.g. S:\Symplectic\Elements\410)
Step 9
Once you have deleted the directory , you should delete the corresponding application in IIS