
Repository Tools 2: Updating and Testing Crosswalks
Introduction
Crosswalking is the process of transforming data from a source format into another format suitable for use in a destination system. Every RT2 connection between a Repository and Elements needs two crosswalks to be fully functional:
a Harvest crosswalk (i.e. from the Repository to Elements). This is sometimes called an inbound or walk in crosswalk.
a Deposit crosswalk (i.e. from the Elements to the Repository). This is sometimes called an outbound or walk out crosswalk.
These crosswalks are defined using crosswalk map files. These are XML files which define how individual data fields are moved from the source system to the destination system.
If you are writing or editing crosswalk map files, please see the Defining Crosswalks Guide for detailed documentation on how to do this.
In addition, if you wish to use the Automated Metadata Updates feature to push relevant changes in publication metadata from Elements to the repository, you will need to define a Relevance Scheme.
At the time of writing (March 2022), automated metadata updates are supported for RT2 integrations with DSpace and EPrints. Automated metadata updates for Figshare for Institutions are only our development roadmap; please check Elements release notes for the latest news.
Managing Crosswalk Map Files
To manage crosswalk map files, go to System Admin > Data Sources > Data Source Management and click on the link to manage your repository connection. By default this will be the name of the repository platform (e.g. DSpace, EPrints, Figshare, Hyrax), although it may have been renamed to reflect the name of your institution's repository. Then scroll down the page to the "Crosswalk Map Files" section. Depending on the repository platform, there are four or five subsections, each of which will expand when clicked.
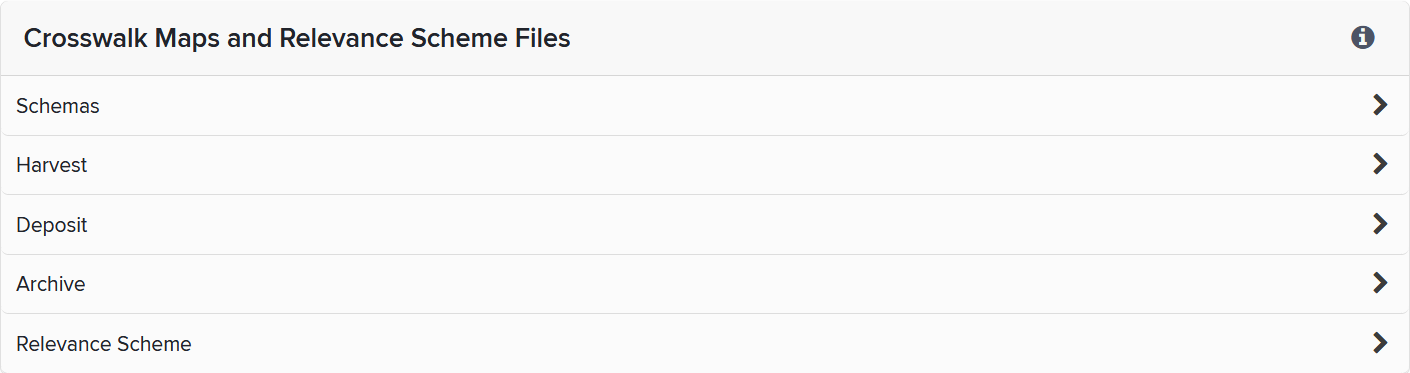
Schemas

These schema files specify which structures are allowed, not allowed, and required in the XML crosswalk map files. If you choose to edit your crosswalk map files in a development environment (such as Visual Studio), you can use these schemas to validate your code, and (depending on your development environment) suggest allowable options as you type. The schemas can change across Elements versions, so download the schema from here to ensure that you are working with the correct schema for your version.
Harvest

There are four buttons in this subsection:
Download Current Harvest Map File - this will download the harvest map file that in currently in use.
Download Example Harvest Map File - this will download an example harvest map file (the default harvest map file that Elements is supplied with).
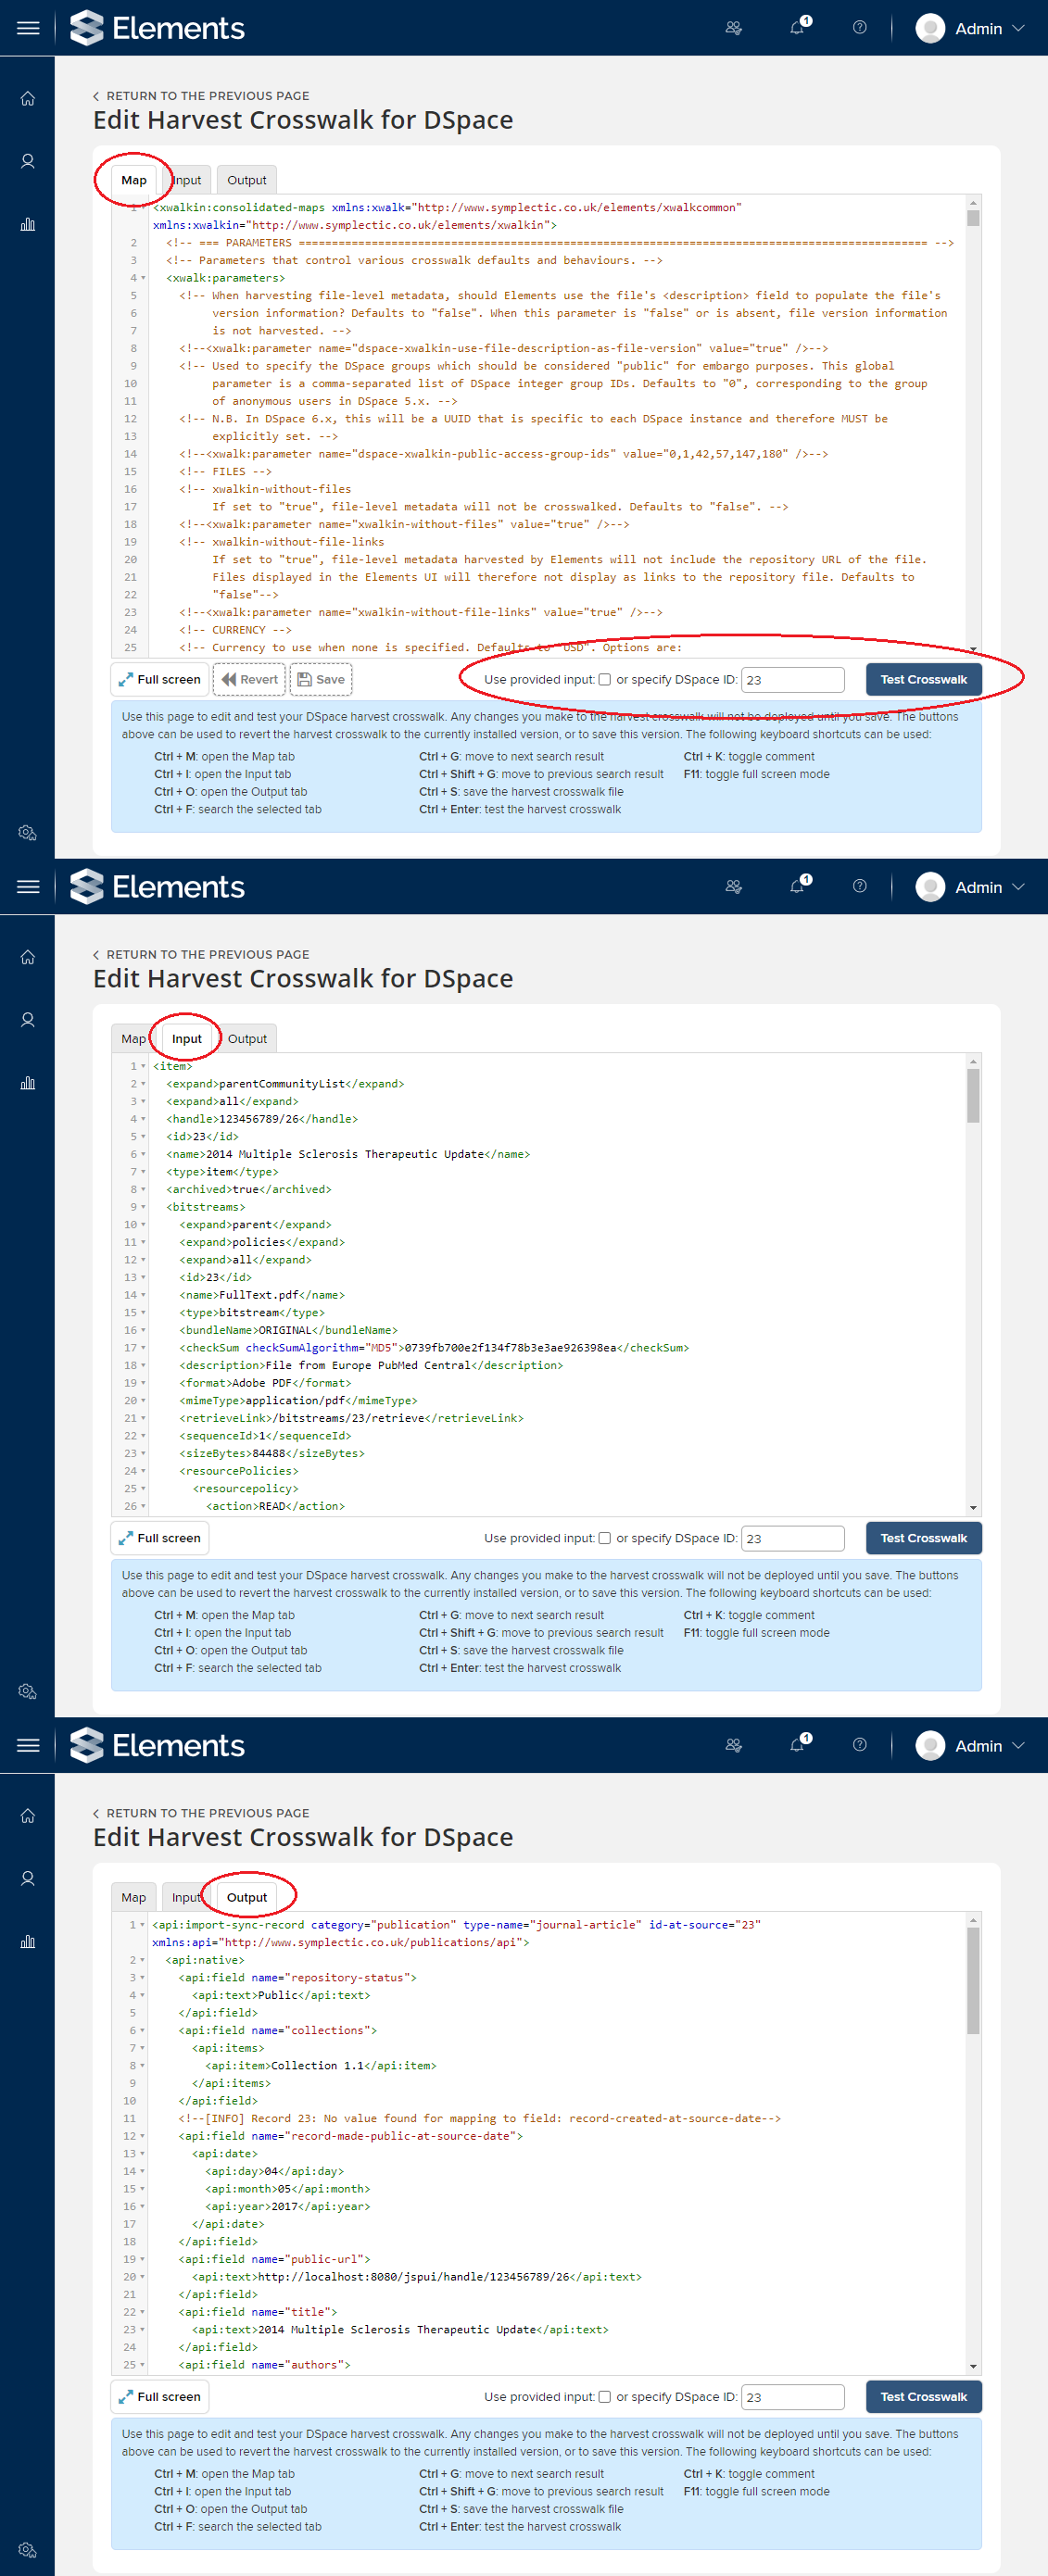
Edit & Test Harvest Crosswalk - this opens a page where you can edit the harvest crosswalk via the Elements interface. You can also test the harvest crosswalk by providing either the ID of a repository item, or some input data.
Upload Harvest Map File - choose and upload a new harvest map file, which will replace the current one. When uploading, Elements will perform some validation on the file including that it conforms to the appropriate XML schema (see above). Files which do not pass validation will not be installed.
Testing
The 'Edit & Test Harvest Crosswalk' page allows you to test the current harvest crosswalk. Importantly, it allows you to test without turning on harvest and without making any changes to data within Elements.
There are two ways to perform a test crosswalk:
Using a repository item ID. This will fetch the input data from the specified item in the repository and use it as the input for the harvest crosswalk. For this to work, correct repository connection details must be entered in the "Connection Settings" and "Harvest Settings" sections of the page. However, the repository connection does not need to be enabled.
Using input metadata which represents the input to the harvest crosswalk. Usually, this will have been obtained previously either by testing a crosswalk using a repository item ID; or by querying the repository API directly; or from verbose logs (see below). This can be useful when the repository connection is not available. It also allows you to create custom tests by directly editing the input metadata.
The 'Edit & Test Harvest Crosswalk' page has three tabs:
The 'Map' tab - this contains the harvest crosswalk map file that will be used for the test. This tab is editable, so you can make changes to the crosswalk and test what effect they have on the crosswalk process. You can save your changes to apply them immediately to the installed crosswalk, or revert back to the currently installed map file.
The 'Input' tab - this shows the input that was, or will be, used for the crosswalk test. After testing using a repository item ID, this tab displays the input metadata that was pulled from the repository. This tab is editable, so you can test using a repository ID, and then change the input metadata to mock up different situations.
The 'Output' tab - after a crosswalk test, this shows the output of the harvest crosswalk, i.e. the repository metadata after transformation by the crosswalk into Elements API XML. This tab is not editable.
Note: repository item IDs vary from platform to platform:
DSpace: repository managers commonly use alpha-numeric "handle" strings to identify items; however the DSpace item ID is a different attribute, which can be found in an item's metadata from the REST API (e.g. https://dspace.example.org/rest/handle/123456789/1234). For DSpace 5.x, use the value of the item/id element; for DSpace 6.x, use item/UUID.
EPrints: the item ID is the integer found at the end of the item's URL.
Figshare for Institutions: the item ID is the integer found at the end of the item's URL.
Deposit (available only if the Repository Tools module is licensed)

The Deposit subsection works in a similar way to the Harvest subsection. It also has four buttons:
Download Current Deposit Map File
Download Example Deposit Map File
Edit & Test Deposit Crosswalk
Upload Deposit Map File
Testing
The 'Edit & Test Deposit Crosswalk' page allows you to test the current deposit crosswalk without turning on deposit and without making any changes to data within your repository. There are two ways to perform a test crosswalk:
using an Elements publication ID. This will use the selected publication's metadata as the input for the crosswalk.
using an XML input which represents the input to a crosswalk. Usually, this will have been obtained previously either by testing a crosswalk using an Elements Publication ID; or from verbose logs (see below). This can be useful for creating custom tests by directly editing the XML input files.
Note: Elements publication IDs are always integers. To find the ID of a given publication, view it in Elements and take the number after "&id=" in the URL. For example, in the URL "elements.lilliput.edu/viewobject.html?cid=1&id=53531", the publication ID is 53531
As with harvest, the page has three tabs:
Map - the crosswalk map to be tested. As with harvest, this tab is editable so that you can try out changes in the deposit crosswalk.
Input - the input prior to crosswalking, in Elements API format. Again, this tab is editable, so you can mock up different situations.
Output - the output from the crosswalk process, in the repository's API format. This tab is not editable.
Note that, because the input data comes from Elements itself, the deposit crosswalk can be tested without any repository connection.
Archive

Elements keeps a copy of every crosswalk map file ever uploaded or saved. Click Download Map File Archive button to download the archive of all these map files. This can be useful if you need to return to a previous crosswalk version, or see what file was in use at a particular time.
Relevance Scheme

Verbose Log Files
The Harvest Settings and Deposit Settings sections of the page include the option to create verbose log files when crosswalking. If enabled, this will generate a zip file for every crosswalked publication containing the crosswalk input, output, and the crosswalk map file used. These log files can be useful when testing crosswalks or debugging unwanted behaviour. However, they can fill disk space very quickly, so you will probably want to turn off verbose logging in your production environment.
The "Verbose Log Files" section allows you to download the 100 most recent log files that have been recorded in the last 24 hours. If you need more or earlier logs, you will need to copy these directly from your Elements application server (hosted clients should contact Symplectic for these).
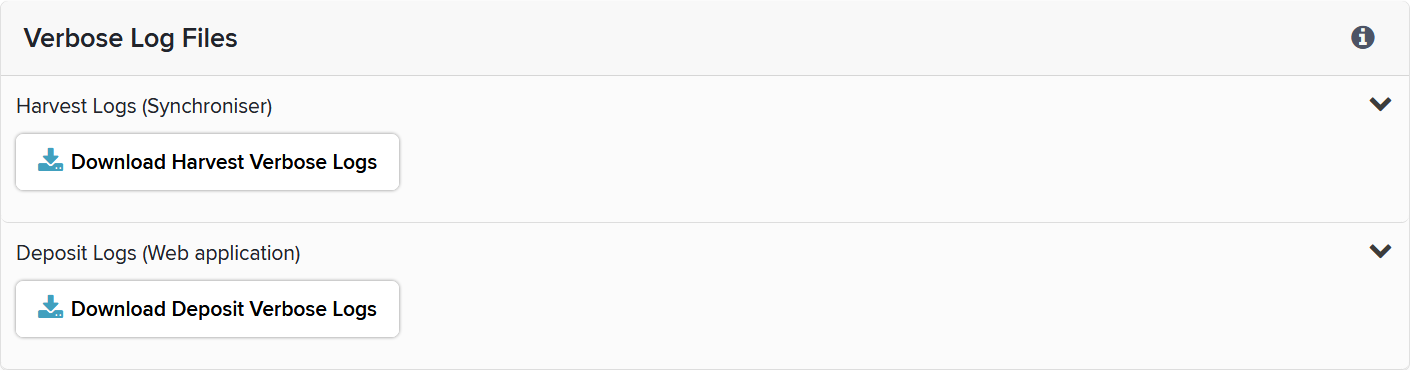
Harvest Logs (Synchroniser)
Use the Download Harvest Verbose Logs button to download the today's harvest log files (latest 100 files only).
Deposit Logs (Web application) (only available if Repository Tools module is licensed)
Use the Download Deposit Verbose Logs button to download the today's deposit log files (latest 100 files only). Note that this may include some harvest logs, since a harvest is performed immediately after a deposit is made.