How to set up figshare.com (v.2) as a data source (Elements v.6.7 and later)
This article is relevant to clients on Elements version 6.7 and later.
In version 6.7, our integration with figshare.com is updated to use the version 2 Figshare API. This change requires that each Elements instance using the figshare.com data source is individually registered as an application in Figshare. This article will guide you through the process.
Note: If you intend to use figshare.com on more than one instance, please make sure you register each instance individually.
Request authentication credentials
The new API no longer uses an API key for Elements as a whole. You now need to get a set of authentication credentials specific to each Elements instance for which you intend to enable the figshare.com data source.
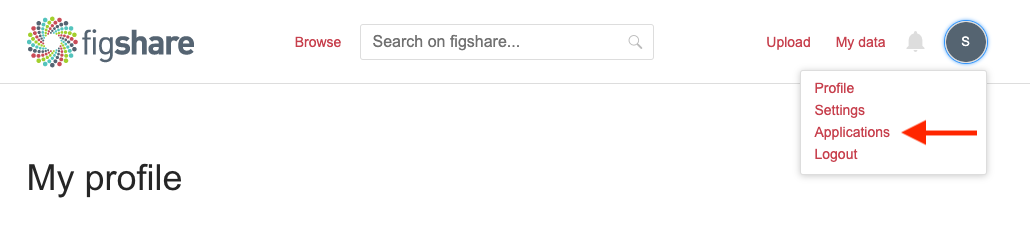
First, the system administrator should have an account at figshare.com. Once logged in, select Account Menu Icon > Applications.
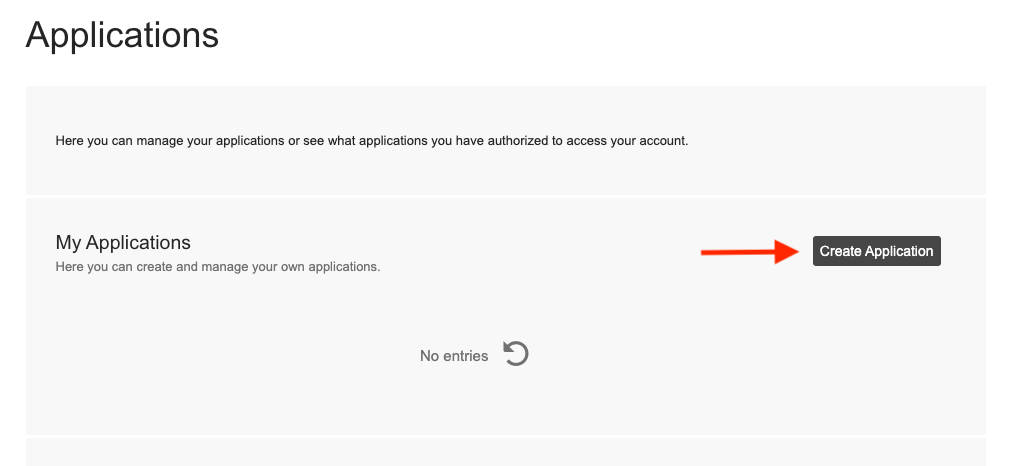
Scroll down to Applications and Create Application.
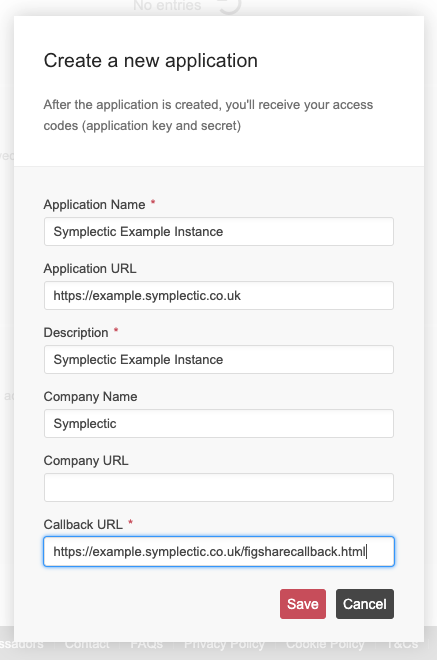
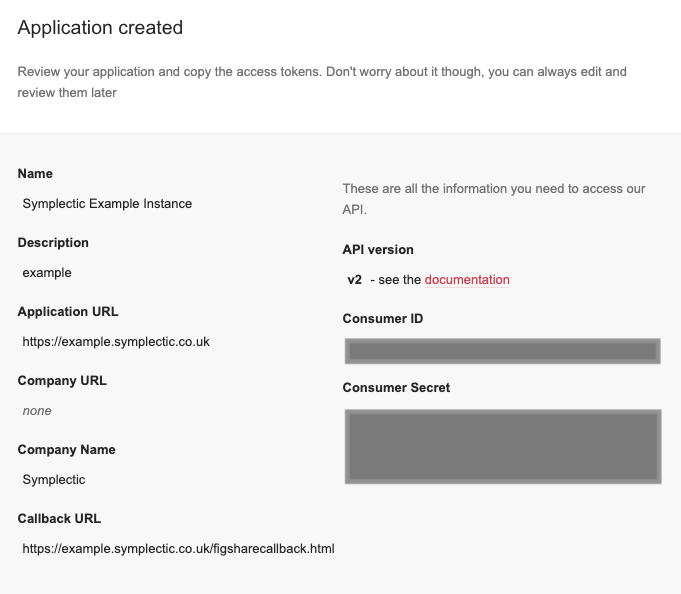
Fill in the details as required. Note that callback URL is important and must be the base URL of the Elements website, followed by /figsharecallback.html. See the screenshot for an example.
Once saved, you will obtain a Consumer ID and Secret on the same screen, as shown in the screenshot below:
If you have issues obtaining these, please raise a ticket with Figshare support.
Configure Elements with figshare.com credentials
For Symplectic-hosted clients, please contact our support team for assistance.
For self-hosted clients, please enter these into both the web.config and synchronise.exe.config files of your Elements instance in the value attribute of the appropriate keys: use the ‘Consumer ID’ for ‘figshare-consumer-key’ and ‘Consumer Secret’ for ‘figshare-consumer-secret’. You should use the same values for the two files for the same instance.
<!--the figshare-consumer-key states the identity of the Elements product to Figshare. Your Elements instance should be registered as a Figshare application and the key and secret specified here.-->
<add key="figshare-consumer-key"value="00000000000000000000000000"/>
<!--the figshare-consumer-secret proves the identity of the Elements product to Figshare. Your Elements instance should be registered as a Figshare application and the key and secret specified here.-->
<add key="figshare-consumer-secret" value="00000000000000000aaaaaaaaaaaaaaaaaaaaaaa000000000000000000000000000000aaa"/>
Note: Both the web.config and Synchronise.exe.config files must be configured. After editing these files, you must restart the Synchroniser service on the Scheduled Jobs page within the Elements user interface.
Note: Editing the web.config file will log all users out of the system without warning. We therefore suggest doing this work during a maintenance window or quiet period.
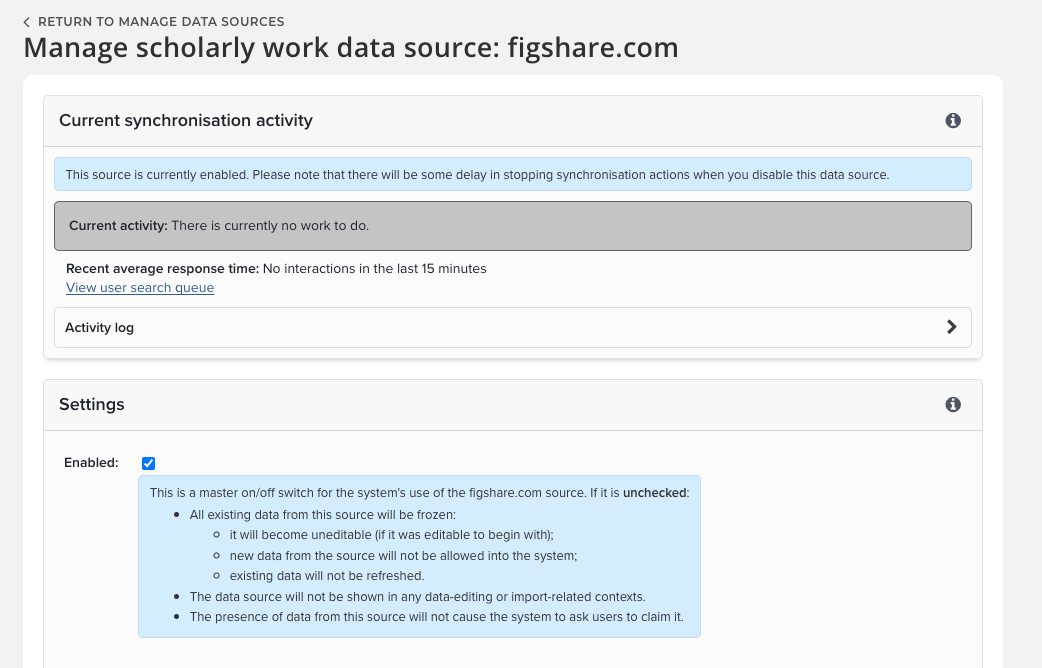
Configure Data Source Settings
Once the configuration step is completed, you should make sure figshare.com is enabled as a data source. Go to the Figshare.com data source management page via Menu > System admin > [DATA SOURCES] > Data source management (V6.n System Admin > Data Sources > Data Source Management) and clicking on figshare.com in the list of publication data sources. Make sure Enabled is checked to enable search and harvest. If any changes are made, make sure you scroll down and click the Update button.