
How to configure branding 6.x
Users with ‘System administration’ rights can configure the branding of Elements for the whole organisation, or for individual Primary Groups. This can be managed from the Customise Branding page (System Admin > System Settings > Customise Branding)
1. Choose which group to update
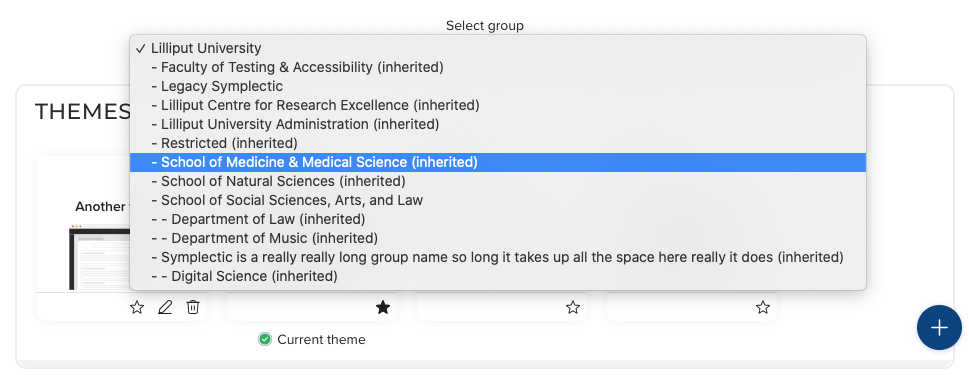
The group selector at the top of the page allows you to control which group/s will be affected by the update. You can learn more about Elements User Groups here. Branding settings are inherited by groups further down the hierarchy. If a group inherits its branding settings this is indicated in the group selector. The inherited theme and logo is also indicated in the relevant section.
2. Create and apply a theme
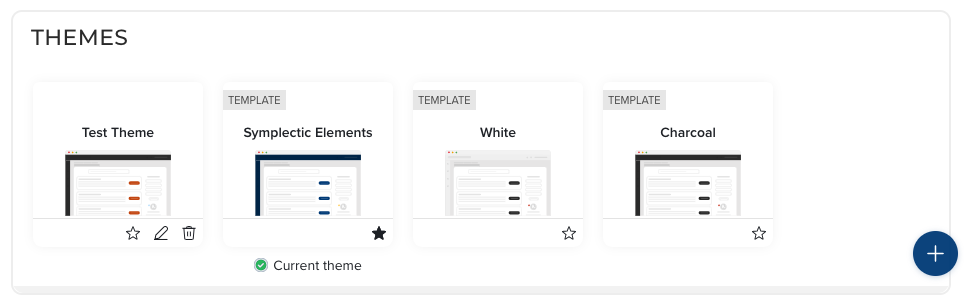
In order to set the branding you should first create a ‘theme’. There are three stock themes available - ‘Symplectic Elements’, ‘White’ and ‘Charcoal’, or you can create your own. Themes consist of a;
Branding colour - The branding colour is shown on the header (and optionally the sidebar). Elements will automatically switch the colour of the icons used between black and white to ensure the contrast remains accessible. It is possible to choose between ‘Light’, ‘Charcoal’ and ‘Custom’ colours. If a custom colour is chosen the colour picker can be used to select a colour or to add a hex colour code.
Colour palette - The colour palette is used to add colour to page components such as buttons and icons. It consists of a primary colour and a secondary colour that is used for highlights. There are nine different colour palettes to choose from. You should choose a colour palette that works alongside your chosen branding colour.
Finally, save the theme and choose whether or not to set it as the current theme. Themes can be edited after they have been created. If you delete a theme you will receive a warning describing which groups will be impacted (NB: A theme cannot be deleted if it is being used by the top level group, you must set a new theme before deleting it).
3. Upload and apply a logo
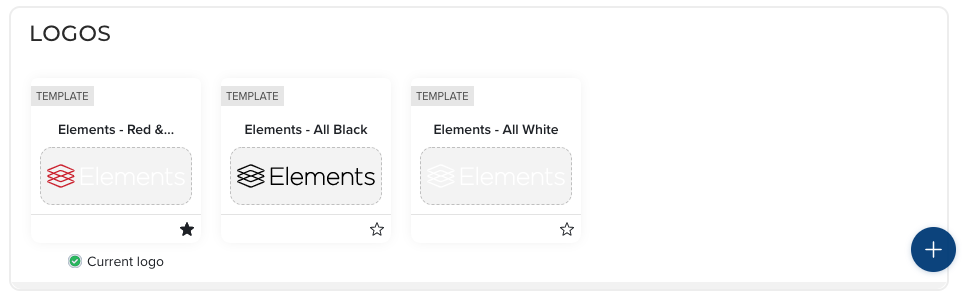
Alongside the use of themes, it is also possible to set the logo to be displayed on the header bar. The logos section displays the available logos and indicates which logo is currently being used. To add a new logo, upload a horizontal, left-aligned SVG image to be used. It is important to check that your chosen logo contrasts suitably with your branding colour.
The display of logos across different groups is controlled in the same way as themes.
5. Choose a Dashboard palette
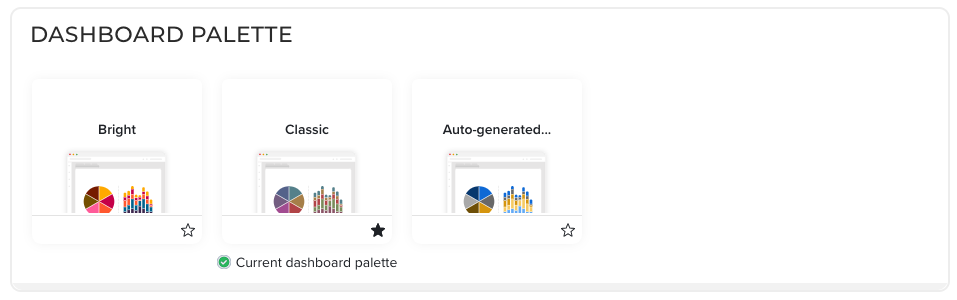
There are three different Dashboard palettes to choose from;
Bright
Classic
Auto-generated
It is not possible to create custom Dashboard palettes. However, the auto-generated Dashboard palette will produce a set of colours and hues for Dashboards based on the branding colour in the current theme. An example of the colours can be seen in the thumbnail (and of course you can open one of Elements’ stock Dashboards!)