
Implementation: Configuration via the Elements Admin UI (v6.14+)
The Discovery Configuration page is available via the System Admin menu within Elements. It enables administrators with a System Administrator role to manage many of the Discovery configuration settings and publish those settings to the Discovery Module. The settings available for configuration were migrated to the Discovery configuration page between v6.14-v6.21. All Discovery settings are available for configuration on the Discovery configuration page from v6.21 onwards.
Configuration changes between v6.14 and v6.21
If your Elements instance predates v6.21, some of the settings will not yet be available via the Discovery configuration page. If you would like to update your settings and they are not available, please contact our support team for assistance.
Settings available via the Discovery Configuration page
The settings available to be configured via the Discovery configuration page are organised into five tabs:

Site design
Branding
Organisation name
A free text box to capture your organisation's name, which can support up to 150 characters.
Bold branding style
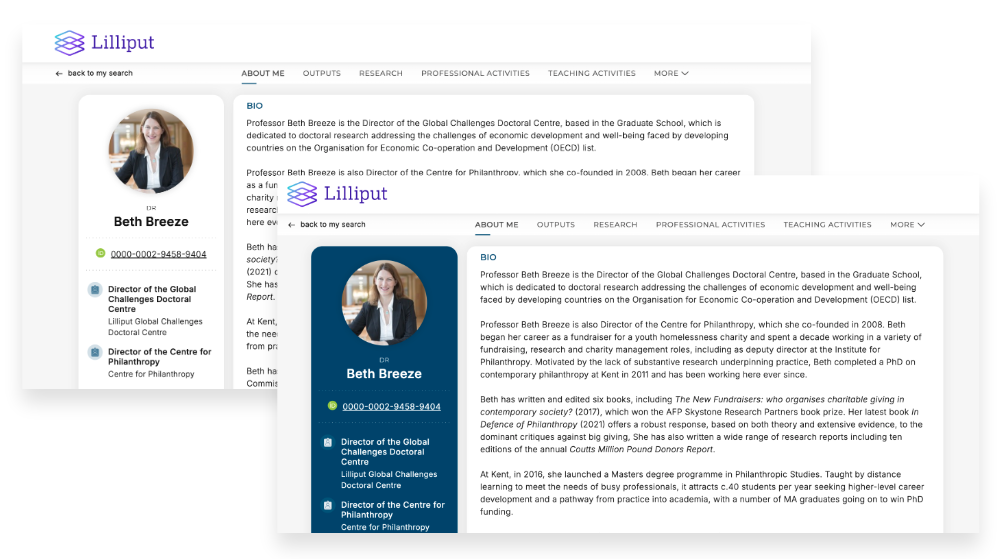
A toggle to choose between the default 'light' branding style and an alternative 'bold' branding style. In the ‘light ’ branding style, uploaded branding colours are used as accents against a predominantly white profile design. In the ‘bold’ branding style, the institution’s selected branding colour is used as a stronger visual element, most notably in the profile sidebar.
Favicon
You can upload a favicon (small icon file) for display on browser tabs when users visit your Discovery site. To upload your favicon, please upload an ICO or PNG file. PNG files must be square and have a maximum size of 256px by 256px.
Branding colours
You can select primary and secondary branding colours for your Discovery site which will be used as accent colours across buttons, headers, illustrations and backgrounds. Branding colours should be entered using the six-digit hex format #rrggbb. To meet accessibility guidelines, colours must have a 4.5 : 1 contrast ratio with white. If you enter a colour that does not meet this requirement, it will be automatically adjusted to meet the required contrast ratio. Learn more about contrast requirements for accessibility.
Header
Logo file
Upload your logo to brand your Discovery site. The uploaded logo will appear in both the header and footer. Please upload an SVG file of your logo, preferrably in a landscape format.
Logo position in header
Options to select whether your logo should be left, center or right aligned.
Logo height
Allows you to adjust the overall size of your logo by increasing or decreasing the height of your logo SVG. These settings will allow you to decide how strongly branded you wish your Discovery instance to be, and to make adjustments to align with the structure and style of your logo. To use, enter your preferred height in pixels. The default value is 28px.
Logo top & bottom margins
Allows you to adjust the top and bottom margins to adjust the space around your logo SVG. This setting allows you to make fine adjustments to ensure your logo is well-placed and balanced. To use, enter your preferred margin height in pixels. The default value is 7px.
Logo link override
If you leave this field blank, the institutional logo will link to the Discovery home page. If you want it to link to somewhere else, enter the full URL here, including the http:// or https:// at the beginning. Limited to 300 characters.
Home page
Home page title
Set the main heading for use on the Discovery home page. Use Enter to create line breaks if desired. Limited to 100 characters.
Tagline for desktop
Set the subheading for use on the Discovery home page when in desktop mode. Use Enter to create line breaks if desired. Limited to 300 characters.
Tagline for mobile
Set the subheading for use on the Discovery home page when in mobile mode. Use Enter to create line breaks if desired. Limited to 200 characters.
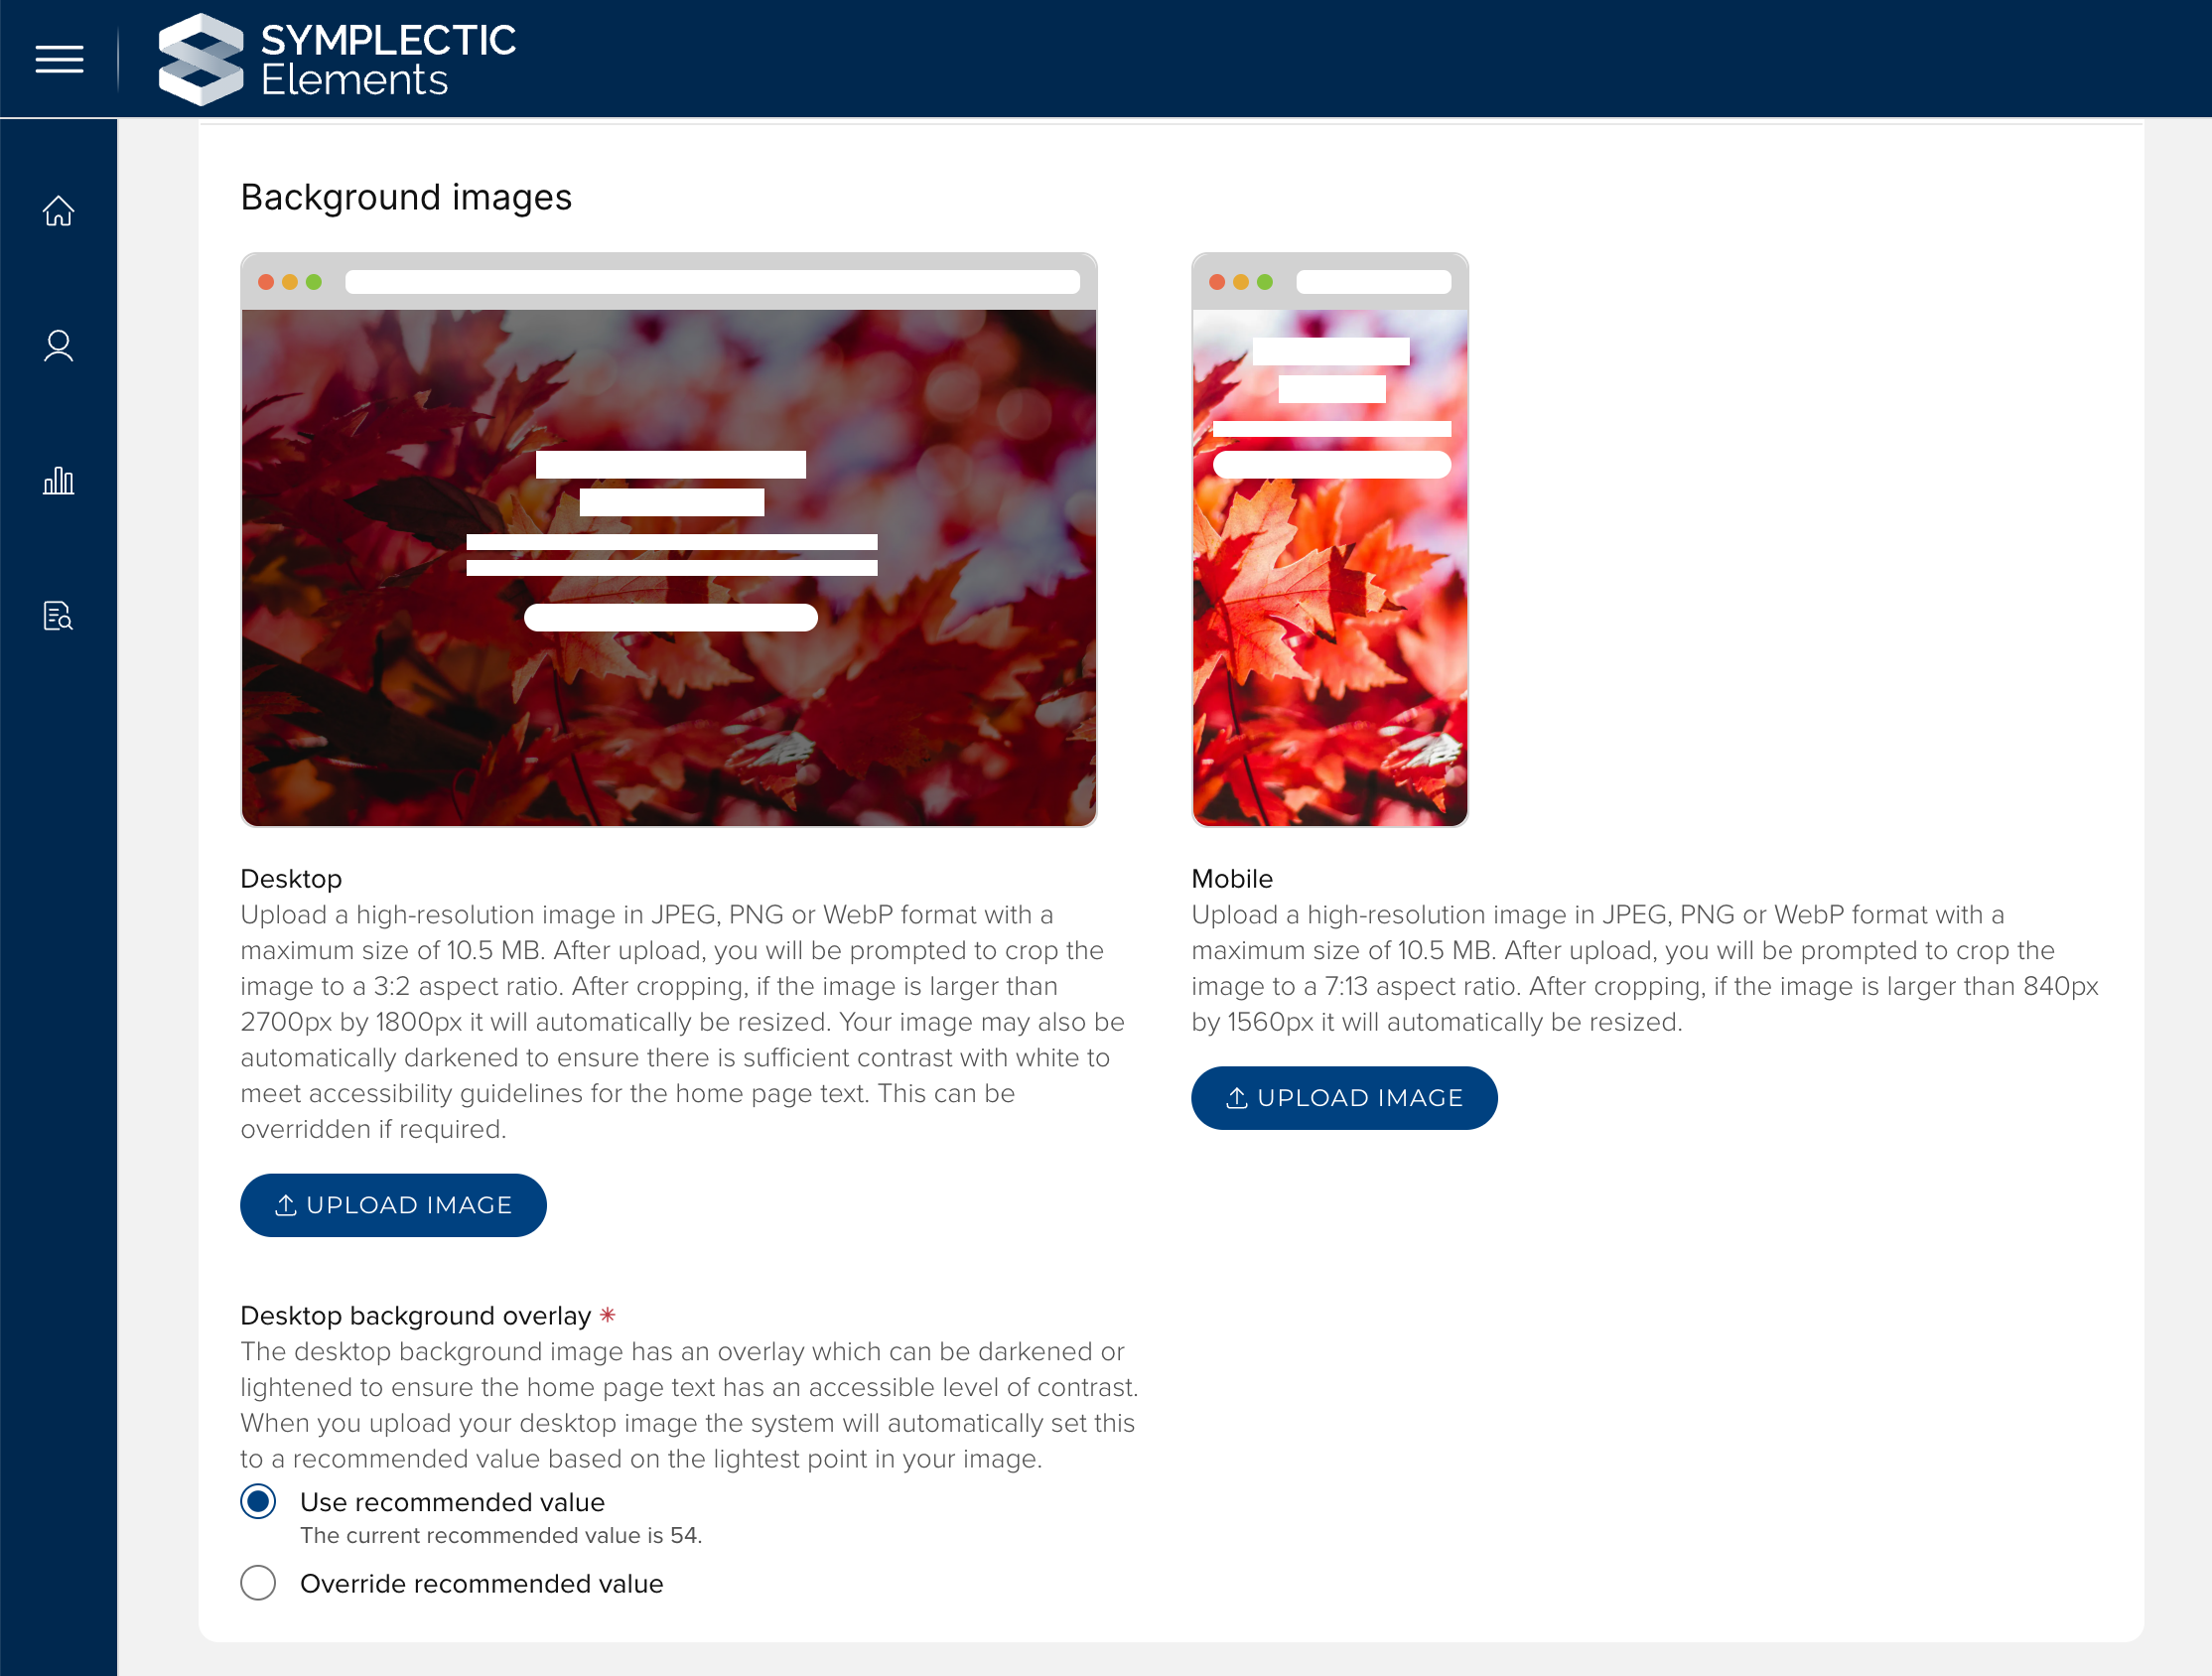
Background image - Desktop
Brand your Discovery site by uploading a background image for the desktop Home page. Upload a high-resolution image in JPEG, PNG or WebP format with a maximum size of 10.5 MB. After cropping, if the image is larger than 2700px by 1800px it will automatically be resized. Your image may also be automatically darkened to ensure there is sufficient contrast with white to meet accessibility guidelines for the home page text. This is done by checking the contrast against the lightest point in your uploaded image, and can be overridden if required by adjusting the desktop background overlay (see below).
Background image - Mobile
Brand your Discovery site by uploading a background image for the mobile Home page. Upload a high-resolution image in JPEG, PNG or WebP format with a maximum size of 10.5 MB. After upload, you will be prompted to crop the image to a 7:13 aspect ratio. After cropping, if the image is larger than 840px by 1560px it will automatically be resized.Upload a high-resolution image in JPEG, PNG or WebP format with a maximum size of 10.5 MB.
Desktop background overlay
The desktop site has a background overlay which can be darkened or lightened to ensure an accessible level of contrast between the home page text and the background image. When you upload your desktop image the system will automatically set this to a recommended value based on the lightest point in your image. You can optionally override this recommended value to manually control the amount of darkening or lightening.
Search page
Search bar background
For the search bar background, you can choose from a range of branding options, including a standard neutral, light or bold branding colour or an image of your choice (desktop view only). There are separate settings for the desktop and mobile versions of the site.
Footer
Contact section
A collection of settings for managing the information to appear in the 'contact' section of the footer, including the following:
Contact section title: Change the title of the contact section.
Hide logo in footer: By default, a logo appears above the organisation's address in the footer. Toggle this setting on to remove it.
Address: Your organisation's mailing address for general contact.
Telephone: Your organisation's telephone phone number for general contact.
Email address: Your organisation's email address for general contact.
Contact link: Your organisation's web link for general contact.
Custom links sections 1 and 2
The Custom links sections in the Discovery footer can be populated with up to 10 links of your choosing per section. These sections allow you to ensure that your Discovery site connects appropriately across your organisations other public websites. It can also be used to link to relevant policies or support services.
Additional information
The additional information section allows you to add other important local information or compliance information to appear across the bottom of your site at the base of the footer. This is typically used for copyright statements, provider IDs and/or acknowledgements (e.g. acknowledgements of traditional owners).
Core settings
User profiles
Search category name
Select a display name for the user profile search category. It will be used on the search mode selectors and to refer to this search category across the Discovery Module. Options include "Experts", "People" and "Researchers".
Media - Show media
When toggled on, the "view media" button and "MEDIA" section will show on expert profiles.
Collaboration network
A pair of settings to enable the Discovery internal collaboration network and to allow you to enter an override for the Department label on the network diagram to match the name used for your 'department' filter.
Sidebar contact button
A pair of settings to optionally add a customisable contact link in the sidebar of all user profiles. This link allows users to easily reach out to you or your team via a URL of your choosing.
Link to Elements
When toggled on, users will see a prompt at the bottom of the sidebar inviting them to log into Elements to update their profile.
Equipment profiles
Enable Equipment profiles
When Equipment profiles are enabled, Equipment profiles will be visible across Discovery and be available for dedicated searching. To ensure that Equipment data is pushed to Discovery, you must also enable the synchronisation of Equipment data on the Manage Discovery data page.
Search category name
Select a display name for the Equipment search category. It will be used on the search mode selectors and to refer to this search category across the Discovery Module.
Group profiles
Enable Group profiles
When Group profiles are enabled, Group profiles will be visible across Discovery and be available for dedicated searching. To ensure that Group data is pushed to Discovery, you must also enable the synchronisation of Group data on the Manage Discovery data page.
Search category name
Select a display name for the Group search category. It will be used on the search mode selectors and to refer to this search category across the Discovery Module.
User feedback
Enable user feedback survey
When this setting is enabled, a 'Give Feedback' button will appear to visitors to the site on the right hand side of Discovery to allow users to give feedback to Symplectic about their experience of using the Discovery Module. Data is collected anonymously and is used to support our user research efforts.
URL parameters
URL parameter controlled search filters
When toggled on, you will be able to construct URLs with a range of parameters so that the Discovery Module Search Results page can be loaded in a pre-filtered state. Please see this support site article for more information.
Profile tabs
All tabs
Featured label
This setting allows you to select the term used to describe favourited/featured works on Discovery.
Favourites are first by default
When toggled on, the "featured first" toggle on lists of objects related to a user will be turned on by default, so the researcher's featured objects will appear at the top of each list. Featured objects are objects that have been marked as favourites within Elements.
About tab
Summary display name
This setting allows you to enter an alternative name for the Summary (Bio) section on the Discovery 'About' tab. The name entered here will be displayed in ALL CAPS in Discovery profiles. You can update the source field on the Manage Discovery Data page. If there is no source field, the summary section will not be shown in Discovery and the heading is ignored. Limited to 60 characters.
Tab name
Select the display name for the About tab on the Discovery Module.
Institutional appointments display name
This setting allows you to enter an alternative name for the Institutional Appointment section on Discovery. The name entered here will be displayed in ALL CAPS in Discovery profiles. If there is no data, the section will be constructed from the organisation name instead, in the format : <Organisation name> Appointments
Date range ends in “- present”
When toggled on, date ranges with no end date will be shown with a suffix of " - present". When toggled off, only the start date will be displayed.
Hide dates from institutional appointments
When toggled on, the system will hide all dates in the institutional appointments section.
Hide dates from academic appointments
When toggled on, the system will hide all dates in the academic appointments section.
Associated profiles tab
Display rule
A choice as to when this tab will appear on relevant profiles. Options are:
Show in profiles with relevant data: This means the tab will only appear on a given profile if it would be populated i.e. the tab will not appear if profile does not contain relevant data.
Show in all profiles: This means the tab will appear on all profiles, even if it is empty.
Hide in all profiles: This means the tab will not appear on any profiles - should be used if a given tab is out for scope for your Discovery site.
Tab name
Select the display name for the Associated profiles tab on the Discovery Module.
List section name
Select a display name for the list of objects that will appear on this tab. The selected name will also be used to refer to these objects across the Discovery Module.
Publications tab
Display rule
A choice as to when this tab will appear on relevant profiles. Options are:
Show in profiles with relevant data: This means the tab will only appear on a given profile if it would be populated i.e. the tab will not appear if profile does not contain relevant data.
Show in all profiles: This means the tab will appear on all profiles, even if it is empty.
Hide in all profiles: This means the tab will not appear on any profiles - should be used if a given tab is out for scope for your Discovery site.
Set Elements TYPE order as default
Toggle to set Elements TYPE order as the default sort order when landing on the page (otherwise the default is Date Descending)
Summary display name
This setting allows you to enter an alternative name for the Summary section on this tab. The name entered here will be displayed in ALL CAPS in Discovery profiles. You can update the source field on the Manage Discovery Data page. If there is no source field, the summary section will not be shown in Discovery and the heading is ignored. Limited to 60 characters.
Tab name
Select the display name for the Publications tab on the Discovery Module.
List section name
Select a display name for the list of objects that will appear on this tab. The selected name will also be used to refer to publication objects across the Discovery Module.
Show Dimensions badges
Enable to allow Dimensions citation badges to show on your Discovery Site. Badges will only appear for publications with 1 or more citations.
Show Altmetric badges
Enable to allow Altmetric attention badges to show on your Discovery Site. Badges will only appear for publications with 1 or more mentions.
Show ReadCube “View PDF” buttons
When toggled on, open access publications listed on Discovery profiles will include links to the PDFs via the publisher website (if available).
Enable repository PDF downloads
When toggled on, open access publications listed on Discovery profiles will include links to download related PDFs from the integrated repository (if available).
Enable AI summarisations
When toggled on, AI-generated summaries will be made available on Discovery profiles for supported publications. Individuals can opt-out in their profile settings.
Grants, Professional activities, Teaching activities, Impact, and Projects tabs
Display rule
A choice as to when this tab will appear on relevant profiles. Options are:
Show in profiles with relevant data: This means the tab will only appear on a given profile if it would be populated i.e. the tab will not appear if profile does not contain relevant data.
Show in all profiles: This means the tab will appear on all profiles, even if it is empty.
Hide in all profiles: This means the tab will not appear on any profiles - should be used if a given tab is out for scope for your Discovery site.
Set Elements TYPE order as default
Toggle to set Elements TYPE order as the default sort order when landing on the page (otherwise the default is Date Descending).
Summary display name
This setting allows you to enter an alternative name for the Summary section on this tab. The name entered here will be displayed in ALL CAPS in Discovery profiles. You can update the source field on the Manage Discovery Data page. If there is no source field, the summary section will not be shown in Discovery and the heading is ignored. Limited to 60 characters.
Tab name
Select the display name for these tabs on the Discovery Module.
List section name
Select a display name for the list of objects that will appear on this tab. The selected name will also be used to refer to these objects across the Discovery Module.
Equipment tab
Display rule
A choice as to when this tab will appear on relevant profiles. Options are:
Show in profiles with relevant data: This means the tab will only appear on a given profile if it would be populated. The tab will not appear if profile does not contain relevant data.
Show in all profiles: This means the tab will appear on all profiles, even if it is empty.
Hide in all profiles: This means the tab will not appear on any profiles - should be used if a given tab is out for scope for your Discovery site.
Set Elements TYPE order as default
Toggle to set Elements TYPE order as the default sort order when landing on the page (otherwise the default is Date Descending)
Tab name
Select a display name for this tab to be displayed on the Discovery Module.
List section name
Select a display name for the list of objects that will appear on this tab. The selected name will also be used to refer to equipment objects across the Discovery Module.
Filters
Expert profiles, Group Profiles & Equipment Profiles
This group of settings allows you to configure how the filters will display for each type of data in Discovery. Here you can name the filters, select an icon, set the order in which the filters will appear and enable the filter. Please remember to also set the filter source data on the Manage Discovery Data page.
Analytics & Privacy
SEO and reporting
General
Meta description
This is a short description used as a part of the search engine indexing process. It should be a short factual summary of the purpose of the site.
Google Tag Manager
Google Tag Manager ID
Add your Google Tag Manager ID (if desired) in the format: GTM-XXXXXX
Google Tag Manager cookie declaration
If using built-in cookie consent management (see below), you must declare what kinds of cookies (if any) are set by the scripts injected using Google Tag Manager. This declaration will be used determine whether cookie consent is required before allowing these scripts run and to correctly classify them in cookie consent pop-ups.
Google Tag Manager cookie information
If using built-in cookie consent management (see below) and using Google Tag Manager to inject scripts that use cookies, use this setting to provide information about the purposes these cookies will be used for. This information will be shown in cookie consent pop-ups on Discovery and should be sufficient for visitors to the site to make an informed choice to accept or reject cookies.
Google Analytics
Google Analytics Measurement ID
As many Google Analytics Measurement IDs (for GA4) as desired. Should be of the form G-XXXXXXXX.
Built-in cookie consent management
Enable built-in cookie consent management
Whether or not use Discovery's built-in cookie consent management system. The built-in system is enabled by default. You may choose to disable it here, for example, if you use another solution for cookie consent management.
Expiry limit on cookie acceptance (days)
Once a user has accepted cookies, how long to wait before asking them to consent again. In most legal jurisdictions, it is a requirement that consent is not assumed to last indefinitely.
Cookie settings page link position
To allow site visitors to change their cookie consent choices, a "Cookie settings" link is shown in the page footer. This setting allows you to choose which section of the footer this link will be displayed in. The link will be the last item in that section.
Delete user's cookie consent choices
You can make Discovery immediately forget all users' previous cookie consent choices, so that they are asked to accept or reject cookies on their next visit, even if they have made a choice previously. This may be required, for example, if you change Google Tag Manager to add new non-essential cookies which are not covered by users' previous choices.
Delete all users' cookie consent choices
Select this option to require all users, including those who have previously consented to cookies, to reconfirm their cookie preferences on their next visit. This will take effect the next time that Discovery configuration changes are published.
Updating your Discovery Configuration settings
To update your Discovery configuration settings, go to Menu > System Admin > Operations > Manage Discovery Configuration. As the Discovery configuration setting page loads, it will automatically check that there is an active connection to the associated Discovery instance, and display a blue confirmation message at the top of the page once that check is complete. You will not be able to edit these configuration settings unless there is an active action. If there is an active connection you will see:

Once that check is complete, the settings on the page will be activated, and you can review and edit them as you wish. Guidance information is provided below each field name and where necessary, the fields are validated to ensure that the data is in the correct format.
Once you have finished making your changes, click ‘Save changes’ at the top of the page. The message at the top of the page will update automatically, showing you how many saved changes there are that have not yet been published to Discovery.

Once you are ready, you can click 'Publish', to automatically apply these changes to the associated Discovery instance. You will see a confirmation message outlining the changes that will be applied.
Please note that publishing will apply all of the saved configuration changes to the Discovery Module. This action cannot be undone. Publishing configuration changes typically takes a few minutes, but can be longer if the Synchroniser is busy. While a request to publish is being applied, you will have the option to cancel the request. However, please note that the request may have already been processed, meaning that the cancellation will not apply.
While the changes are being published, you will see a yellow message appear at the top of the Discovery configuration page. The page is automatically monitoring the publishing process and will update automatically back to the original blue message once the publish request has been completed.

Once configuration settings changes have been published, they will be visible in the Discovery Module after page refresh.
Importing and exporting configuration settings
To make it easier to manage your settings, the Discovery configuration page includes functionality which allows you to Export a copy of the configuration file, and to import settings from a file. This functionality can be used to:
Download a copy of your settings before you begin to make changes if you wish to have an easy way to restore your existing configuration.
Export settings from one environment (e.g. non-production) to import into another environment (e.g. production) to streamline updating tested configurations. Please note: This will only work if both instances are running the same version of Elements.
Import your existing Discovery settings from a pre-v6.14 Discovery configuration file. This will help migrate your existing configuration settings when you first move to v6.14 or higher.

When you import a configuration file, the system will automatically validate the uploaded file and check that it is in the correct format. Once successfully imported, the settings will be displayed via the Discovery configuration page UI, for you to review and save before publishing to Discovery.
Import from Discovery
We also offer the option to import your current Discovery settings from Discovery. This allows you to easily roll back any unsaved or saved changes if you change your mind before you elect to publish the changes.
Troubleshooting
If the Discovery configuration page encounters an issue when trying to connect to the associated Discovery instance, it will display an error message at the top of the page with guidance information about how to address the issue.
Timeout
If the following message is displayed, it means that your session has timed out and you should log in again by refreshing the page.

Discovery configuration settings not found
If the system is unable to detect existing Discovery configuration settings, you will be prompted with the following messaging.

Should this occur, you should:
Check that the Synchroniser is running correctly.
Trigger a full push to Discovery and confirm that it has completed successfully.
If this message still occurs after completing those steps, please contact our support team for assistance.
Unable to connect to Discovery
If the system is unable to connect to Discovery you will be prompted with the following message.

There are two main reasons you might see this message:
If Discovery has not yet been installed/configured to connect to Elements.
If there is a temporary connection or network issue.
If, to the best of your knowledge, your Discovery is already installed/configured correctly, we recommend waiting a short while before refreshing the page to test the connection again.
If the issue persists, please contact our support team for assistance.
Unforeseen error has occurred
If you see the message below, please check the system log for more information, and if necessary, contact Symplectic Support for assistance.
