
AI Assisted Data Entry
Please note: This functionality is available to Digital Science-hosted Elements customers only. Usage quotas will apply. Additional fees may apply to increase usage limits.
AI Assisted Data Entry allows users to create a new item quickly and easily by pasting plain text into Elements. AI is used to extract structured metadata which can be reviewed and saved in seconds, saving users the time and effort associated with traditional, manual data entry.
The feature is available for the following categories of data:
Publications
Grants
Professional activities
Teaching activities
Configuring AI Assisted Data Entry
For how to configure and enable the feature, see Managing AI Features.
Using AI Assisted Data Entry
The AI Assisted Data Entry workflow is triggered when the user clicks an "Add new..." button of a category for which AI Assisted Data Entry is supported and enabled.
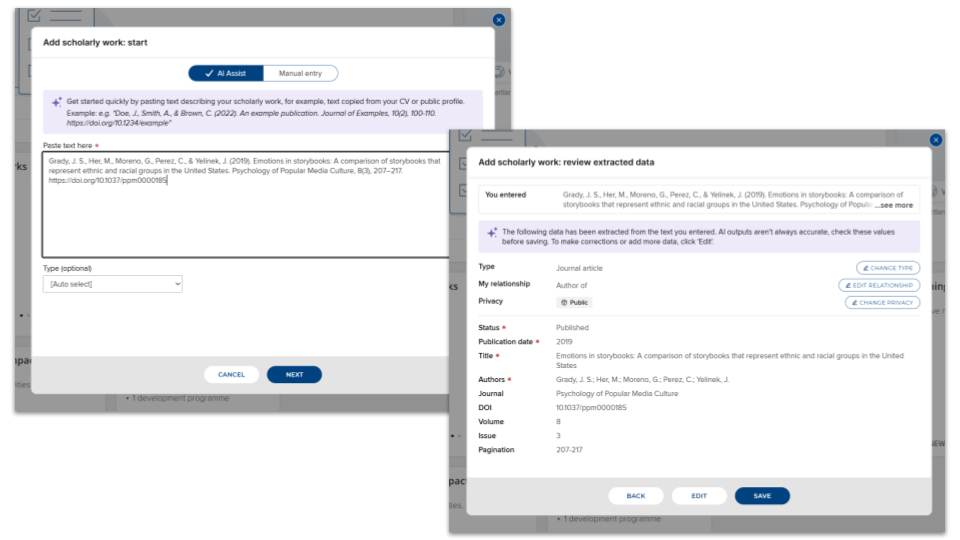
Step 1: start
To start the workflow, simply paste plain text describing your item into the text box, then click 'Next'. You can also optionally choose the type of item you want to create; if you do not choose a type, the workflow will infer one from your entered text.
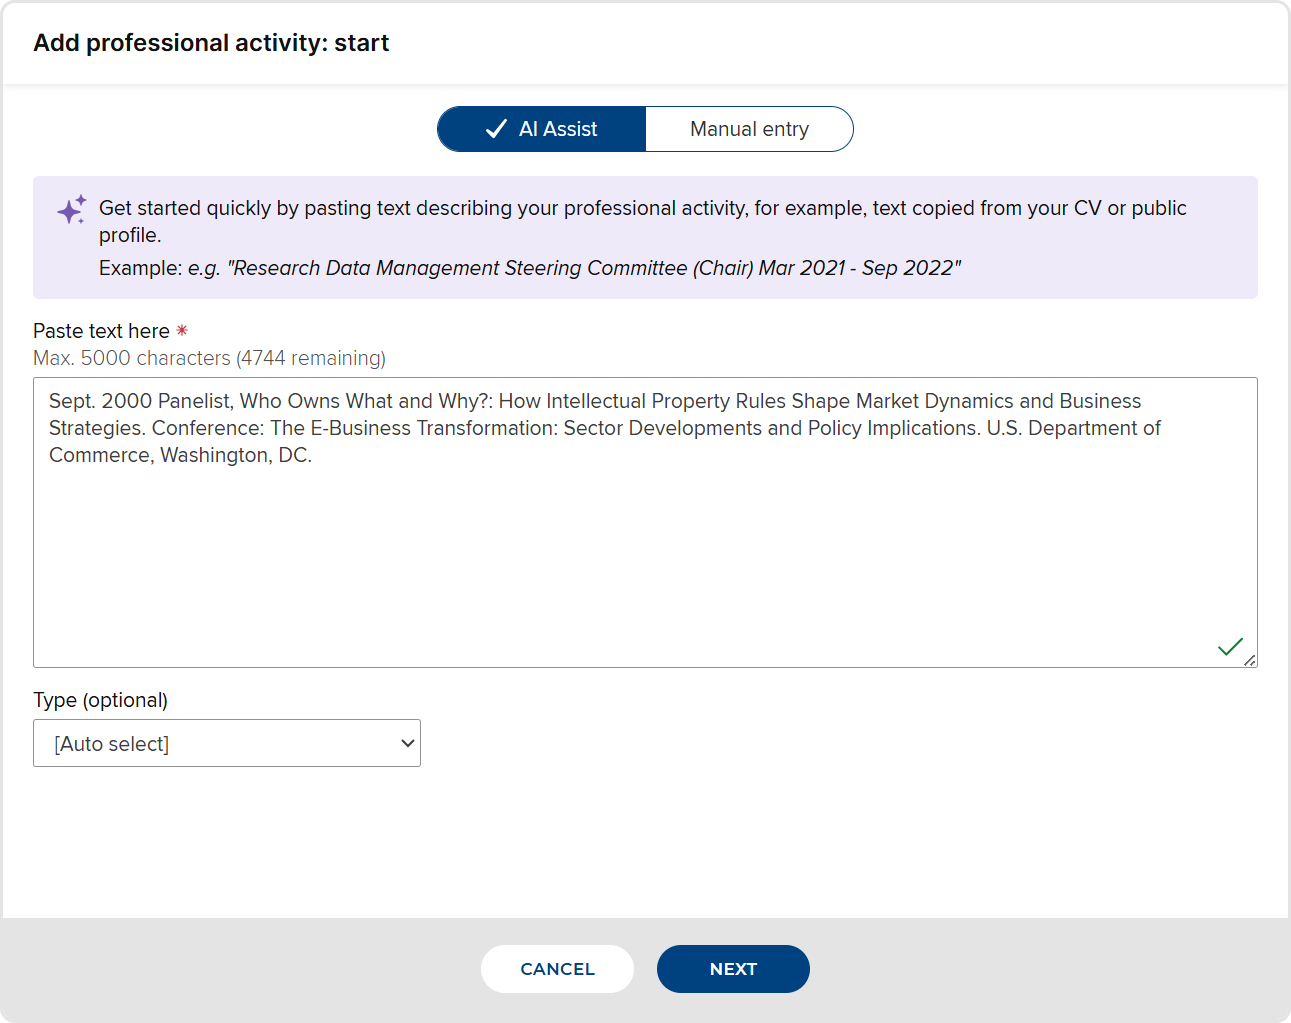
N.B. If you want to enter data manually via a form, use the toggle at the top of the dialog box to switch to "manual entry".
Step 2: check possible matches
To help prevent the accidental creation of duplicate items, Elements will check for existing items that match the entered text. For some data categories, it may also search for matches in external data sources. For details of the strategies Elements uses to look for matches, see "How does Elements check for duplicate items in AI assisted data curation?".
If no match is detected, you'll go straight to step 3 (review extracted data). If matches are detected, they will be offered to you on the "check possible matches" screen:
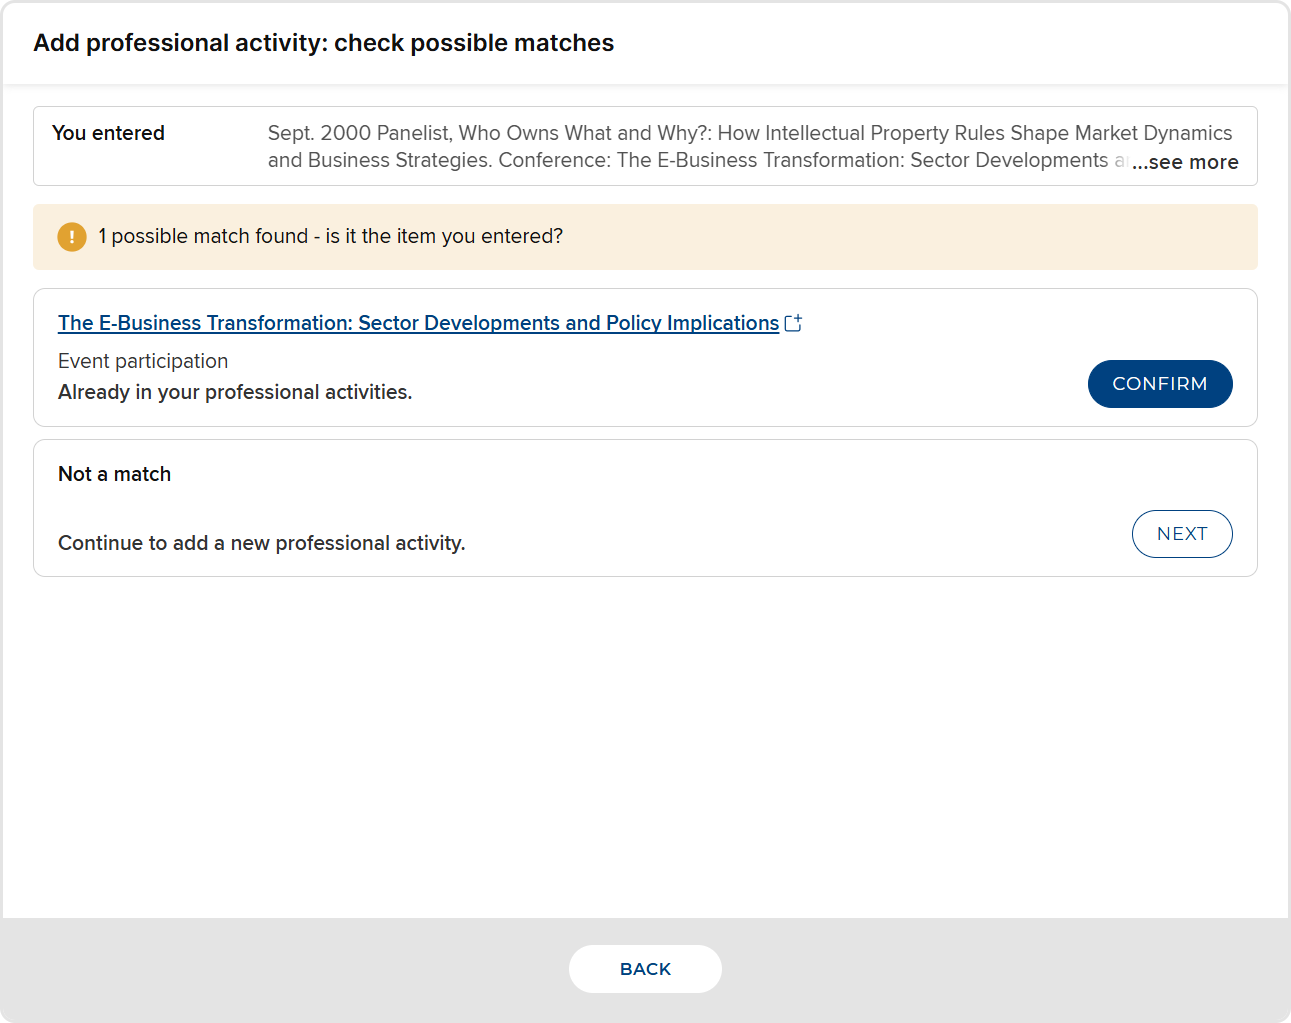
If there is a match for the text you entered, click the match's "Confirm" or "Claim" button to confirm the match and exit the 'add new item' workflow.
If not, click "Next" to carry on and create a new item from the text you entered.
You can also click 'Back' to return to the start screen.
Step 3: review extracted data
The final step is to review the data extracted by AI. This step shows the text you entered, then a section containing item type, relationship type, and privacy information. Beneath that is the extracted data ready for you to review.
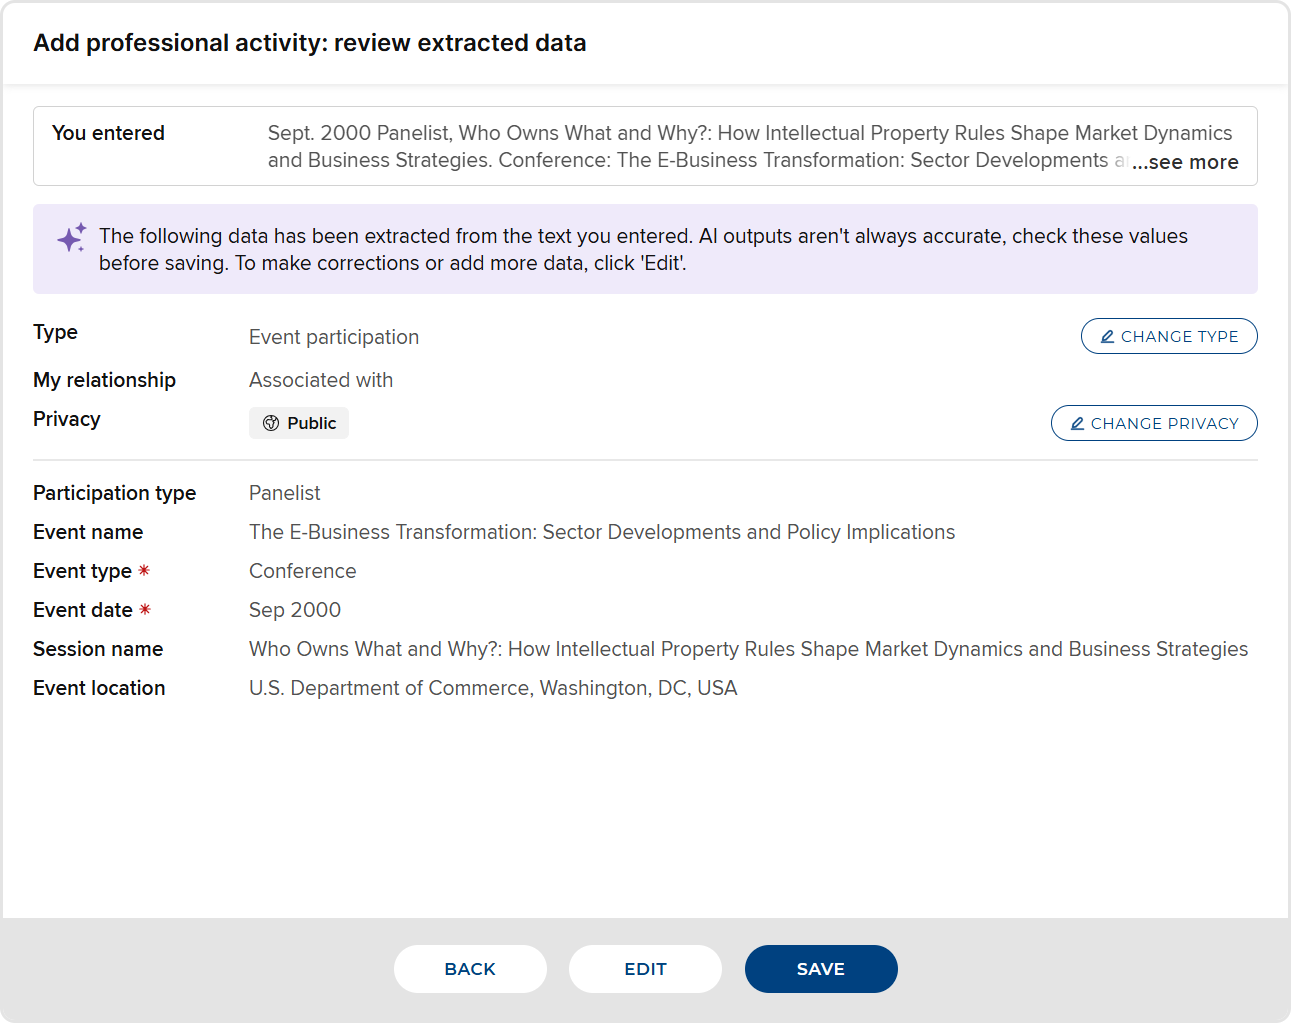
In the top section, you can:
Change the item type. Data will be re-extracted into the schema for the new type.
Change the type of your relationship with the item, for example from "Author of" to "Editor of". Note that some categories of data (e.g. professional and teaching activities) have only one relationship type; this option is not available for those categories.
Change the privacy level of the item and/or your relationship with the item.
In the bottom section, review the extracted data. You have three options:
If the extracted data is correct, simply click 'Save' to create the new item.
If you want to edit or add to the extracted data, click 'Edit'. You'll be taken to the manual data entry form, prepopulated with the extracted data. Make the edits, then save the form in the usual way.
You can also click 'Back' to go back to the previous step in the process.