
How to install the Analytics Database
Introduction
Symplectic-hosted instances of Elements: This article is not relevant to customers subscribing to Symplectic hosting services for Elements, as the Analytics Database is installed by Symplectic in this situation.
Many of the dashboards in Elements are dependent upon data held in the Elements Analytics Database hosted by SQL Server Analysis Services (SSAS), as well as the Elements Reporting Database. The data in the Analytics Database is periodically refreshed from the underlying Reporting Database by the nightly Process Cubes background job (named “Analytics: Process SSAS cubes” in the Scheduled Jobs page of the Elements UI), allowing access to multidimensional data at a given time snapshot.
For any analytics data to be available this job must have successfully completed.
Resourcing: Installing the Analytics Database is a significant job that requires dedicated IT resources for initial configuration and troubleshooting.
Environment configuration
The SSAS server can be set up on any of the machines that hold the Elements Reporting Database, the Elements operational database or the Elements applications. The recommended setup for best performance is to install all components on the same machine, as described in the Elements Installation Prerequisites support article.
Note: if the Analytics Database is to be on the same machine as the operational database or the Reporting Database, then as per the Elements Prerequisites specification, they should be kept on different disks.
Prerequisites
Ensure that SQL Server is of version 2014 or later. Please review the End of Support announcements for supported Server versions/editions.
Install SQL Server Analytics Services in Multidimensional mode, using the SQL Server Installation Center.
Download the two SQL Server Analysis Services Client install files from the support site:
If using SQL Server 2014: https://www.microsoft.com/en-us/download/details.aspx?id=42295 and then choose and then choose a) SQL_AS_AMO.msi and b) SQL_AS_ADOMD.msi from the long list. There are two versions of each file, pick larger ones (4.1 MB and 5.4 MB, respectively). The second file is particularly important in the case where the web server does not have SQL Server installed on it.
If using SQL Server 2016 SP2 or later: at https://www.microsoft.com/en-us/download/details.aspx?id=56833 - and then choose a) ENU\x64\SQL_AS_AMO.msi and b) ENU\x64\SQL_AS_ADOMD.msi from the long list. The second file is particularly important in the case where the web server does not have SQL Server installed on it.
Run SQL Server Analysis Services Client MSI on the Elements application server.
Upgrade Elements using Setup to version 4.16 or later.
Install the Reporting Database using the Reporting Setup utility.
Go to the Reporting Synchronisation management page in Elements (available in the System Admin menu), ensure the Reporting Synchroniser is running, and monitor its progress synchronising data to the Reporting Database until it has completed.
Below is brief description of the connections required for Elements to be able to use the Analytics Database. Please read through these, and the example, to familiarise yourself with the different components and the way they interact. Then follow the walkthrough entitled Analytics Deployment Step-by-Step below.
Connections and environment configuration
A variety of connections between different Elements components are required to view website dashboards drawing data from the Analytics Database. Different network configurations will affect the way these connection occur, and how they are authenticated. The following basic configurations as well as mixtures of them are supported:
All components on the same server and Windows domain
Components on separate servers but the same Windows domain
Components on separate servers and separate Windows domains
The simplest setup is the first of these.
Note: SSAS only supports Windows authentication. In the case where components are in separate Windows domains, cross-domain account matching will be used to authenticate access. To do this, identical accounts (with the same username and password) for the relevant connection will have to be set up in both domains.
The diagram below illustrates the different connections necessary, using, as an example, the case where all components are on separate servers within the same Windows domain. The connections A, B and E should already exist if all prerequisites have been met. In this guide we’ll explain the purpose and how to set up connections C, D, F and G.
Connection G
This connection is used by the Reporting Setup to deploy the Analytics Database onto the SSAS server. It does not matter which user account is used to run the setup as long as it has the SSAS administrator privileges (see Ref. 1)
Connection C
This connection is used by the Analytics Database to pull data from the Reporting Database during the Process Cubes job. In a single domain environment the account used will be the default account running SSAS, which is the NT SERVICE\MSSQLServerOLAPService account. This account must be given access to the Reporting Database, (see Ref. 2).
Connection D
Connecting through SSAS must always be via Windows authentication, not SQL Server authentication. Connection D is used by the Elements Scheduler Windows Service to issue a process order to the Analytics Database for it to refresh data via Connection C. For Connection D, SSAS will try to authenticate whichever Windows account is running the Elements Scheduler. The account, or the group it belongs to, must be added to Processer role in the Analytics Database once it has been deployed (see Ref. 4).
Connection F
Connecting through SSAS must always be via Windows authentication, not SQL Server authentication. Connection F is used by the Elements application to query the Analytics Database and present the result those dashboards that use the Analytics Database. For Connection F, SSAS will try to authenticate whichever Windows account is running the IIS Application Pool that is hosting the Elements applications. The account, or the group it belongs to, must be added to the Consumer role in the Analytics Database once it has been deployed (see Ref. 4).
An example role/account setup for the above configuration might be as follows. It should also be noted that if existing accounts are already in place for Elements usage they can simply be expanded to cover this use case.
Create a Windows account called ‘Elements’.
Create two groups: ‘Elements Administrator’ and ‘Elements User’.
Add the ‘Elements’ user to both groups.
Ensure the ‘Elements’ user account can ‘Logon as a Service’.
Give the ‘Elements Administrator’ group Administrator access to SSAS.
Set the ‘Elements’ account to be the one running the IIS App Pool that is running the Elements application, and the Elements Scheduler.
Deploy the Analytics Database using the Reporting Setup (see Ref 3 below for more details).
Set the ‘Elements Administrator’ group to have membership in the Processor role in the Analytics Database.
Set the ‘Elements User’ group to have membership in the Consumer role in the Analytics Database.
Analytics deployment step-by-step
Ensure that all the Prerequisites have been met.
Add the user who will run the Reporting Setup as an SSAS administrator (see Ref. 1).
Add the account that SSAS will connect to the Reporting Database as db_owner (see Ref. 2).
Having decided where the Analytics Database will be hosted, and where this is with respect to other Elements components, ensure that it is accessible from these Elements components and that relevant account will be able to authenticate over these connections.
Run the Reporting Setup application and select the “Install a new Analytics Database” option (see Ref. 3).
Log in to the SSAS Server using SQL Server Management studio and register the Windows accounts that will be used for Consuming and Processing the Analytics Database (see Ref. 4).
Login to the Elements web application and manually run the Process Cubes job listed on the Scheduled Jobs page (See Ref. 5)
Navigate to the System Log to monitor for any errors
Go to the Dashboards tab and view a dashboard (the "Frequently published journal titles" dashboard draws its data from the Analytics Database)
If there is no data visible, or an error occurs, navigate to the system log and check for errors.
(Ref. 1) Add the analytics deployer role user as an SSAS administrator
Connect to SSAS using the Microsoft SQL Server Management Studio.
Right click the server, select Properties.
Select the Security tab.
Add the Windows account who will be running the Reporting Setup to deploy the Analytics Database.
(Ref. 2) Add the SSAS service account as a db_owner on the Reporting Database
The account used to connect from the Analytics Database to the Reporting Database (Connection C) must be given db_owner access. If the Analytics Database and the Reporting Database are in the same domain the account running SSAS will be used for authentication. By default this is NT SERVICE\MSSQLServerOLAPService account.
Login to SQL Server Management Studio Database Engine as an administrator.
Expand Security.
Right click Logins, select New Login.
Add a Windows account for NT Service\MSSQLServerOLAPService.
Select the User Mapping tab for that login.
Check the box for the Reporting Database.
Give it db_owner role membership.
(Ref. 3) Deploying the Analytics Database from the reporting setup utility
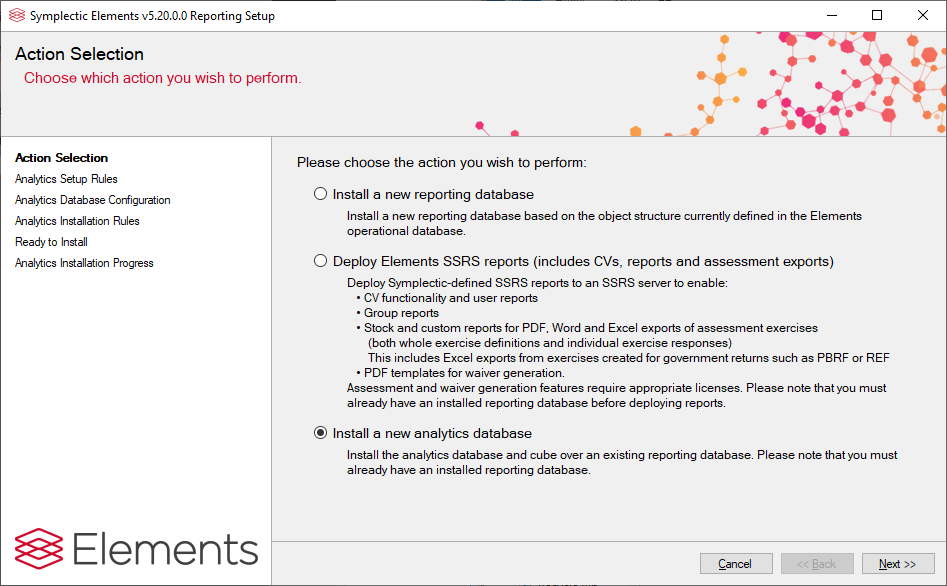
Run ReportingSetup.exe
Action selection - choose “Install a new Analytics Database”
Analytics setup rules - a page of rules to ensure that correct configuration has taken place
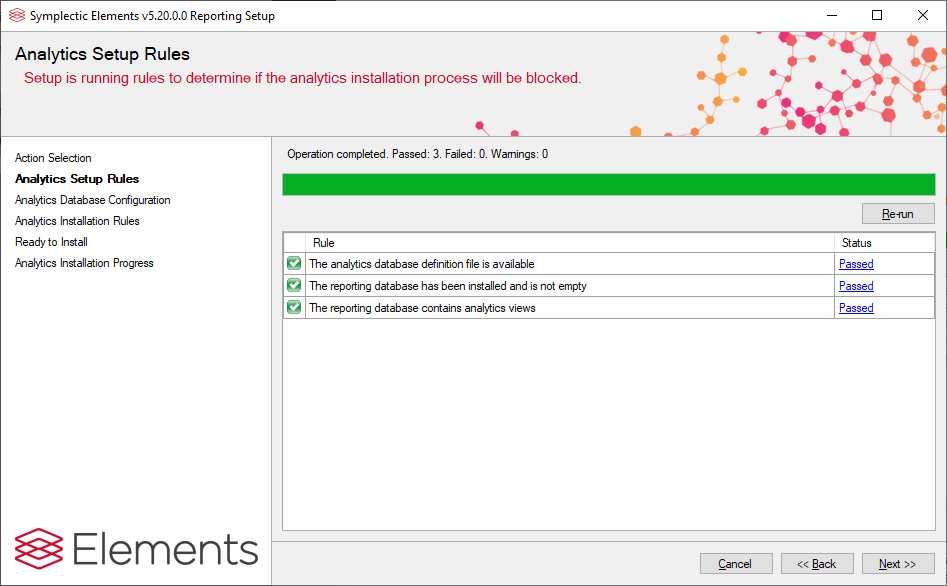
The Analytics Database definition file is available - the rule checks that the Analytics Database has been correctly unzipped from the installable package and is available to the installer. It may fail if the Reporting Setup is being run from an incorrect location.
The Microsoft Analysis Services client is installed - an SSAS Client must be installed on the same machine as the Elements Website. This is achieved by running the following Microsoft Analysis Services Client installer prior to Setup. See Prerequisites.
The Reporting Database has been installed and is not empty - the Reporting Database must have been installed for this instance, and relevant config files updated.
The Reporting Database contains analytics views - the Reporting Database must have been installed while a licence for the Analytics Module is present. This ensures that necessary analytics views have been created in the Reporting Database.
Analytics database configuration
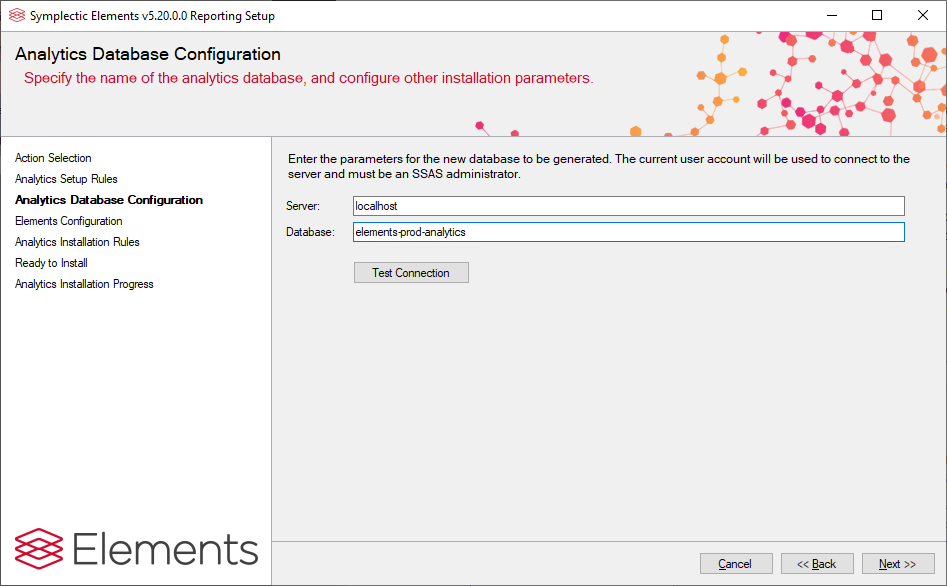
Enter the details of the server where the Analytics Database will be installed.
Test the connection to this database - this test will use the credentials of the currently logged in user.
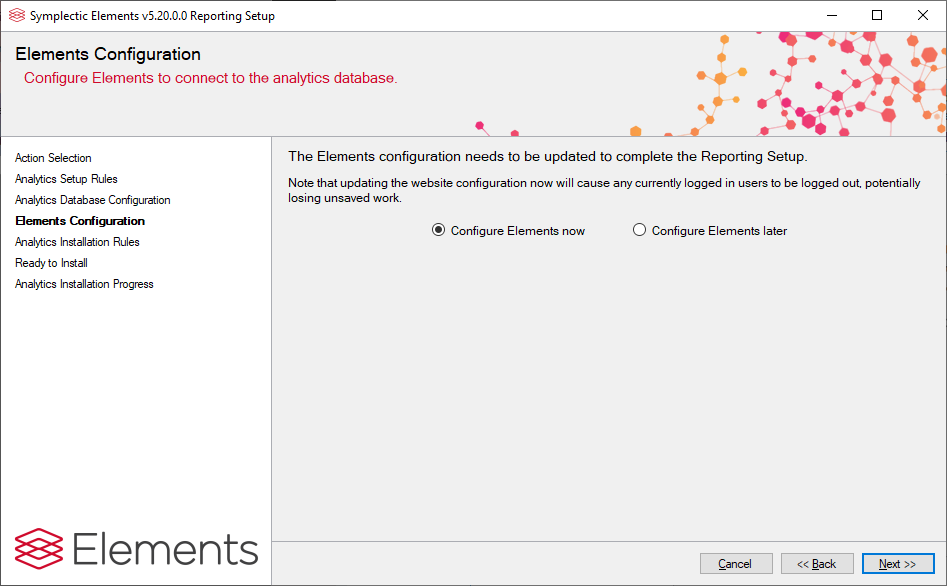
Elements configuration - this page rewrites relevant config files for the chosen database details.
Analytics installation rules - a second page of rules to ensure that the particular Analytics Database specified can be successfully deployed.
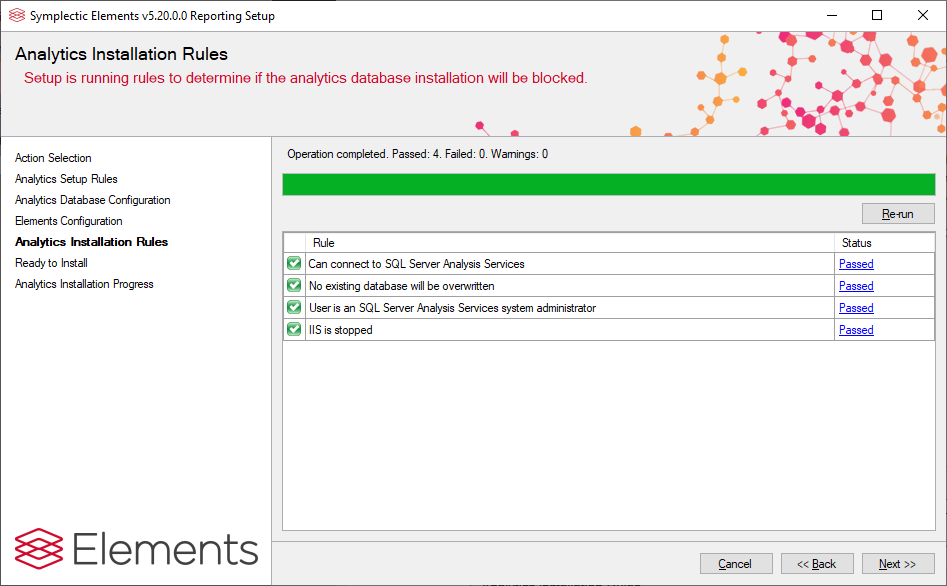
Can connect to SQL Server Analysis Services - This rule ensures that the SQL Server instance where the Analytics Database will be installed is accessible and of the correct version.
No existing database will be overwritten - This rule ensures that an existing database will not be accidentally overwritten. Any such database must be manually deleted in SSAS before continuing.
User is an SQL Analysis Services system administrator - This rule ensures the user running the reporting setup has the rights to deploy the Analytics Database (see Ref. 1).
IIS is stopped - Internet Information Services must be stopped for the installer to proceed.
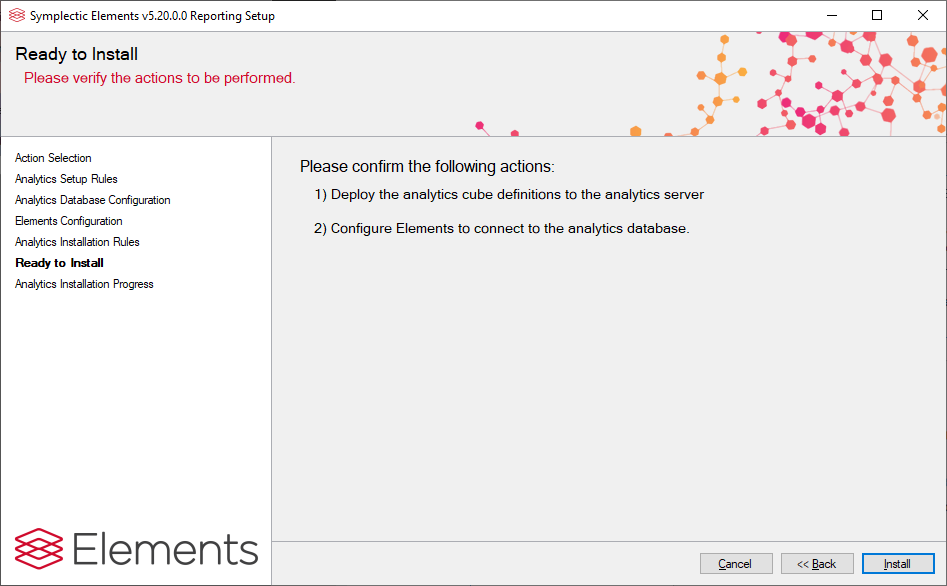
Ready to install - review and confirm the actions to be carried out.
Analytics installation process - as the installation is carried out, this page will display a progress report.
Confirmation dialog - as the installer closes, a confirmation dialog is displayed to confirm that the Analytics Database has been successfully deployed or that errors have occurred, and indicates the next steps that you should take (e.g. restart IIS and the Elements Scheduler, log in to Elements to invoke the Process Cubes background job).
(Ref. 4) Registering the analytics processor role and analytics consumer role in the cube
Connect to SSAS using the SQL Server Management Studio.
Expand Databases.
Expand the recently deployed Analytics Database.
Expand Roles.
Right click the Cube consumer role and select Properties.
Select the membership tab.
Add the Windows account, or the group it belongs to, that is running the IIS Application Pool hosting the Elements website on the application server. Press OK.
Repeat for the Cube processor role, adding membership only for the Windows account, or the group it belongs to, running the Elements scheduler on the Elements application server.
(Ref. 5) Processing the cube to populate it with data
Go to the Scheduled Jobs page in the Elements web application.
Select the Reporting Synchroniser option and ensure that the Reporting Synchroniser service is running and that a full data reload has taken place since upgrading. If not, then select Start and "Reload all data from Scratch".
Configure a schedule for the Analytics: Process Cubes job to run, once per night.
Run the Process Cubes job manually for the first time.
Go to the system log and ensure that no errors were reported.