
Professional Activities module settings
The Professional Activities module settings control access to the module, the display of default types, Professional Activity types and underlying fields.
Making Professional Activities visible to users is controlled via System admin > Data category settings > Manage module access. Begin by checking the appropriate module, which will make the Group structure menu appear. The administrator has the option of making the module available to all users by checking the top level (organisation) check box or, alternately, selecting any groups in the hierarchy.
To assign a single User, type the User’s surname in the box. The User must already be in Elements to be assigned.
Remove group/user(s) with the red cross.
For more information about Module Roles see the following article about Roles in Elements.
Category Settings
From System admin > Data category settings > Professional activities, the administrator can give users the option to change professional activities types using the dropdown box beside the pencil icon.

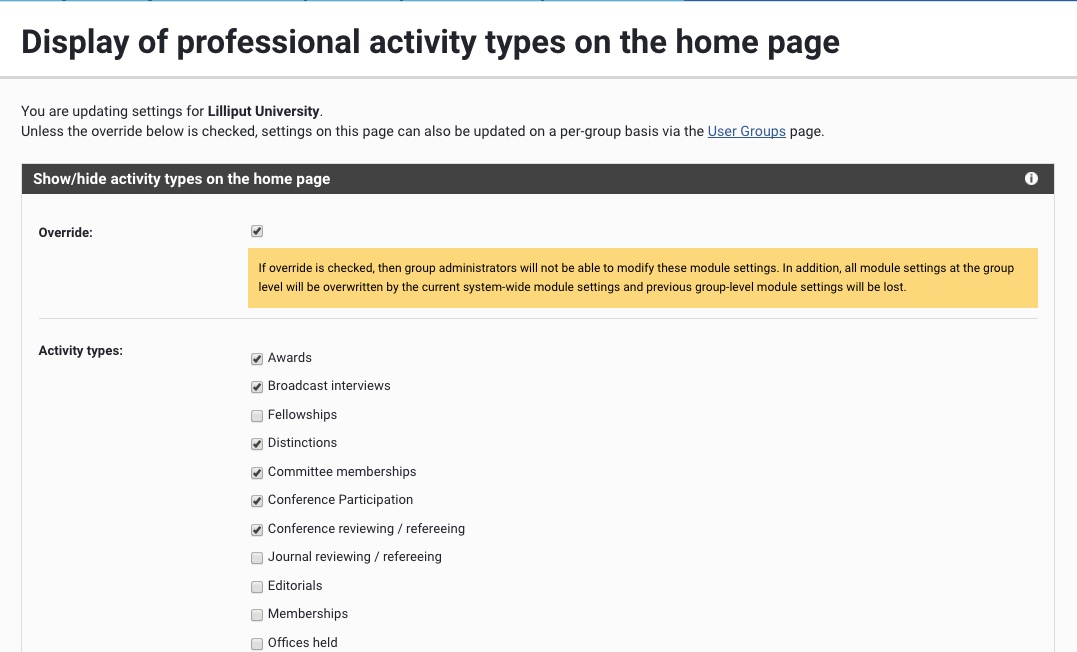
Displaying a limited set of professional activities will reduce the size of the My Professional Activities area. All types will still be available under 'see more'. All activities will still be included in reports and charts. This setting can be specific to Primary Groups or the set for the entire institution. Please refer to Overriding module settings for more details.
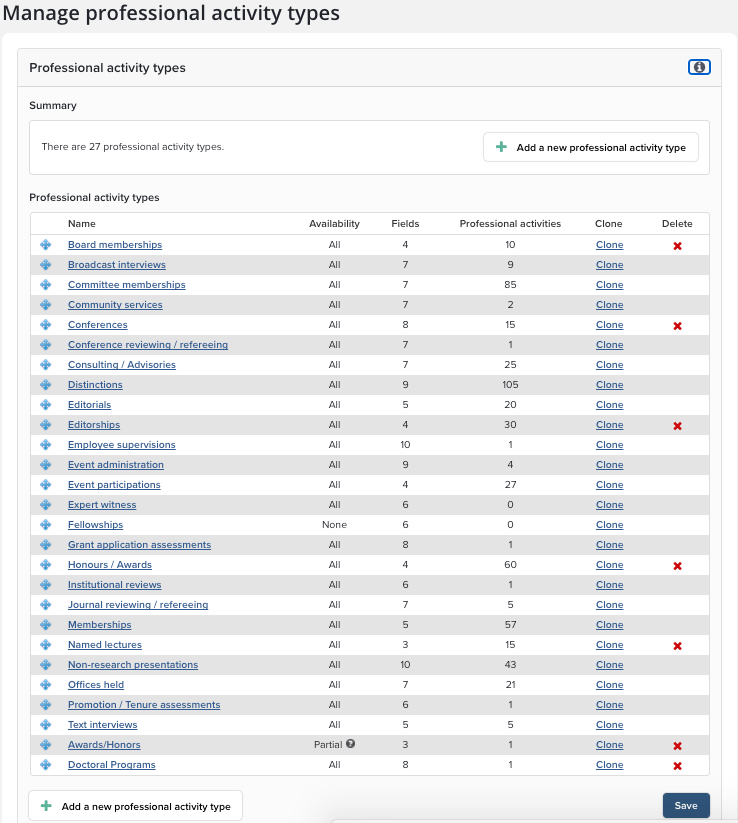
Manage Types
Elements contains 20 default Professional Activity types. Please see Types and Underlying Fields for details on how these are managed. You cannot delete the default types; however, if you add custom teaching activity types, then these can be deleted. This is indicated by a red cross beside the type.
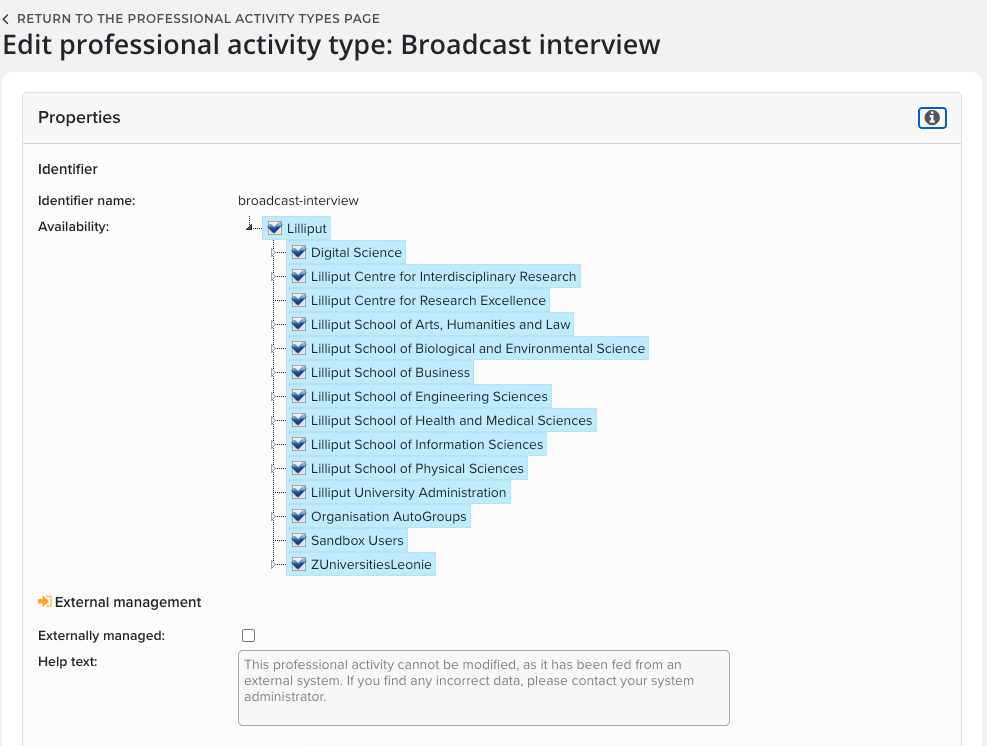
Edit the Properties of a Professional Activity
Availability: Hide an activity type from view by controlling the groups who can see this type. The activity type will be available to users of the checked groups in the hierarchy. Activity types that have been restricted will not be shown within search filters and cannot be created by users. By default, availability is enabled for all users. To remove the availability of a type from the whole organisation, uncheck the root node of the tree.
External Management: Professional activities of an externally managed type cannot be created, edited, split, merged, or have their types changed. Additionally, existing activities cannot have their types changed to any externally managed type.
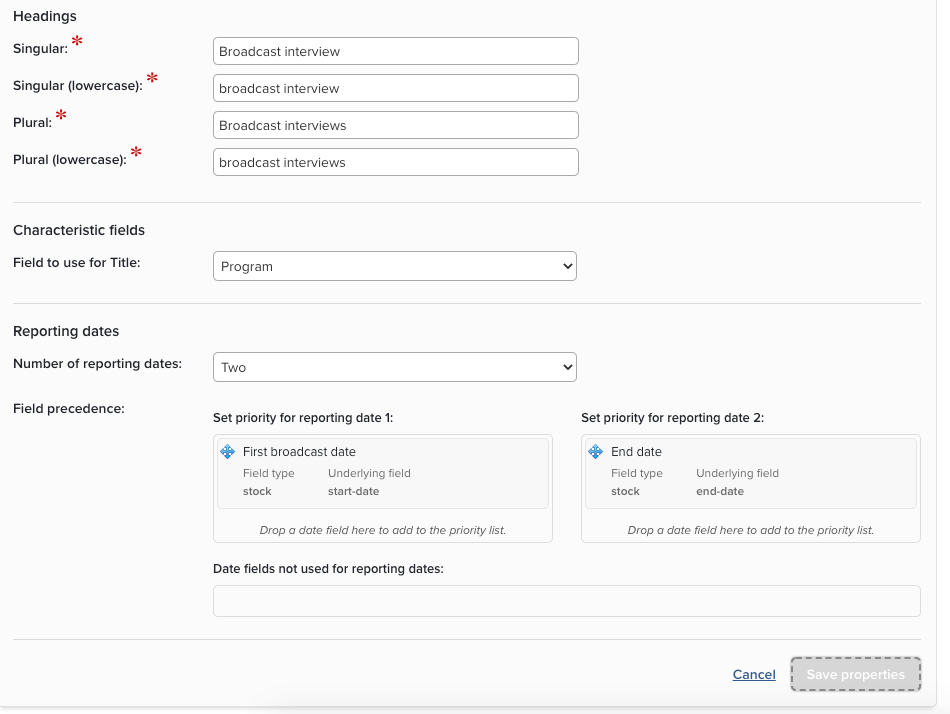
To change the name given to the type, enter the four different cases for the new name in the heading fields, you can alter the headings to reflect a more common use of a type at your institution.
Title field: Select the title field to use.
Characteristic fields: Select a field to control which metadata fields from Elements will populate key fields in the Discovery Module.
Reporting dates: Select appropriate Reporting date fields.
Tip: Only use two reporting dates for events that have a begin and end date, such as an exhibit.
Be sure to click the "Save properties" button when you're finished modifying the activity type.
Note: preventing users from adding types will not prevent data of the same type being added via the Elements API.
Add and Edit Fields to a Type
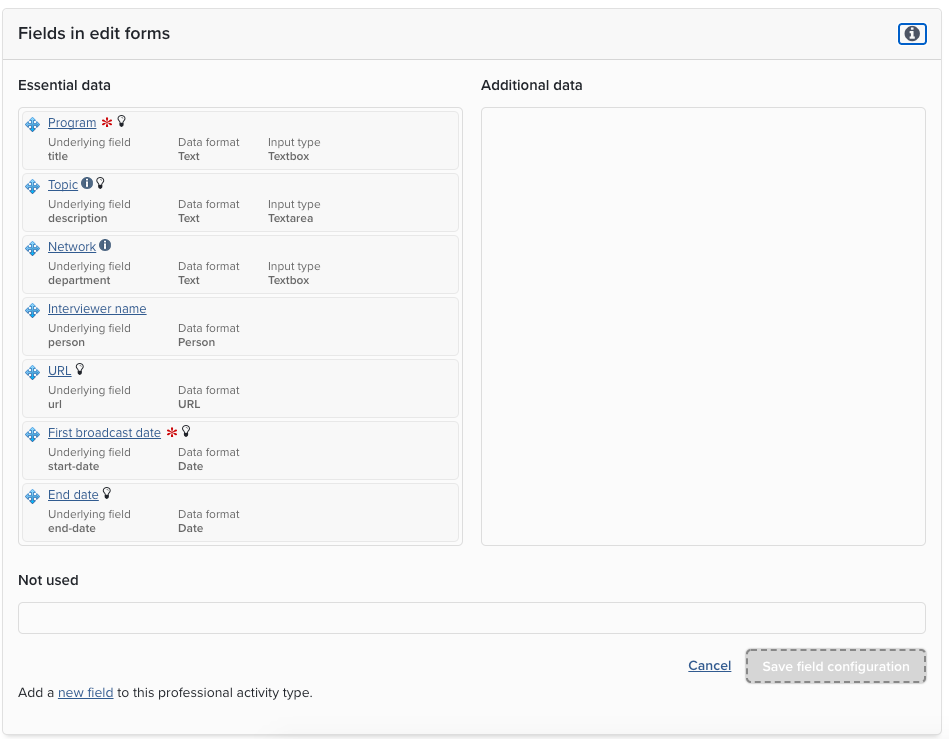
The order and organisation of fields is controlled in the "Fields in edit forms" section.
Reorder fields by dropping and dragging.
Move fields from the top of the form by dragging them into Essential data.
Move fields to the collapsible second section by dragging them into Additional data.
Make fields invisible by moving them to the Not Used section.
Edit Field Properties
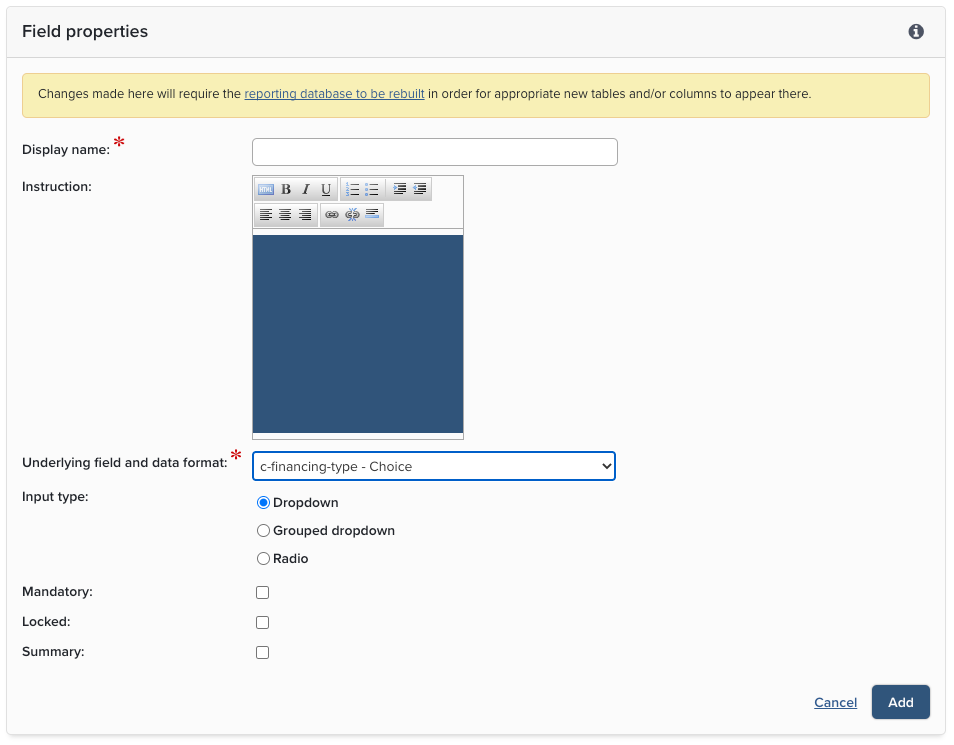
Click on a field name to open the Field Properties menu for that data type.
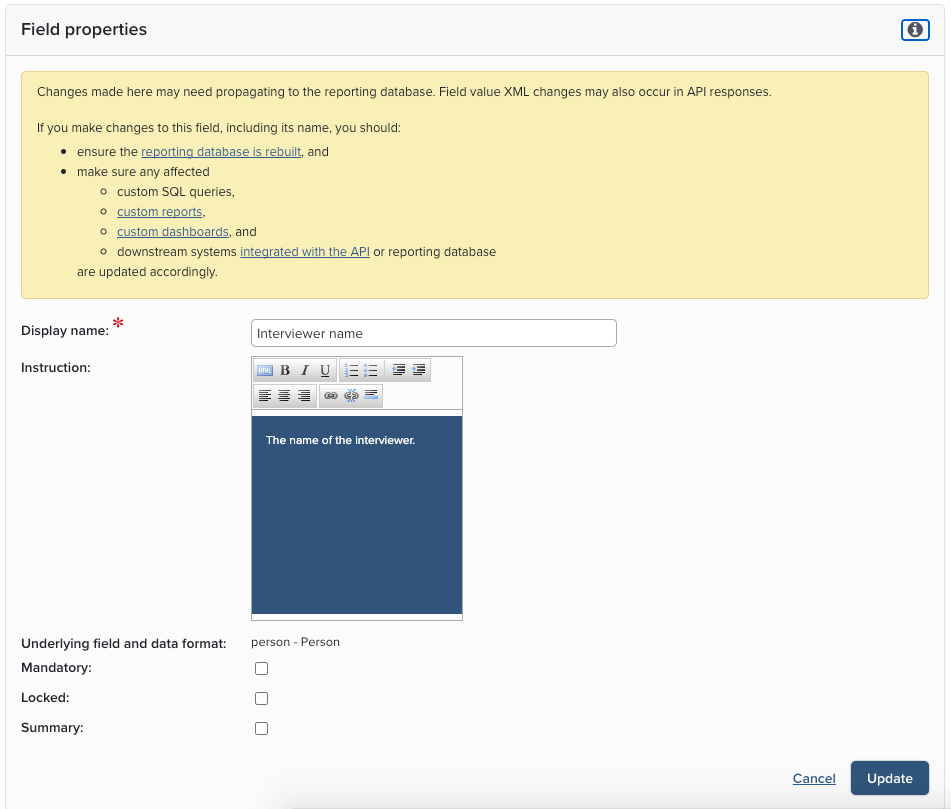
You can customise the display name of a field to suit your institution. For example, in the Broadcast Interview type, you could change the field display name to "Program." The underlying field will still remain as Broadcast Interview, but in the data entry forms Program will be displayed. When adding a new field, be sure to pick a new display name.
Instruction: Help or guidance notes for each field will be displayed next to the field.
Underlying field and data format: Default fields cannot be changed and will vary according to the field selected; however, when creating a new field, you can select from the available default or custom underlying fields. Please see Types and Underlying Fields for details on how these are managed.
Input type and Symbol Inserter: Availability of this option is determined by the default field.
Mandatory: The checkbox determines if the field must contain data.
Locked: A locked field cannot be modified when editing a record and will be hidden when editing if it is currently empty. A mandatory field cannot be locked.
Summary: The summary checkbox only appears when creating a new field and determines if the field will display on the summary view in My Publications and the View Object screen.
Add fields
You can now, if you like, add additional fields associated with the new activity types. Click on the "Add a new field to this professional activity type" link at the bottom of the screen and follow the instructions until you have added all the information you wish to collect for the new type.
Complete this task outside the normal usage hours of your system wherever possible. As soon as you have added a field to the type, it will become available to users of the system, which may be confusing.
Delete an activity type
Default types cannot be removed, but any custom type can. Click on the cross (X) next to the professional activity type on the main ‘Manage types’ screen. You will receive a pop-up warning that any data associated with the data type will also be deleted. Click through this warning only if you are sure you wish to remove the type and all associated data.
More Information
We recommend that, as much as is possible, you restrict your use of underlying fields to the default fields.