
Recording the proposal approval decision
Once all reviews and approvals have been submitted and it is known whether to proceed with the proposal or not, you will want to record the overall internal approval decision. This is undertaken over a number of steps:
Successful proposal
Record approval decision (moving the Proposal to 'Pre-approved')
Notify the PI
Move the Proposal to 'Approved'
Unsuccessful proposal
Record declined decision (moving the Proposal to 'Pre-rejected')
Notify the PI
Move the Proposal to 'Closed' (which will close the Proposal)
Adding the Funding Opportunity to the Approval Decision Meeting
In order to be able to record overall approval decisions on Proposals, you must first add the relevant Funding Opportunity to the 'Approval Decision Meeting'.
This can be done directly in the Funding Opportunity (from v7.1), as described in this support article, or via the Meeting's edit page, as described below.
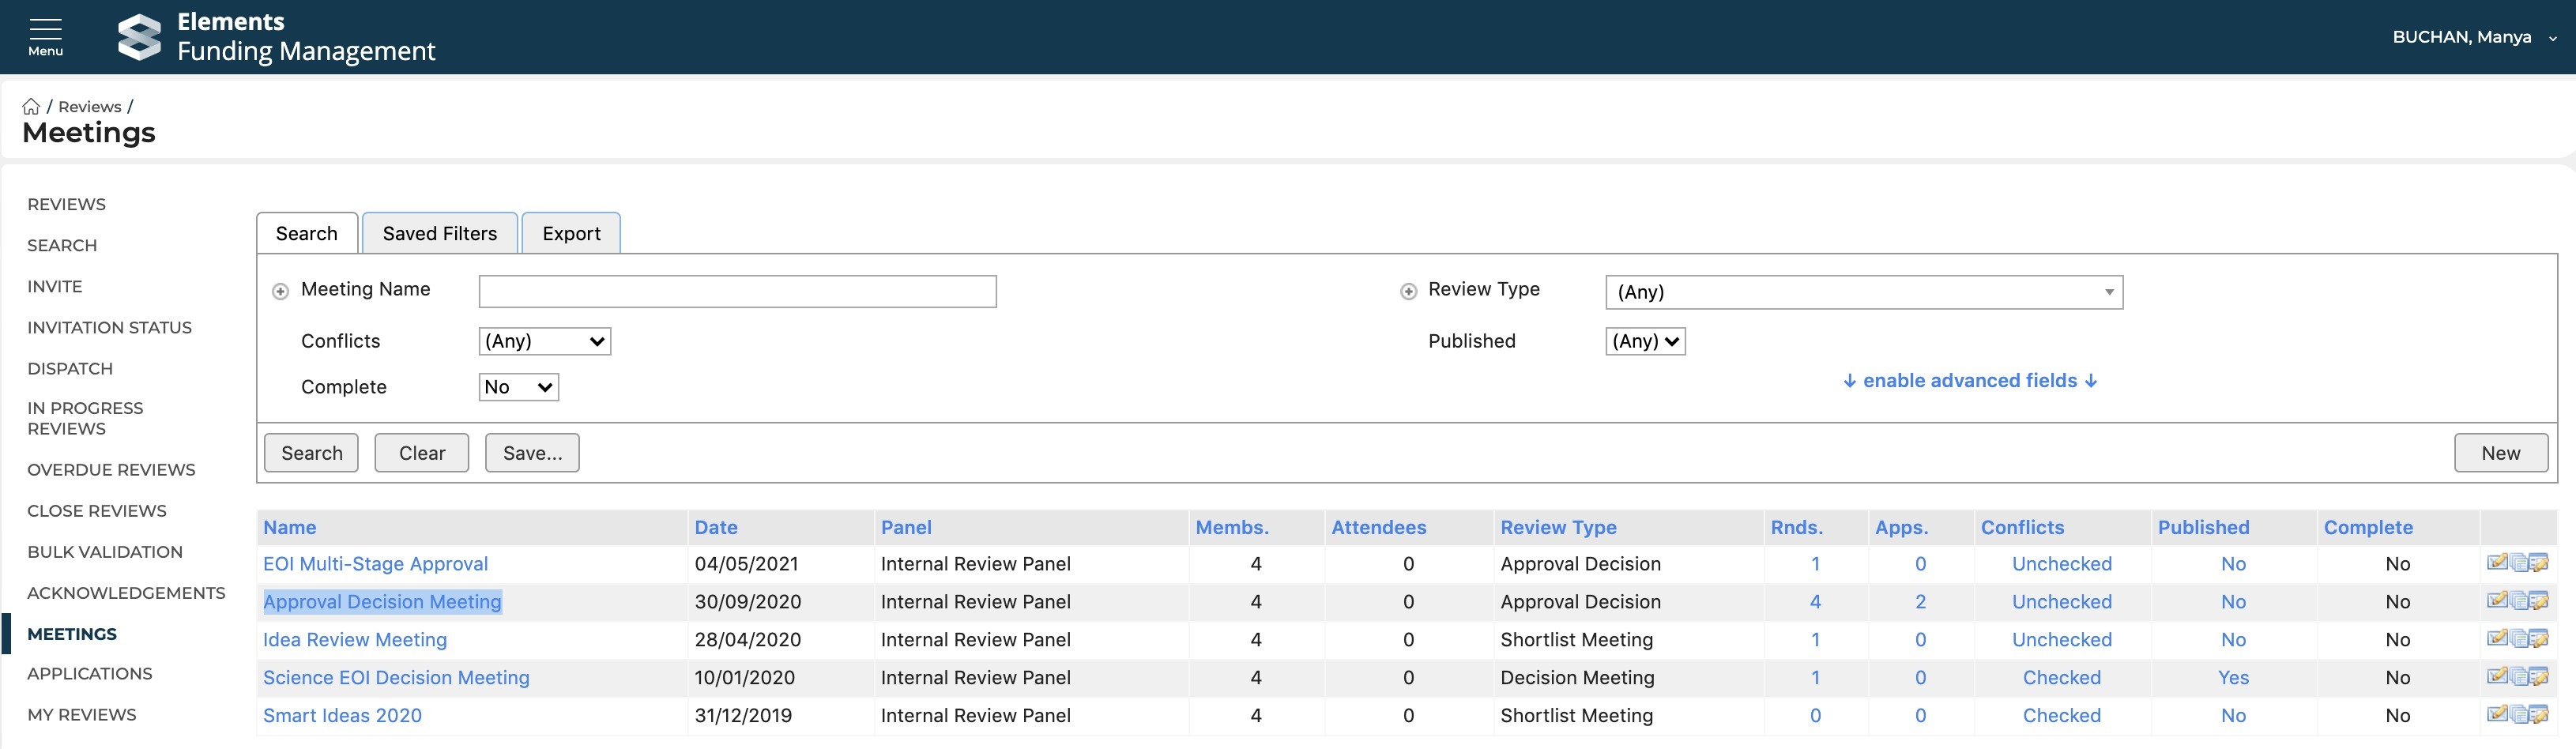
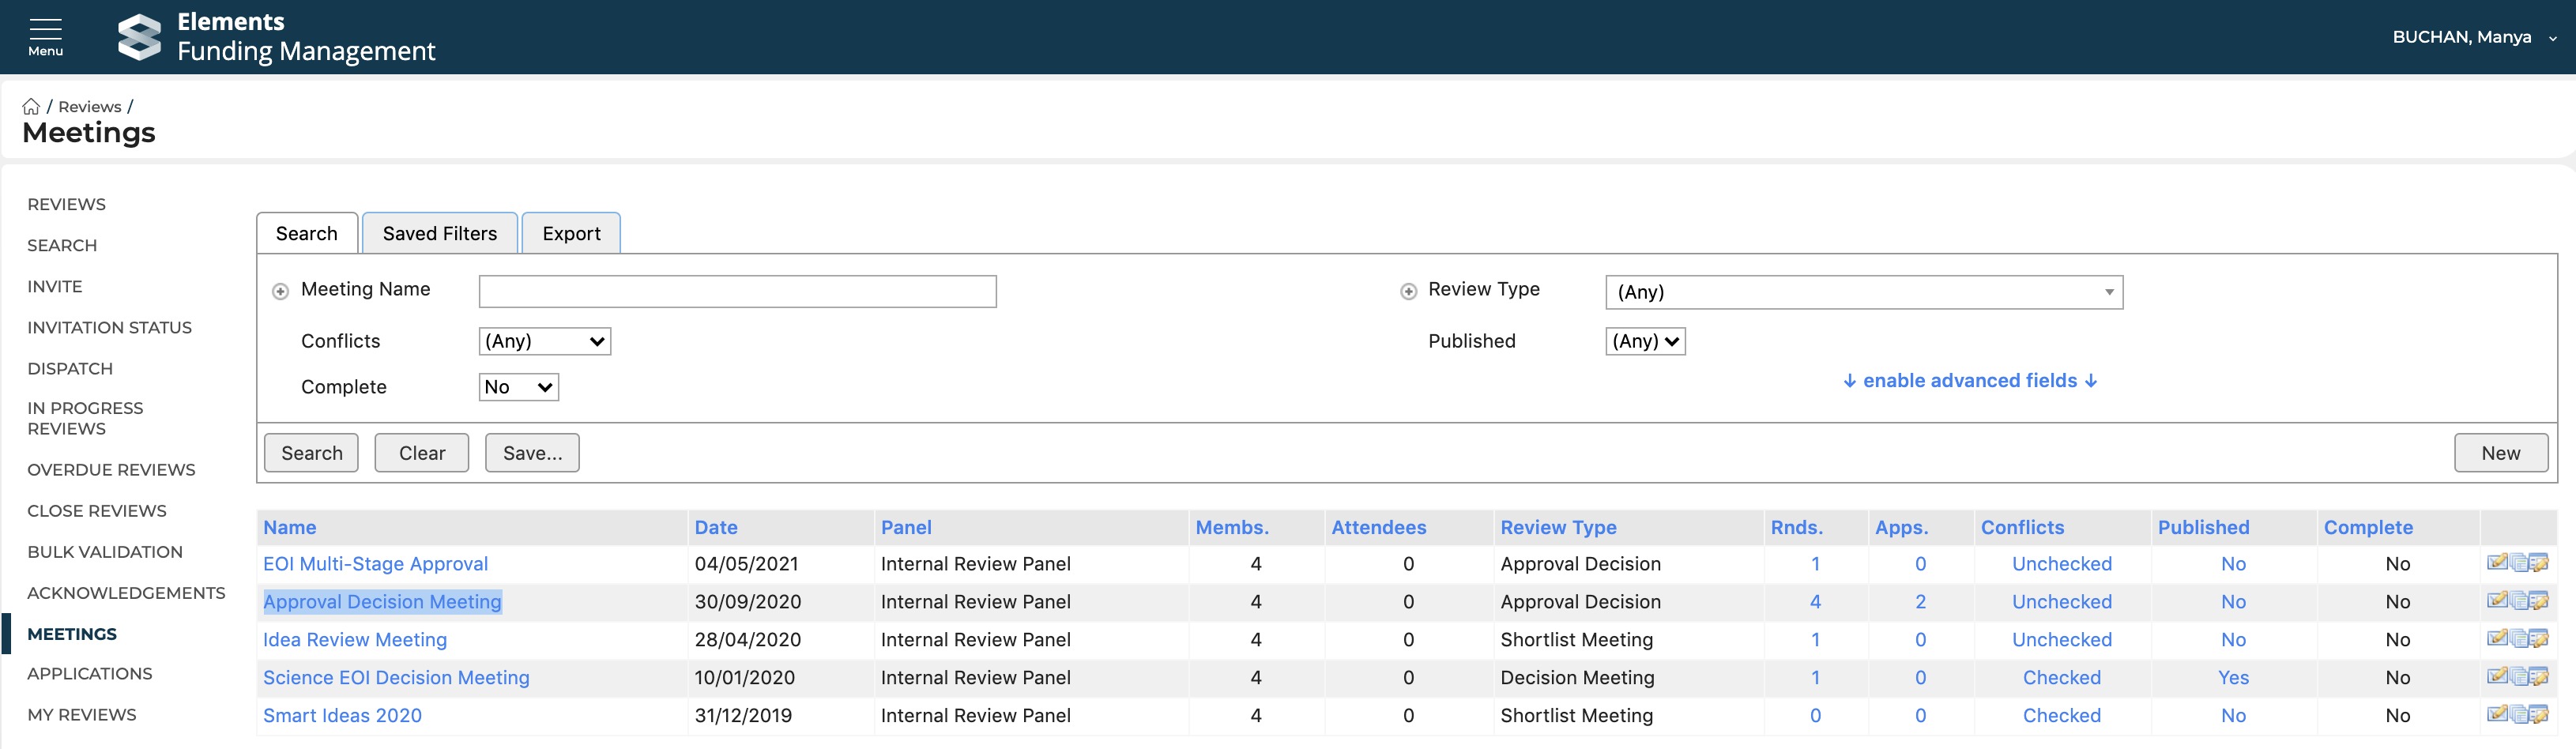
Go to Reviews > Meetings and select 'Approval Decision Meeting'.
Go to Edit and scroll down to the bottom of the screen and select 'Add rounds ...'.
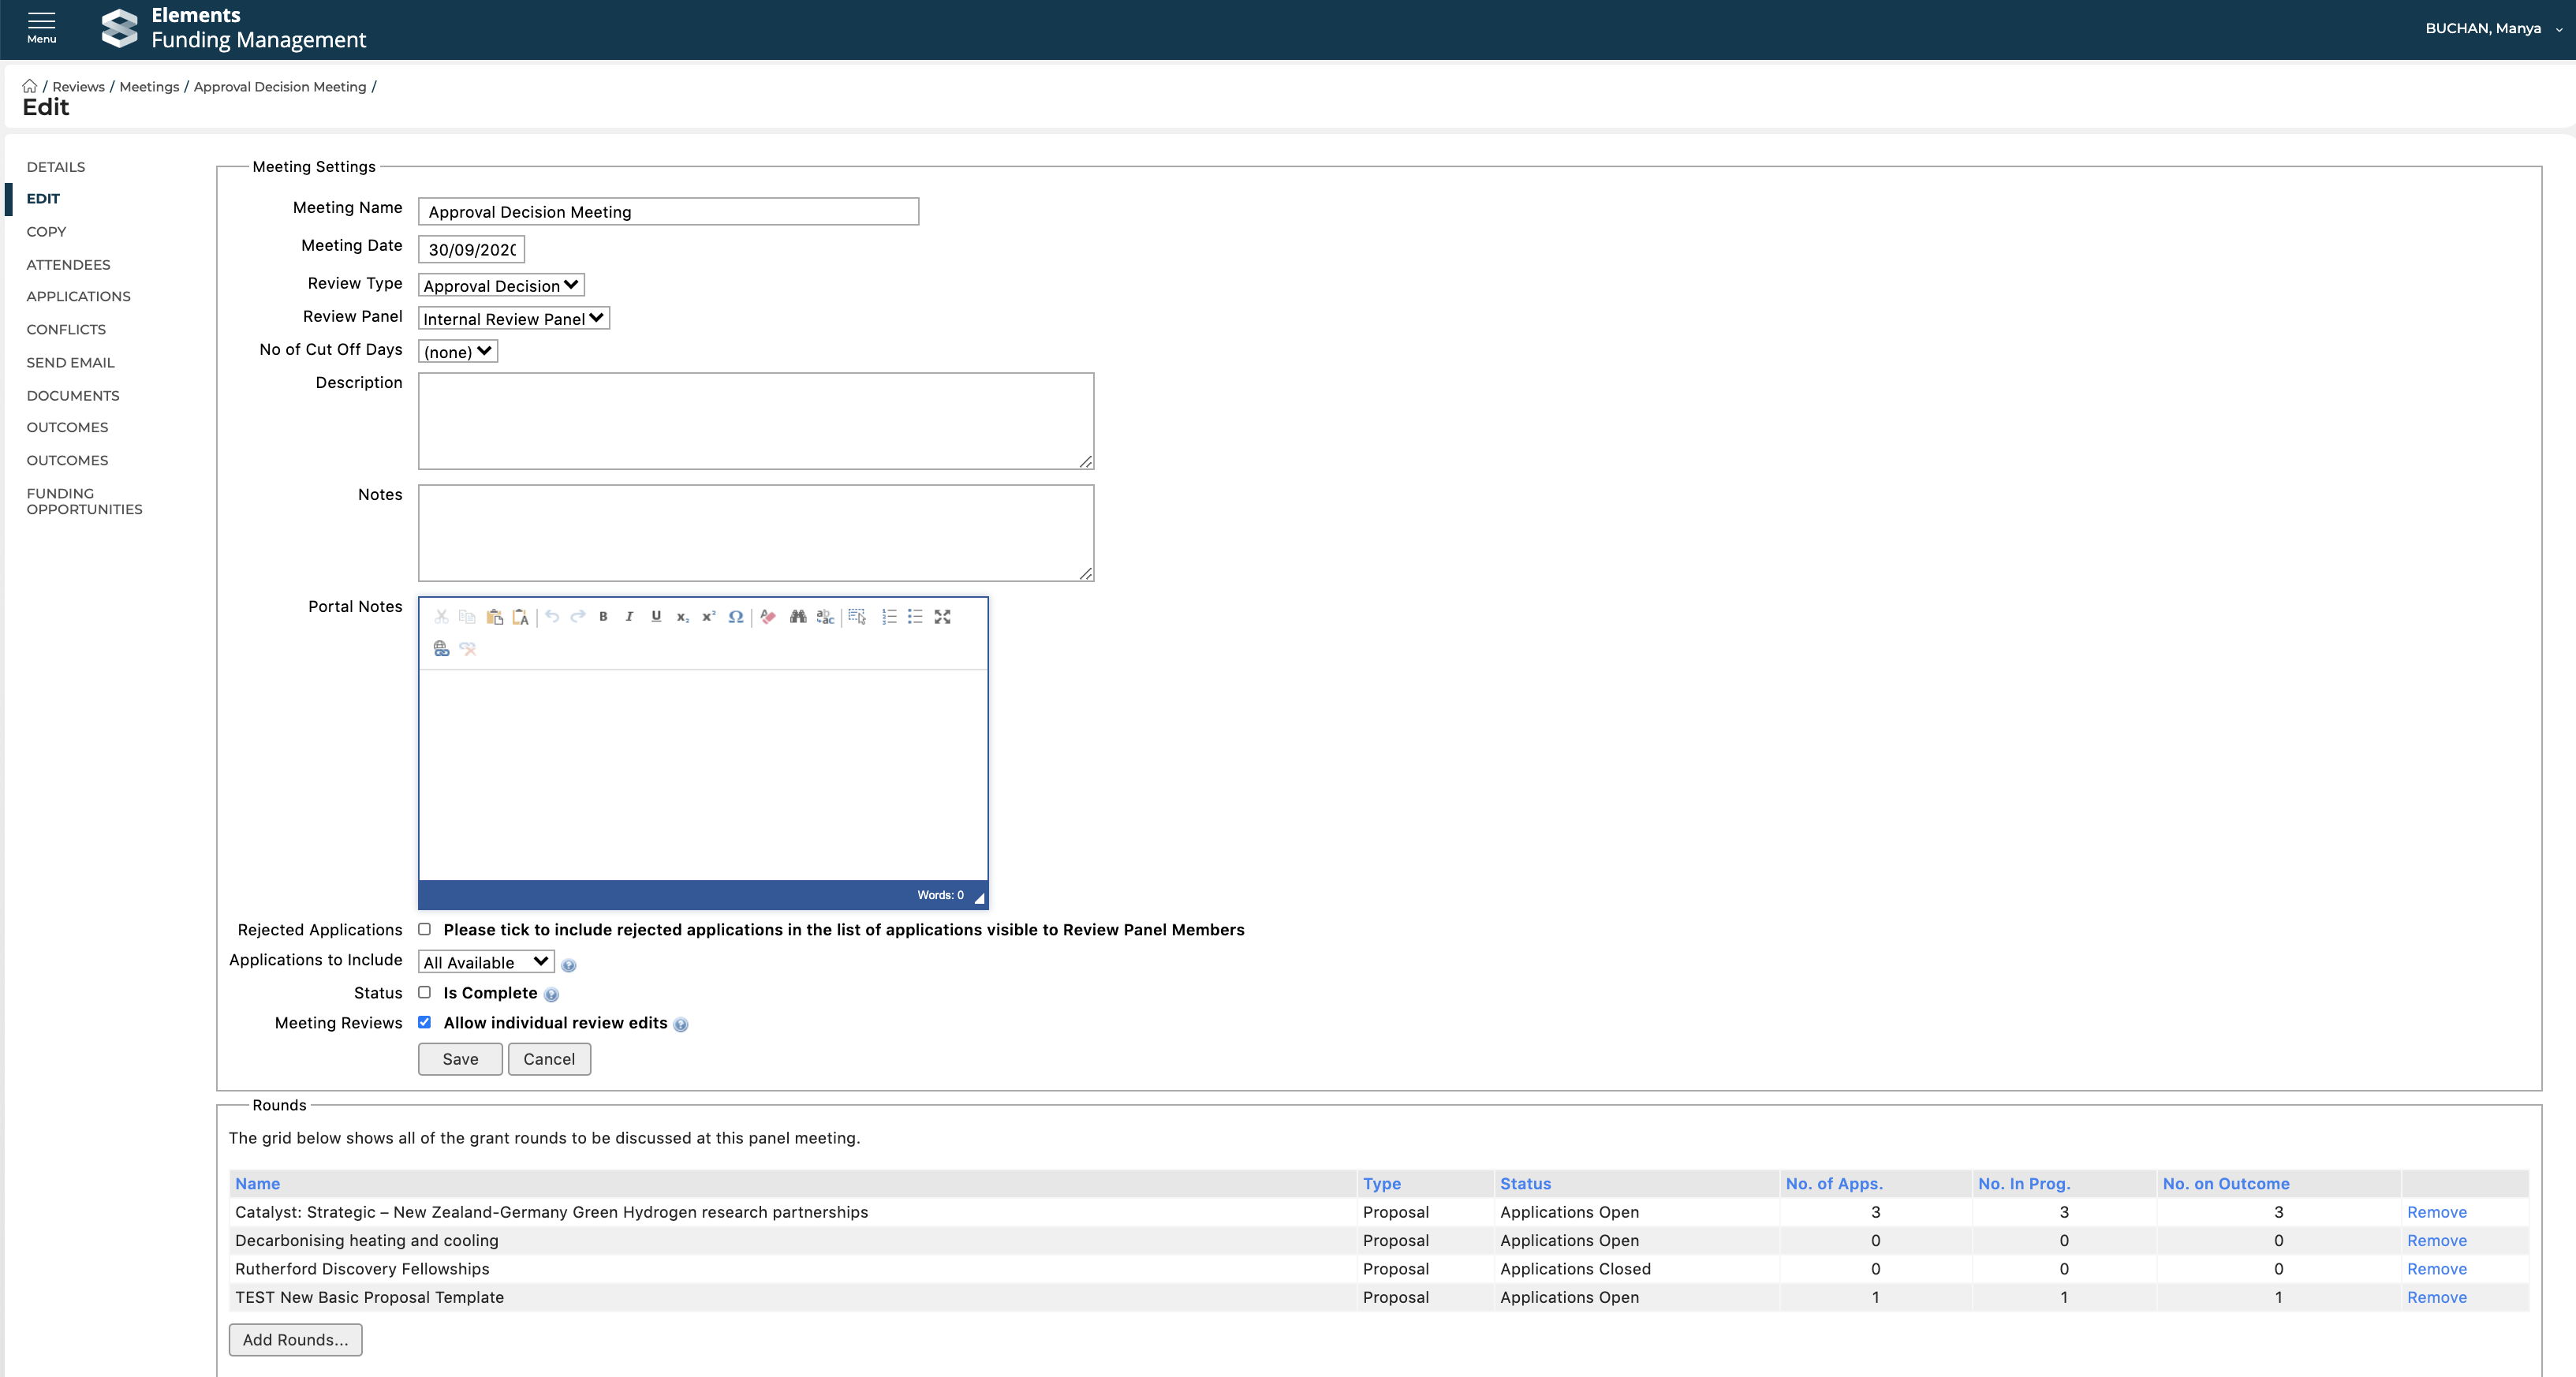
In the pop-up, select the relevant Funding Opportunity. You can filter by various properties to narrow down the list.
This adds the Funding Opportunity to the meeting and now enables you to capture overall approval decisions for Proposals for that Funding Opportunity.
Note that you can perform this step of adding the Funding Opportunity to the meeting at any point following the completion of the Review & Approval configuration.
Capturing the overall internal approval decision
Navigate to Reviews > Meetings and select 'Approval Decision Meeting'.
Then open the 'Outcomes' tab, where all 'Under Review' proposals will be listed. You can filter this list by Funding Opportunity.
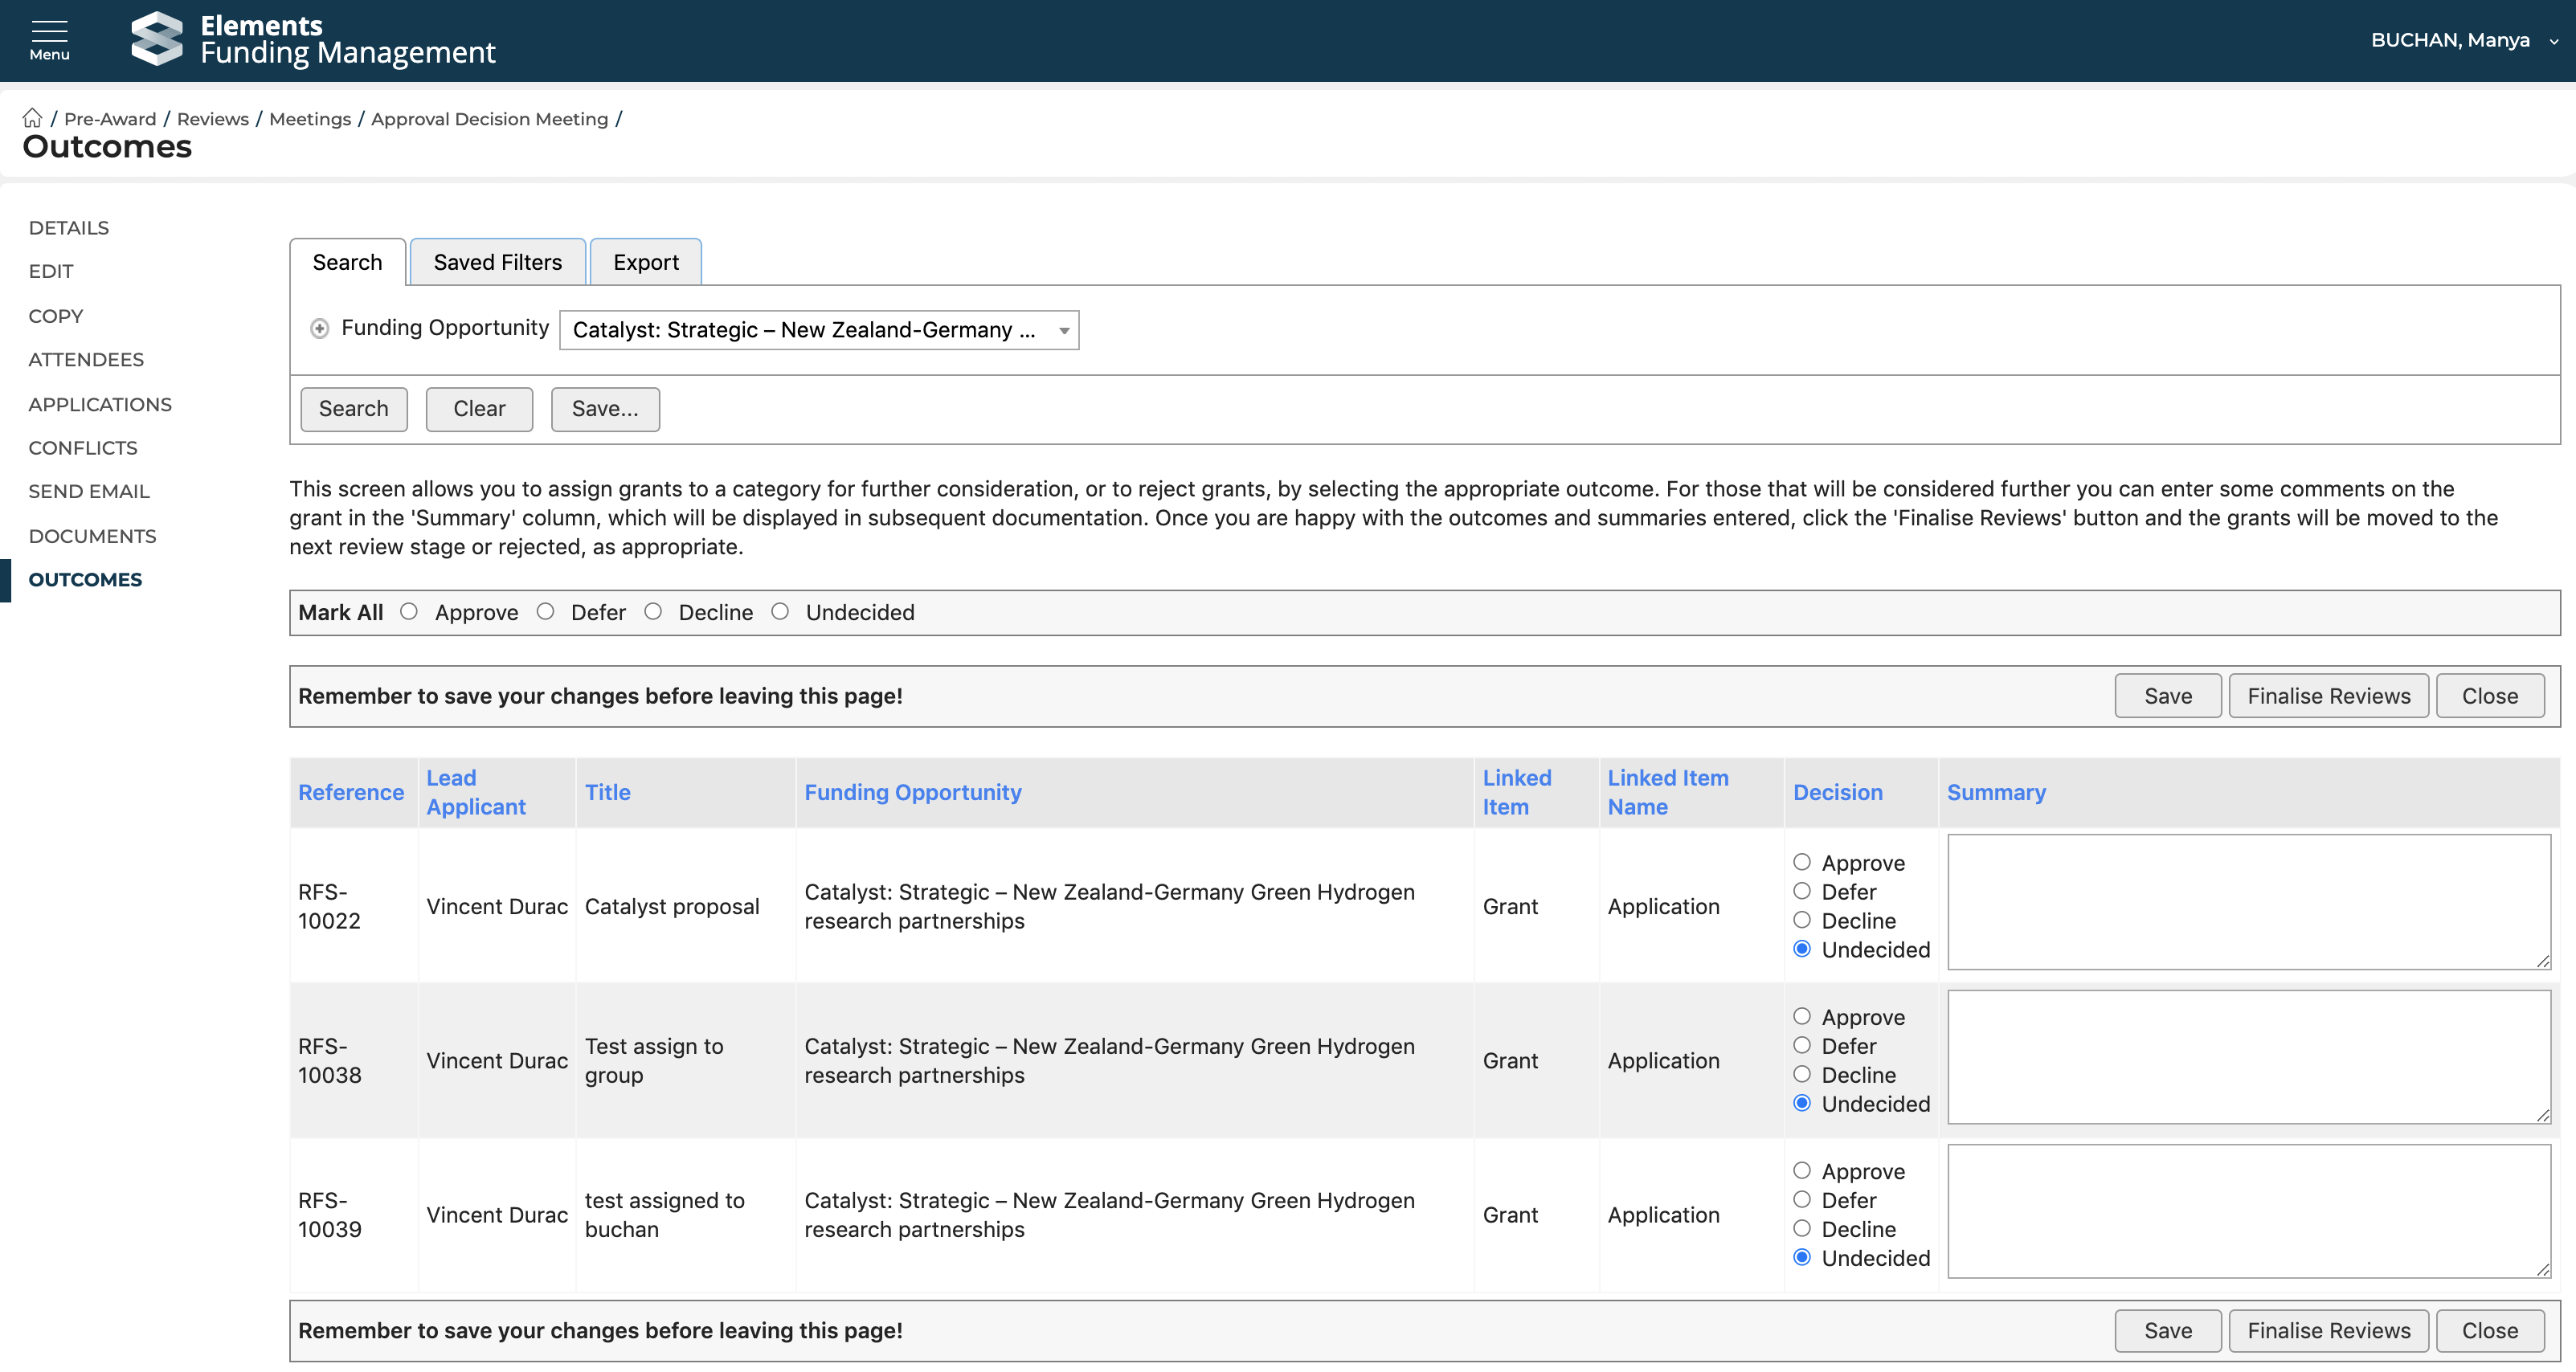
Record approval decision
To approve a proposal, select 'Approve'.
Then select 'Finalise Reviews' (or you can select 'Save' which will save the Decision, but not change its status (in case you simply record the decision at this stage, but not action it)).
This will then move the Proposal to the 'Pre-approved' status.
Notify the PI
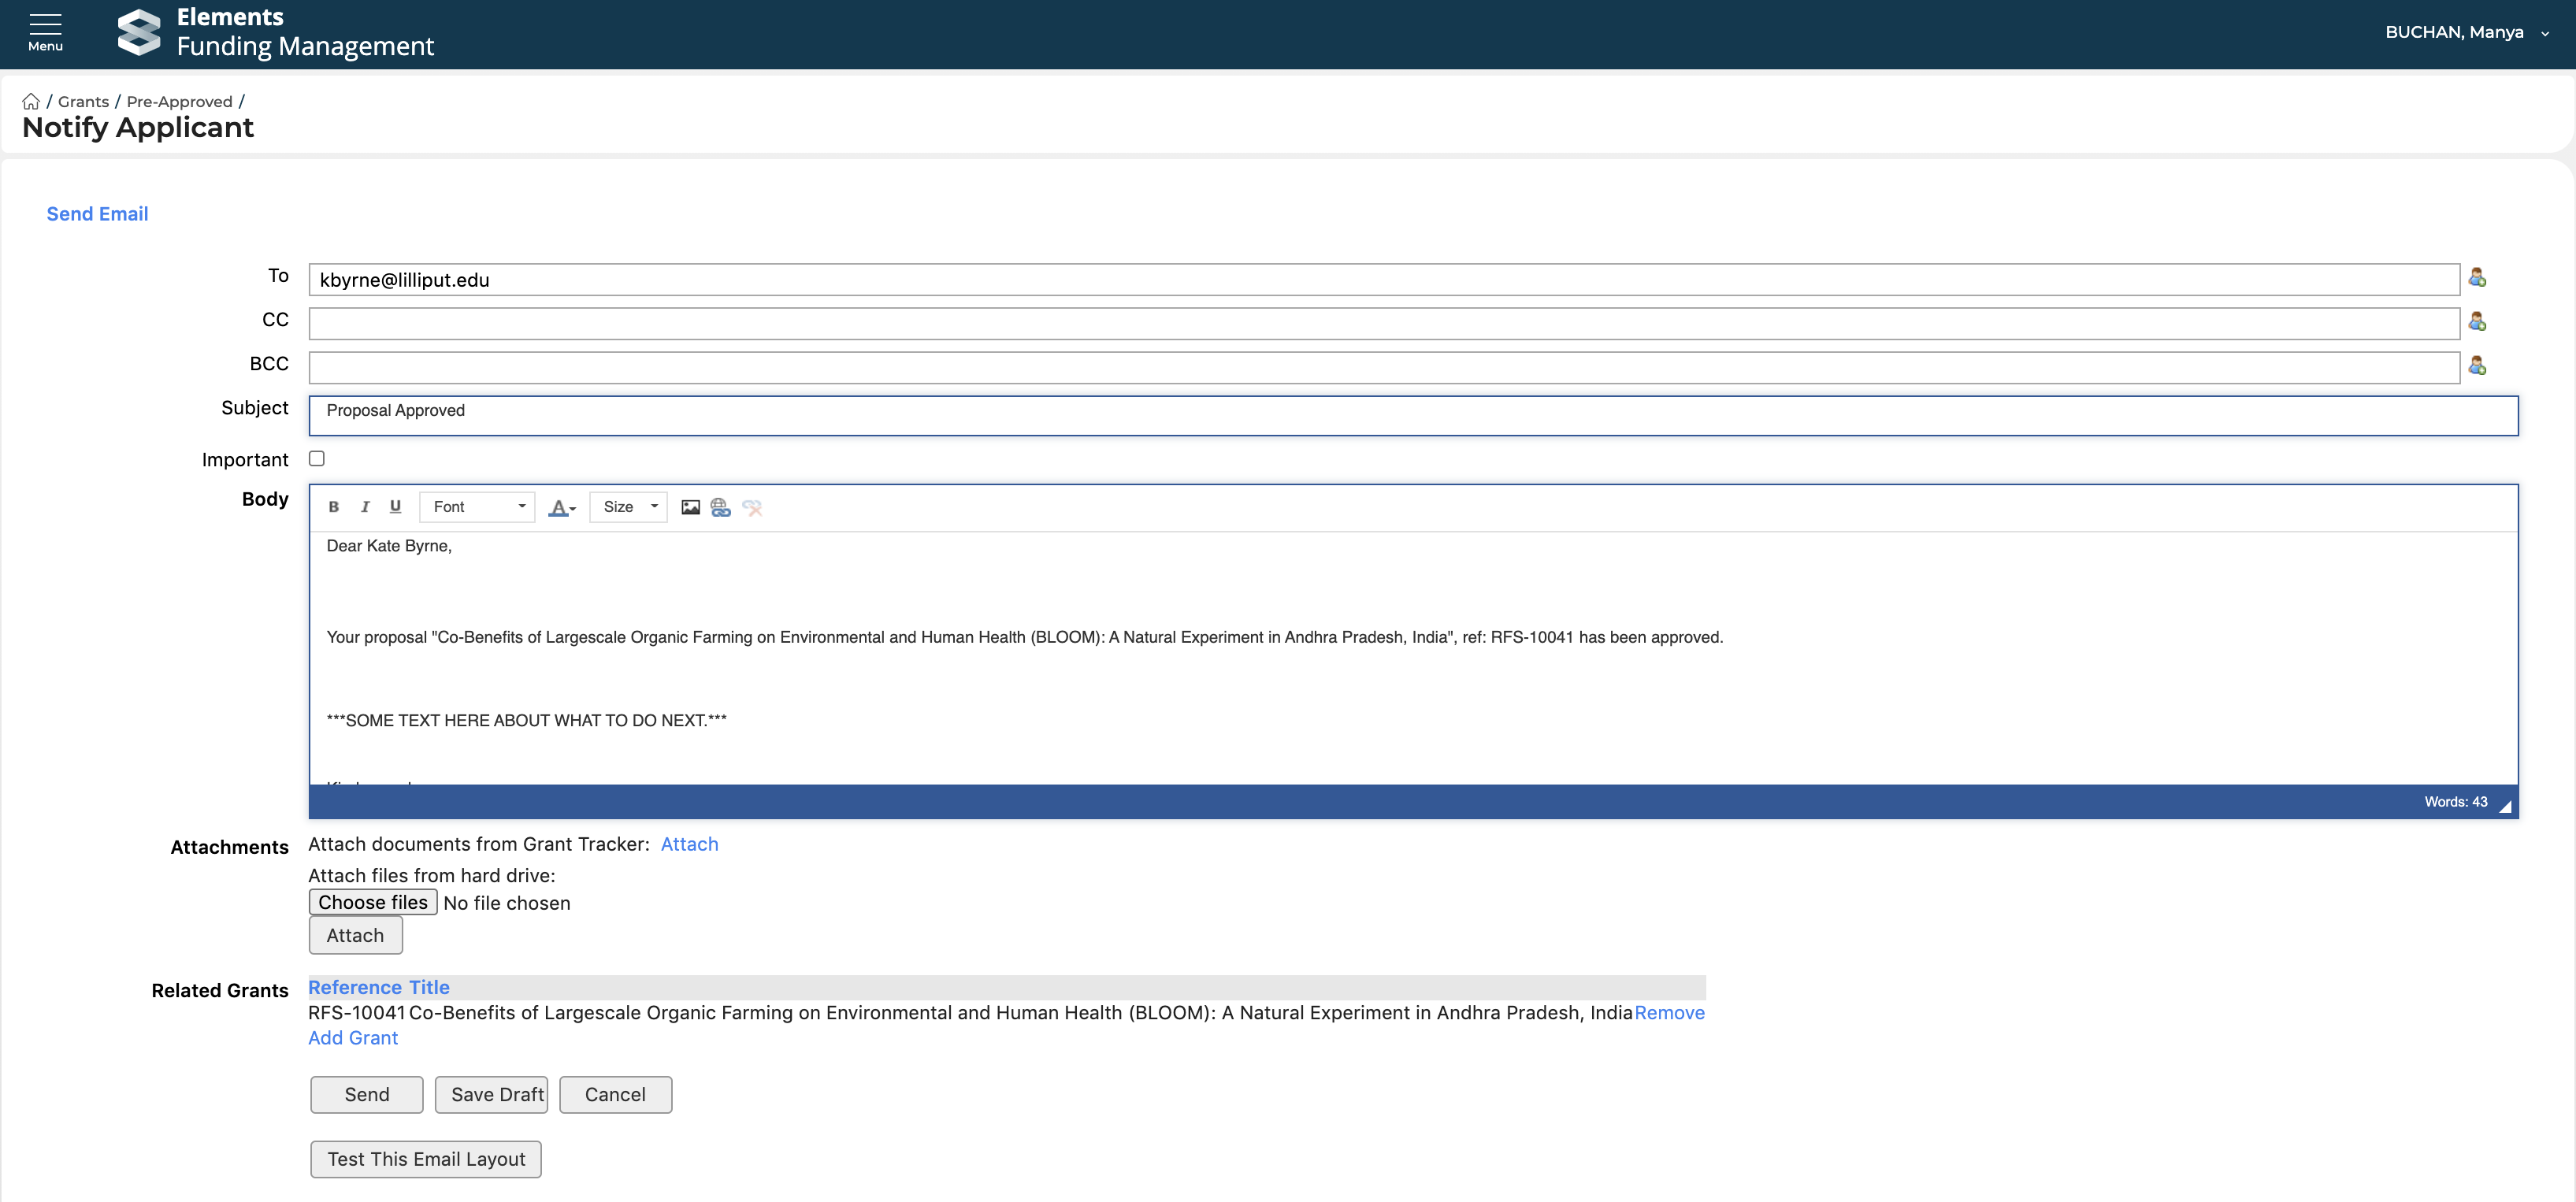
Navigate to Pre-award > Proposals > Pre-approved and select the email icon for the affected Proposal.

This will open an email page with the recipient's email (note you may need to select the relevant email template from the 'Template' drop-down). You can modify the subject, body of the email, add attachments, etc. If this is not the final stage, you may wish to skip this step as there is a separate notification once the PI is invited to the next stage.
Approve Proposal
After notifying the PI, you should then approve the Proposal from the Pre-approved screen by selecting the 'Approve' icon for the affected Proposal.
If the 'Proposal outcome workflow' applicable to the Proposal is 'Default workflow', selecting the 'Approve' icon for the affected Proposal will update the status of the Proposal to 'Approved' (or if it is an Initial Expression of Interest or Expression of interest, 'Invited').
If the 'Proposal outcome workflow' applicable to the Proposal is 'EOI funder submission' or 'Proposal funder submission', selecting the 'Approve' icon will initiate the submit to funder workflow. More details are available here.
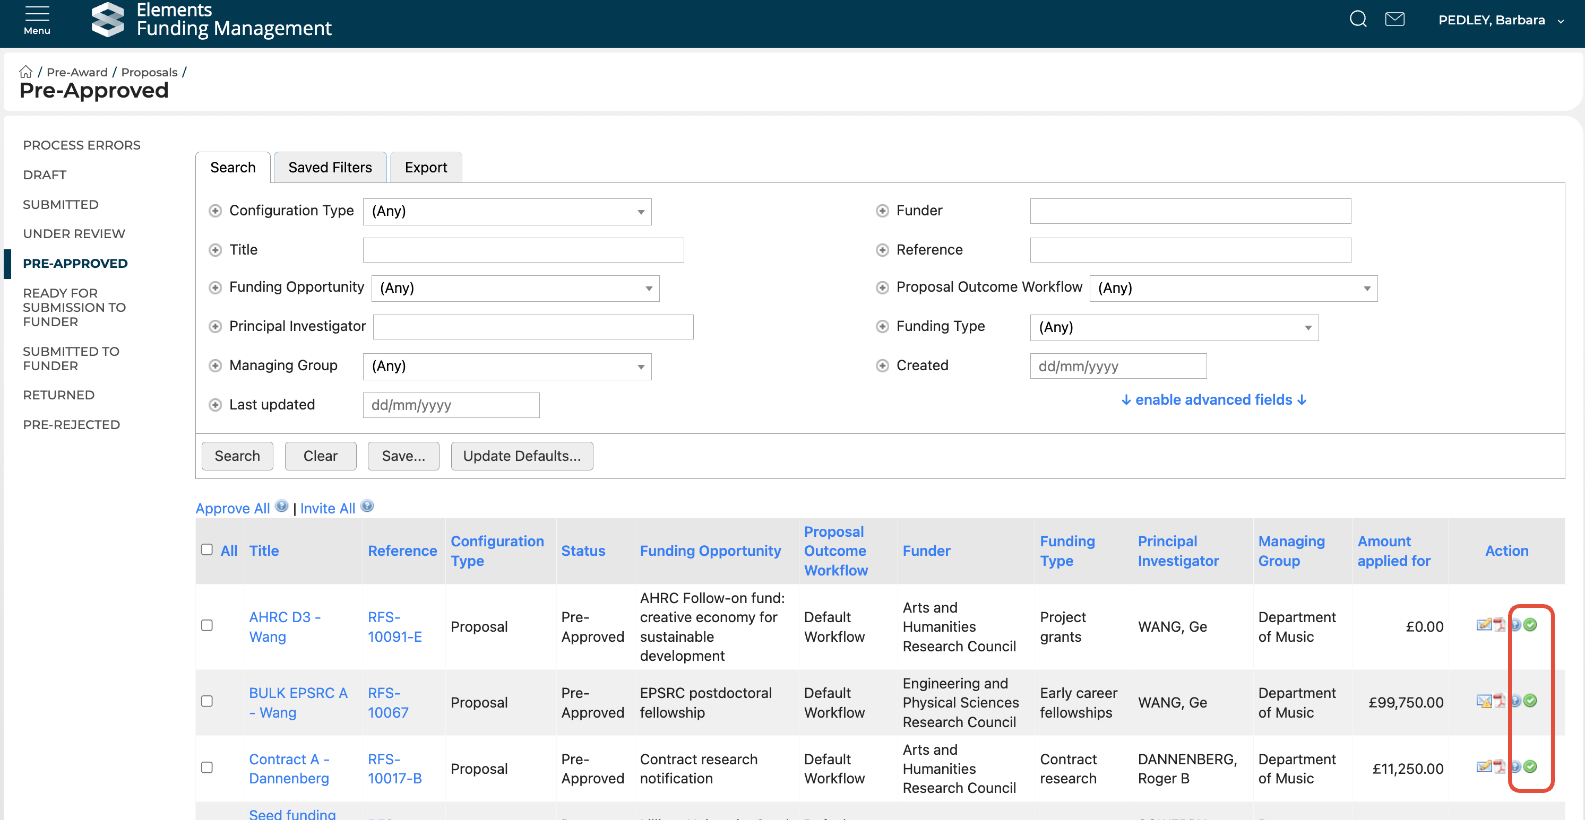
Approving Proposals in bulk
You can also perform these approval / invitation actions in bulk by selecting the affected Proposals / EOIs then 'Approve all' or 'Invite all' (depending on whether you are processing Expressions of Interest or full Proposals, and whether they are internal or external opportunities).
Note that, in order for this action to be successful, all selected Proposals / EOIs must have key properties in common - appropriate combinations are as follows:
Action | Configuration type | Proposal outcome workflow |
Invite all | Initial Expression of Interest / Expression of interest | Default workflow |
Approve all | Proposal | Default workflow |
Proposal / Initial Expression of Interest / Expression of interest | Proposal / EOI funder submission |
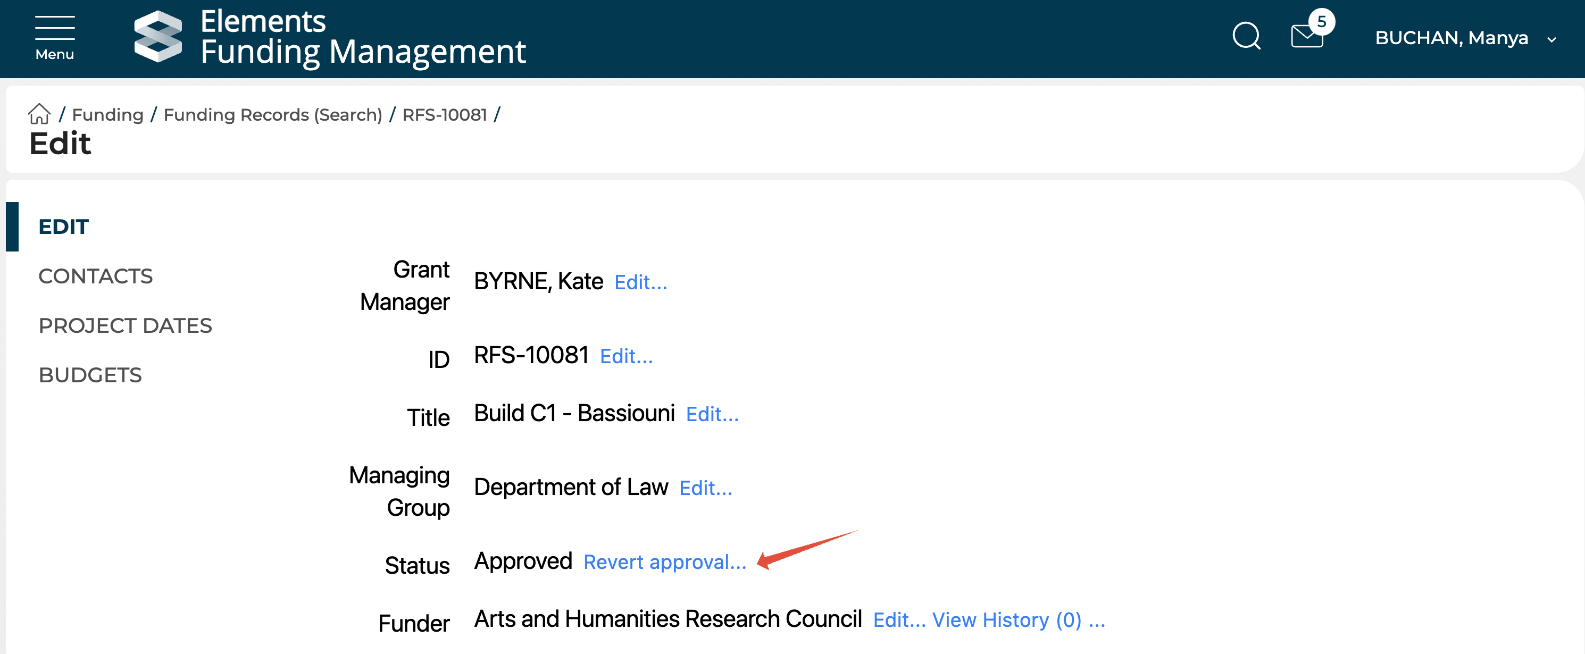
Revert approval
System Administrators and Research Funding Administrators can revert an individual Proposal's approval via the Proposal > Edit screen. This will:
move the Proposal back to the Pre-Approved state (for internal awards) or the Submitted to funder state (for external awards)
remove all existing Deliverables
remove the 'Approved' budget.
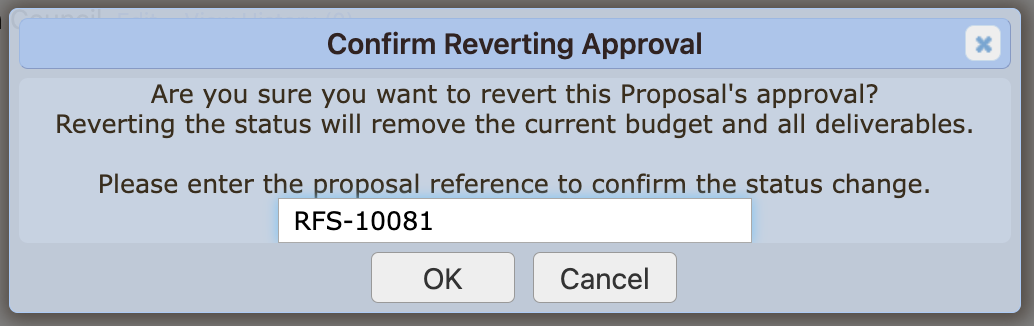
After selecting 'Revert approval', you will be presented with a confirmation message, where you will need to input the Proposal's reference (or ID) before selecting OK:
Unsuccessful proposals
Record declined decision
To reject a proposal, select 'Decline' and select the rejection reason.
Then select 'Finalise Reviews' (or you can select 'Save' which will save the Decision, but not change its status (in case you simply record the decision at this stage, but not action it)).
This will then move the Proposal to the 'Pre-rejected' status (and will appear as 'Not approved' to the PI).
Notify the PI
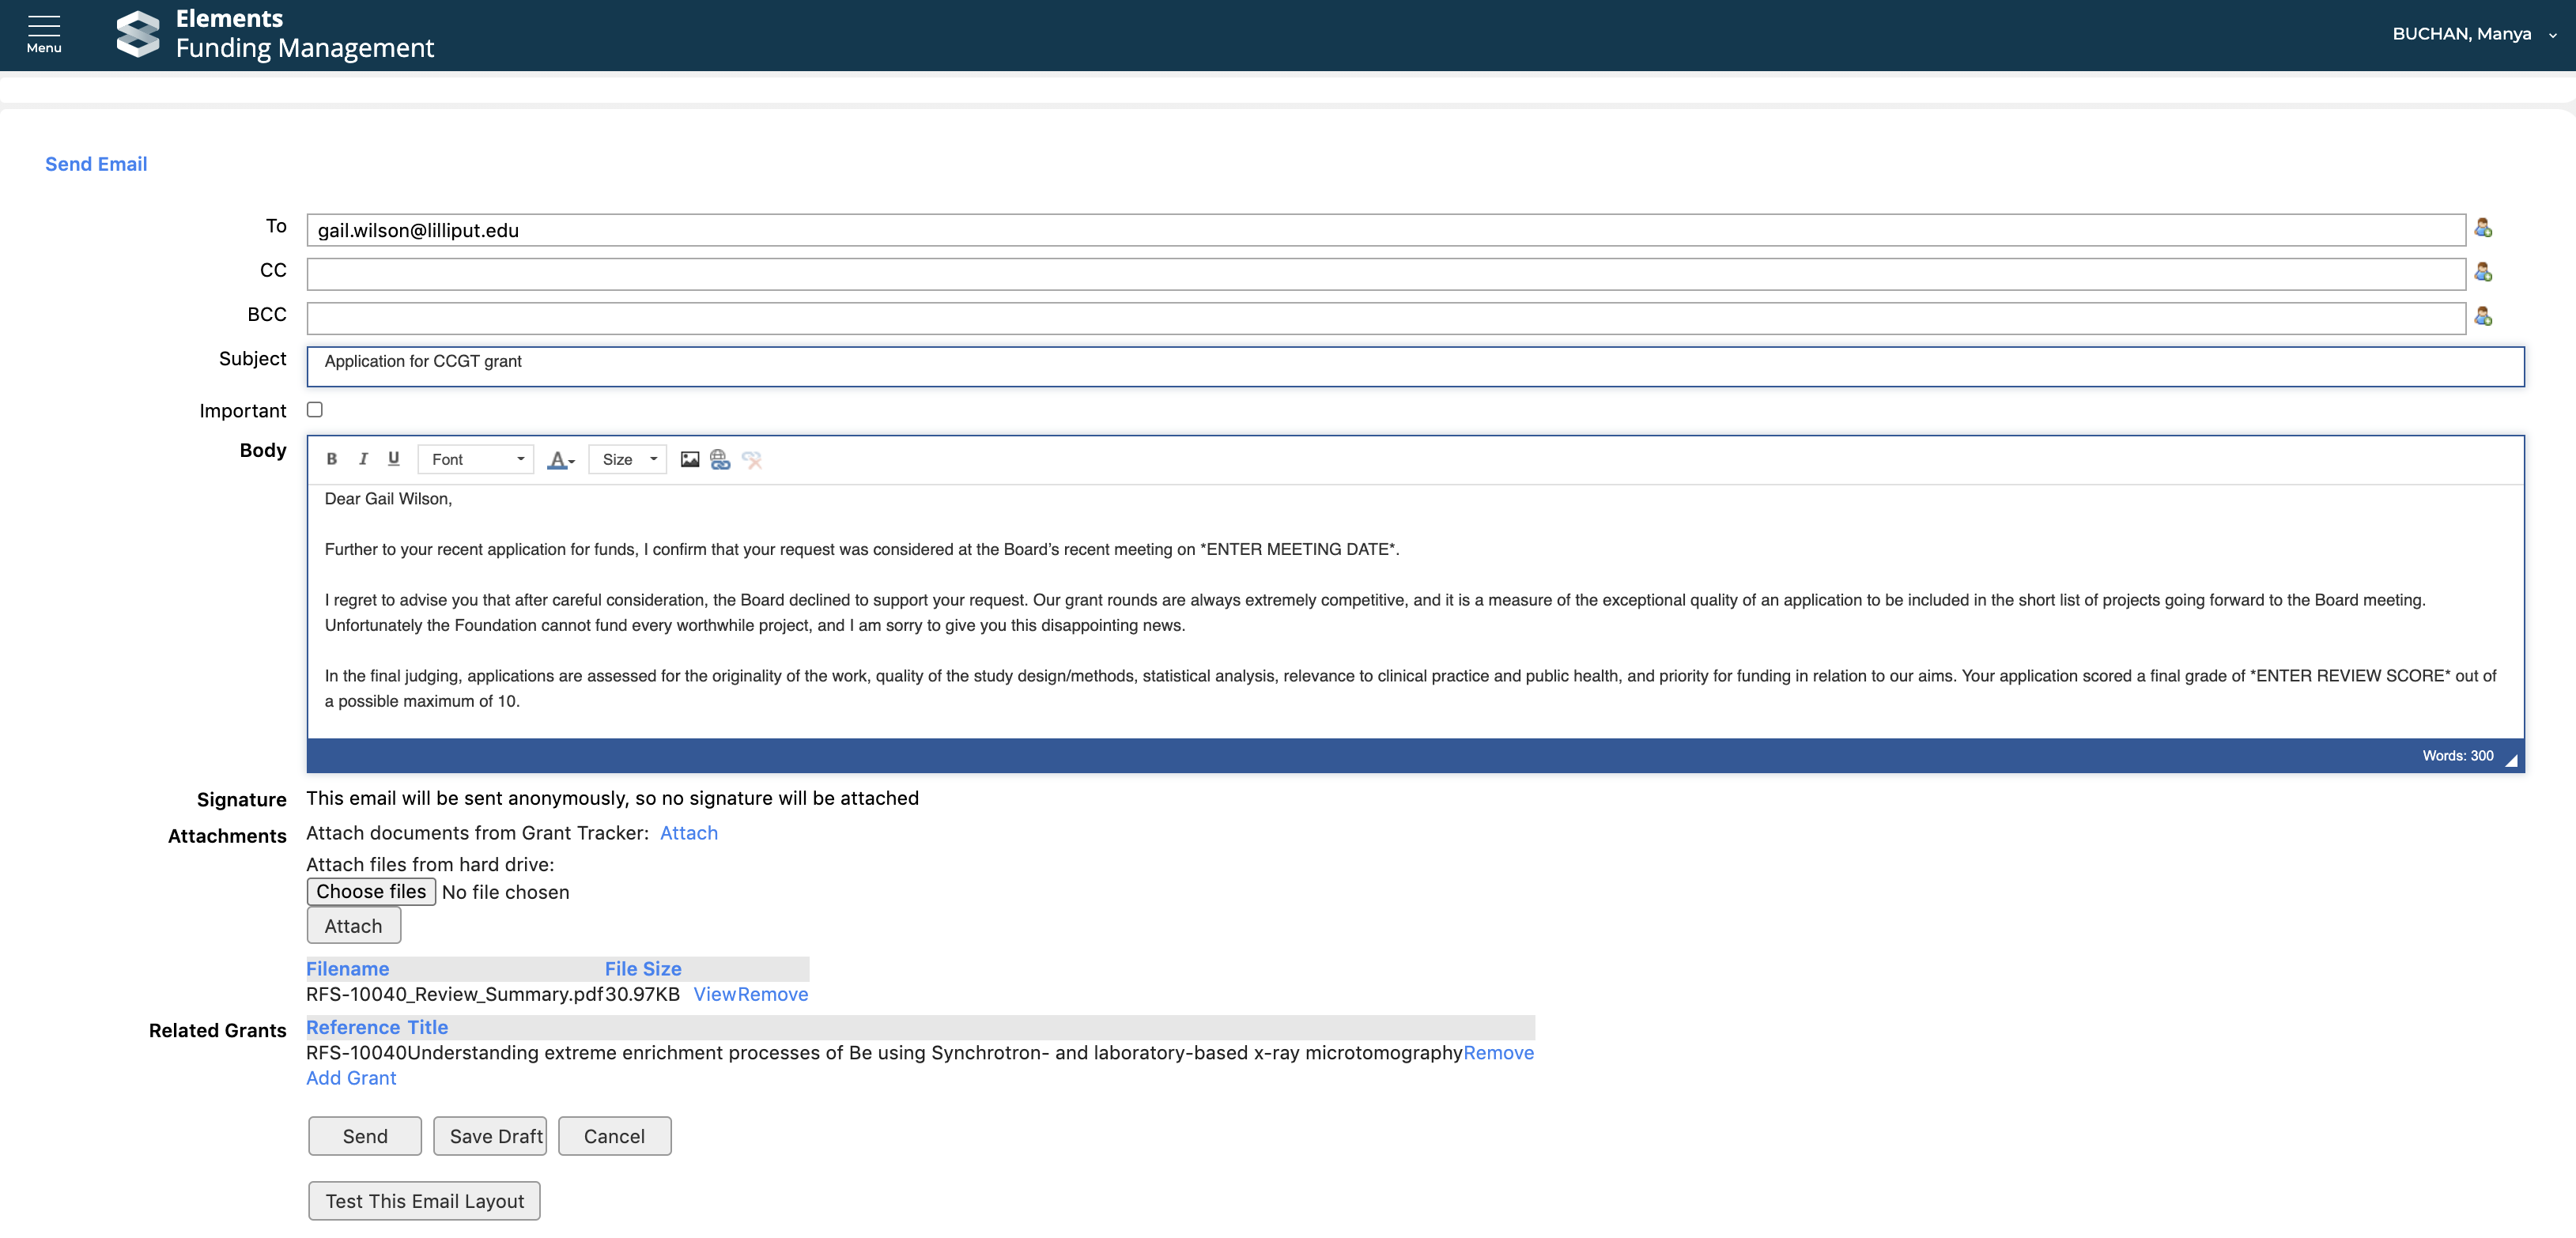
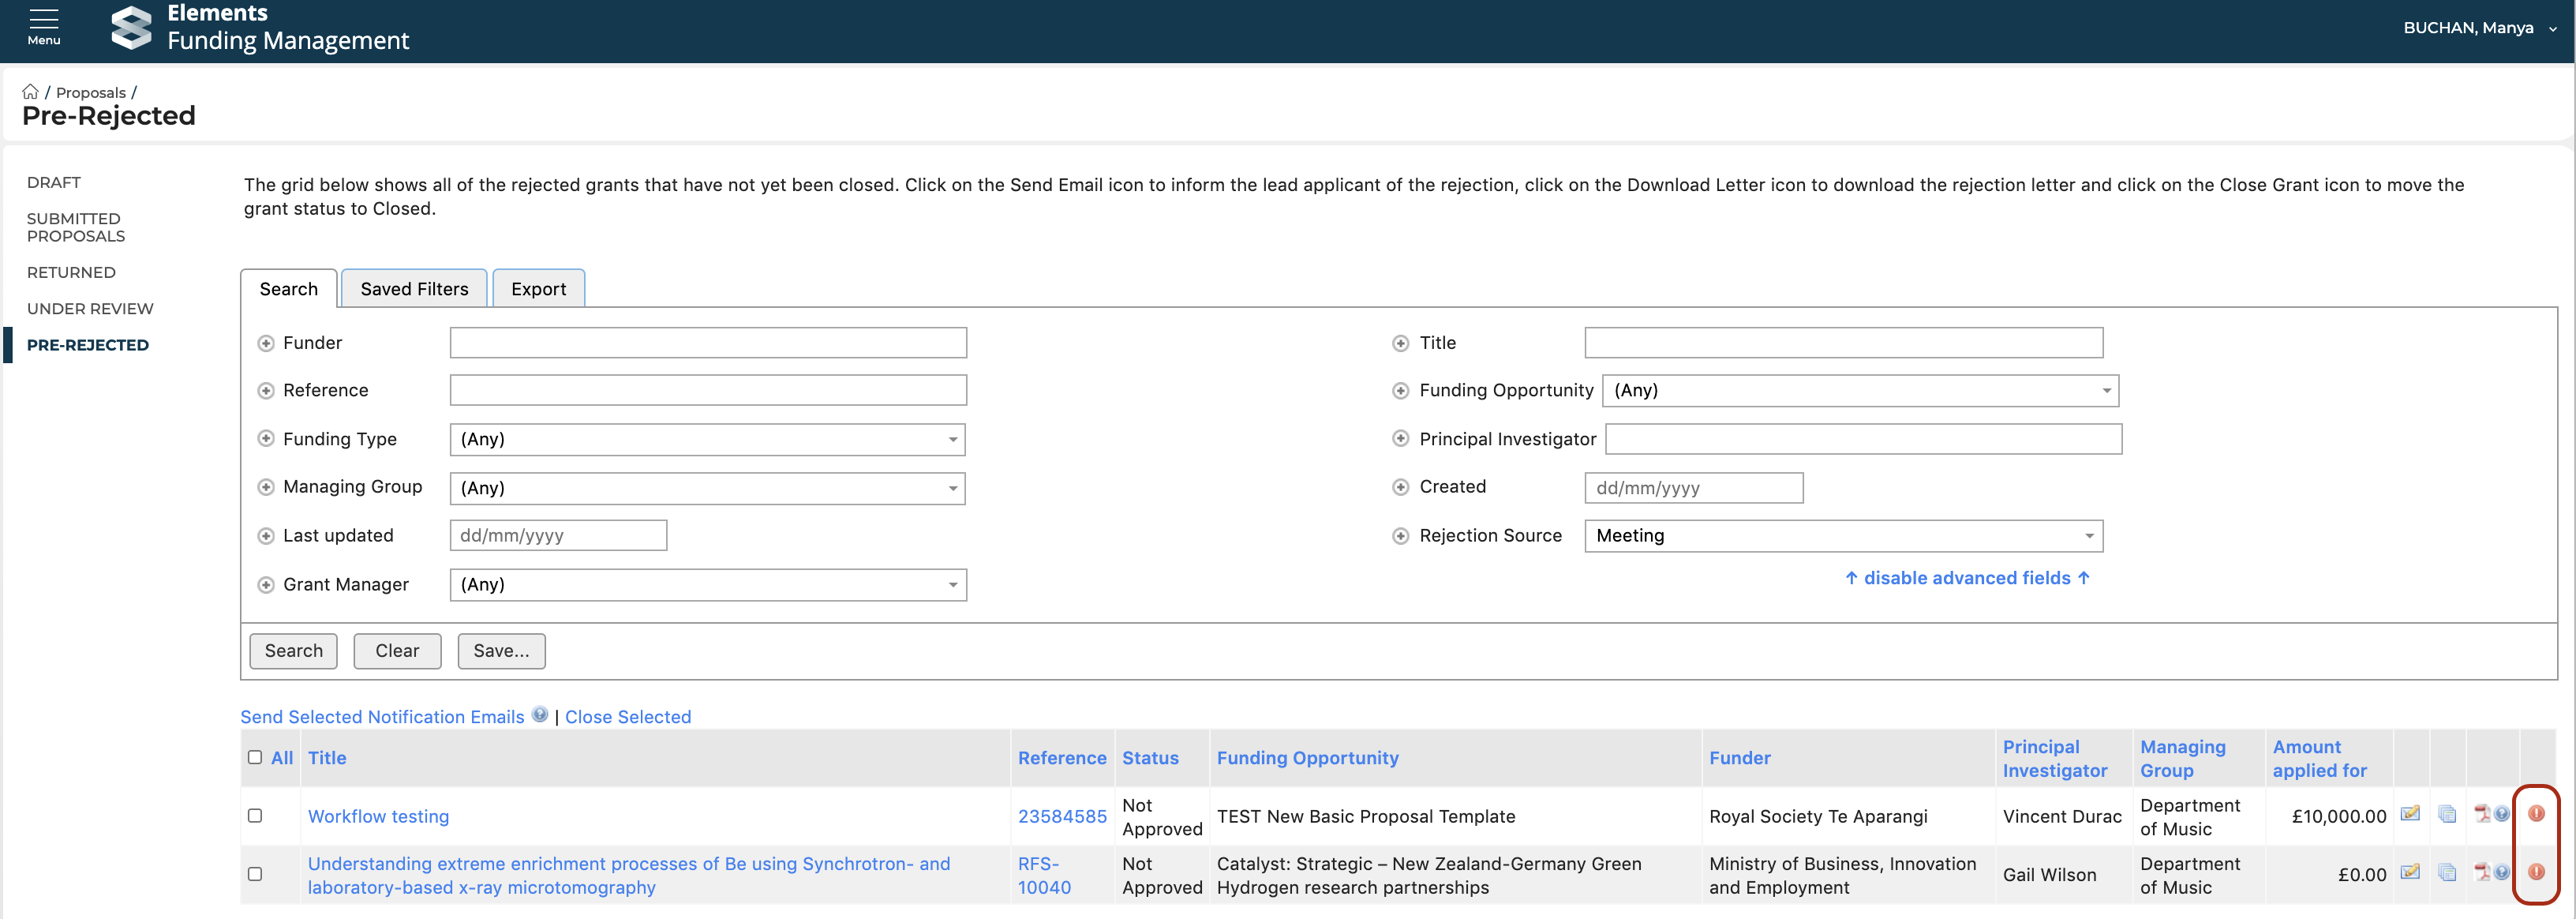
Navigate to Pre-award > Proposals > Pre-rejected and select the email icon for the affected Proposal.
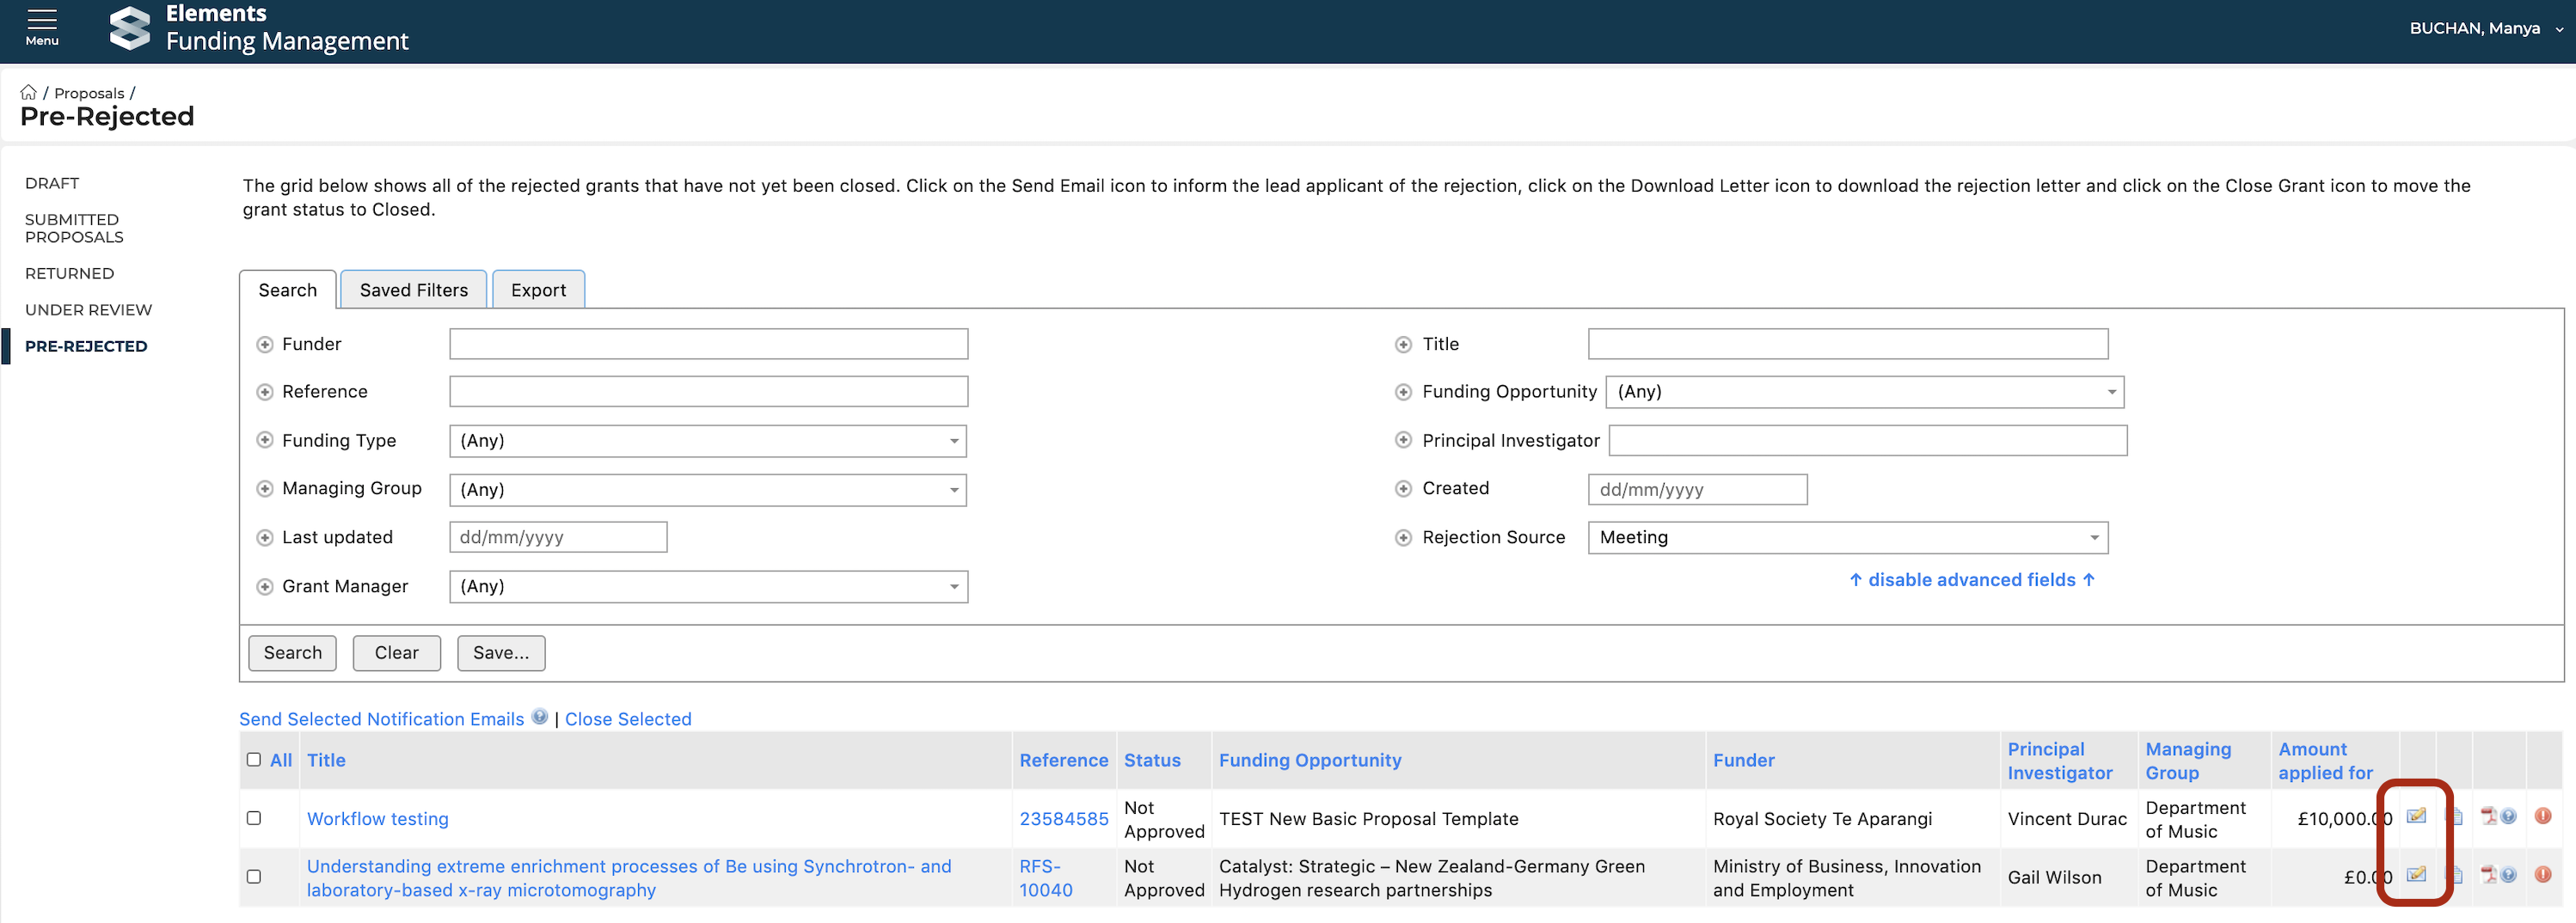
This will open an email page with the recipient's email and relevant email template already populated. You can modify the subject, body of the email, add attachments, etc.
You can also perform this action in bulk by selecting the affected Proposals then 'Send Selected Notification Emails'.
Close Proposal
After notifying the PI, you should then close the Proposal from the Pre-rejected screen by selecting the 'Close' icon for the affected Proposal.
You can also perform this action in bulk by selecting the affected Proposals then 'Close Selected'.