
Managing Users
Most user processes, such as the creation of new users and the deactivation of users who leave your institution, will be carried out automatically using the data in the user feed supplied by your institution’s HR system. However, a small number of users may not appear in the user feed and will need to have their details managed manually by System Administrators.
User management
To access the user management tools navigate to System admin > User & groups > User management > Manage users and user feed. Here you can change settings for individual users, add new users and alter how large changes in the user feed are handled.
Add a new local user
To add a new user, click on "Add a new user" or navigate to System admin > Users & groups > User management > Add new user.
Note: adding a user manually means the user details will have to be maintained locally, rather than through the automatic feed
Ensure that you choose a unique ID number that cannot be duplicated by the automatic feed.
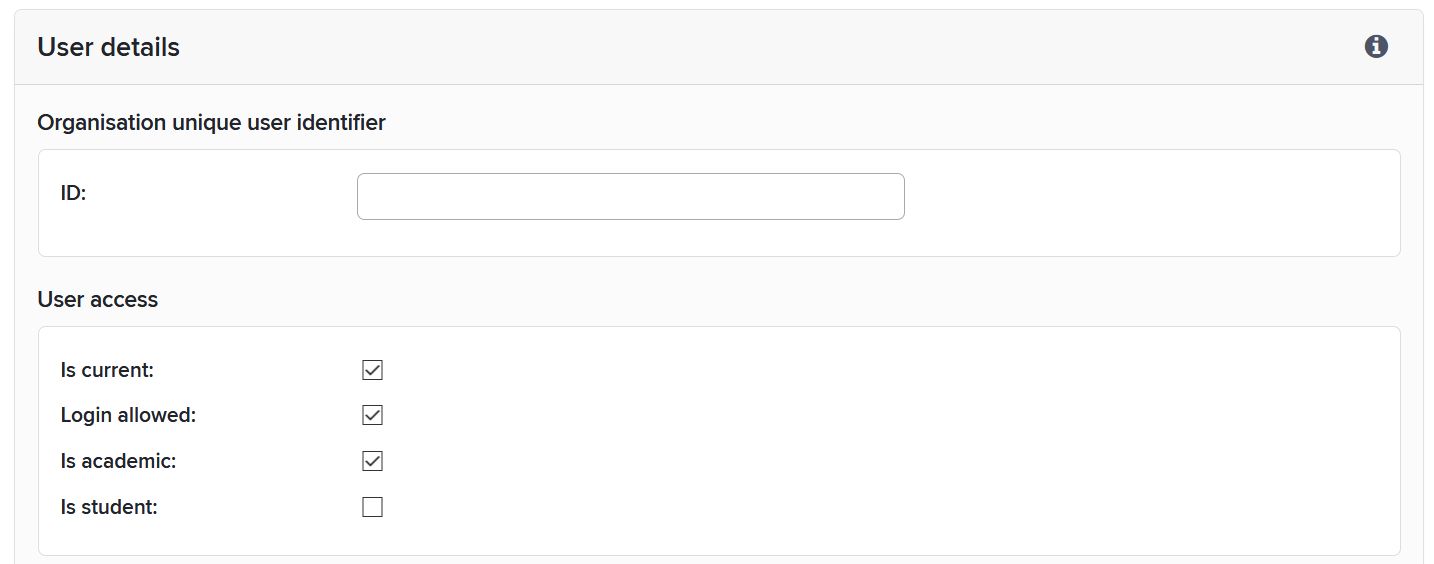
User Access
Check the User Access boxes that apply to the new user:
Is current is used to indicate whether a user is currently a part of the organization. N.B. "Arrive date" and "Leave date" in a user's personal information have no effect on the Is current indicator.
Login allowed indicates whether the user is allowed to log into the system.
Is academic is used when a user is newly imported into the system to determine whether a default search profile should be created or not. It is also used within the reports section of the system to filter users supplied in reports.
Is student is
Effect on searching
If and only if a user has both Is current AND Login allowed checked, they will be automatically added to name-based searches of the data sources configured in their search settings. Identifier-based automatic claiming continues irrespective of Is current or Login allowed status.
This table summarises the possible options and shows their affect on Name based Search Settings and whether a user is added to the Synchronisation Queue. You can run searches for individual non-academic users on the Search Settings page to override the default and include non-current users on the User Sync Queues page.
Is | Login | Is | Default search settings | Added to Synchronisation Queue |
|---|---|---|---|---|
True | True | True | Yes | Yes |
True | True | False | No | Yes (if has been given search settings) |
True | False | True | Yes | No |
True | False | False | No | No |
False | True | True | Yes | No |
False | True | False | No | No |
False | False | True | Yes | No |
False | False | False | No | No |
Privacy overrides
This section can be used to override various privacy settings for a user.

User privacy level override: This option allows your organisation to specify an overriding privacy behaviour for the user's profile. Setting a value of "Internal" indicates that the user's account should be marked with an intention that no data about the user should be displayed in any public-facing systems/contexts. Elements will continue to share data about the user internally with other users of Elements. Setting a value of "Public" indicates that the user's data may be displayed in public-facing systems/contexts. Setting a value of "No override" allows for the privacy level of the user's profile to be managed either by the user directly or by a system-wide default (which itself defaults to "Internal"), depending on system-wide configuration on the "privacy configuration" page.
Institutional email privacy level override: Similarly to the override above, this option allows your institution to override the privacy behaviour for the user's institutional email address. Elements will never share the user's institutional email address publicly for a user whose overall profile privacy level is not also "Public", whatever the chosen value of this setting.
Note that if your organisation uses the API or reporting database to extract data to public-facing systems, then it is your organisation's responsibility to maintain its integrations with the Elements API and/or reporting database in such a way that the privacy levels of user data are appropriately respected. Please see Introduction to Data Privacy and Personal Data in Elements, and the API and reporting database documentation for more information about data privacy.
Set password
After saving the new details, you will be taken the screen below, where you can add a password for your new user.
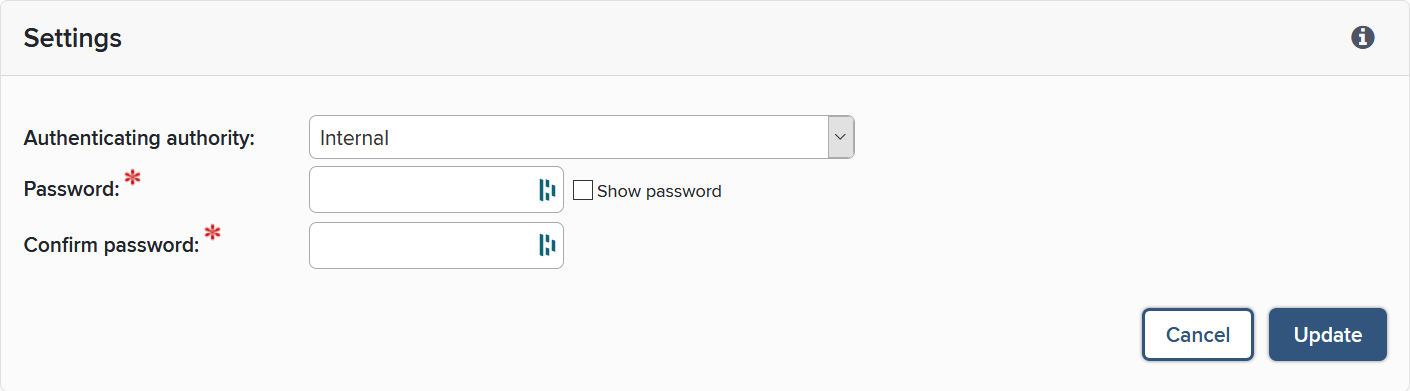
Tip: you can also switch a user whose details come from the automated feed to use an internally set password. To do this for an existing user, click on ‘authentication settings’ next to their name in the list of users and then change their authentication settings from ‘external’ to ‘internal’ and set a new password. This does not change them into ‘local users’ and will not change the way their other details are updated via the user feed.
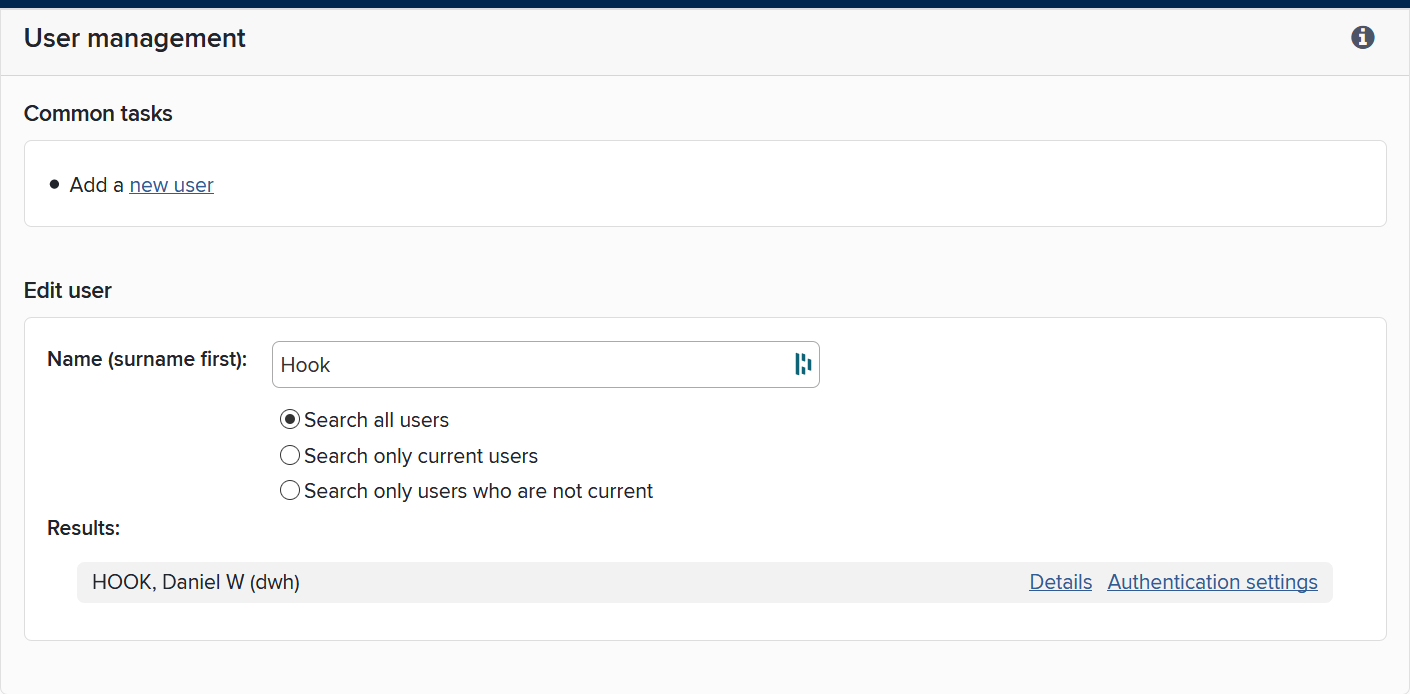
Search for user
To find an individual user, start typing their name in the box at the top of the main user management screen, and a list will appear. Click on Details next to a user’s name to see the information stored about them.
Edit user details
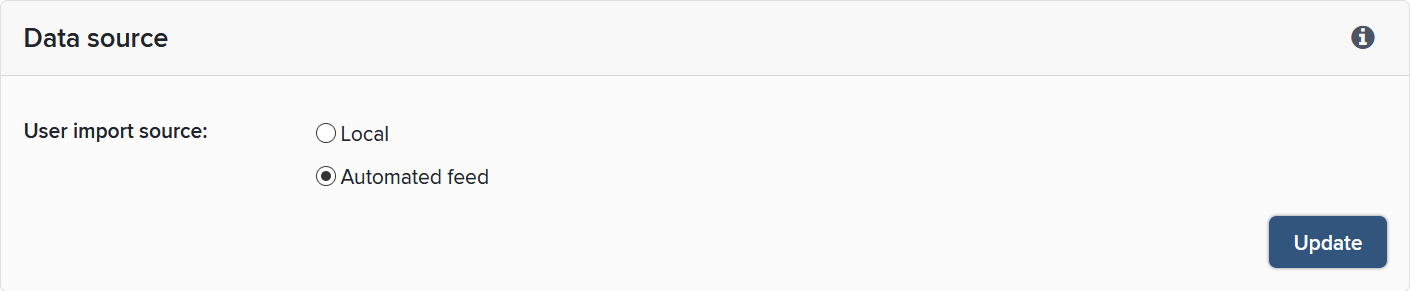
To edit details of an individual whose details are currently obtained from the user feed, first change the user type to ‘local’ at the top of their ‘details’ screen, and click on ‘update’.
The fields in the bottom half of the screen will then become editable.
Note: this will mean that no further updates to these details will be obtained from the automated user feed. The user will have to be updated manually from now on. A more robust method for correcting a user’s details is to change the data in the HR feed, via your institution’s HR system.
To restore automatic updates to an individual’s details (which will override any locally entered information) change the user type back to ‘automated feed’.
User feed
You can check the contents of the most recent data feed from your institution’s HR system using the Common tasks links in the User feed section:
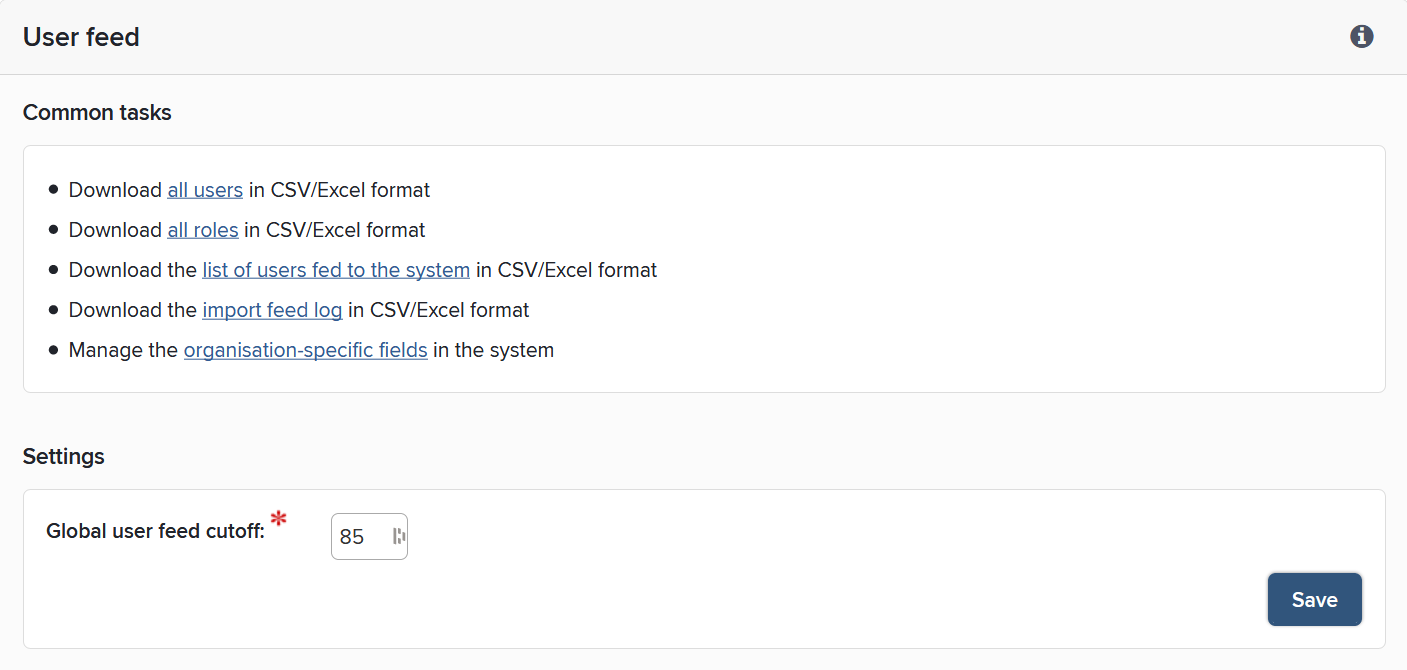
The table at the bottom of the page summarises the results of the last 10 times the user feed was processed. See the key below the table for the meaning of each column.
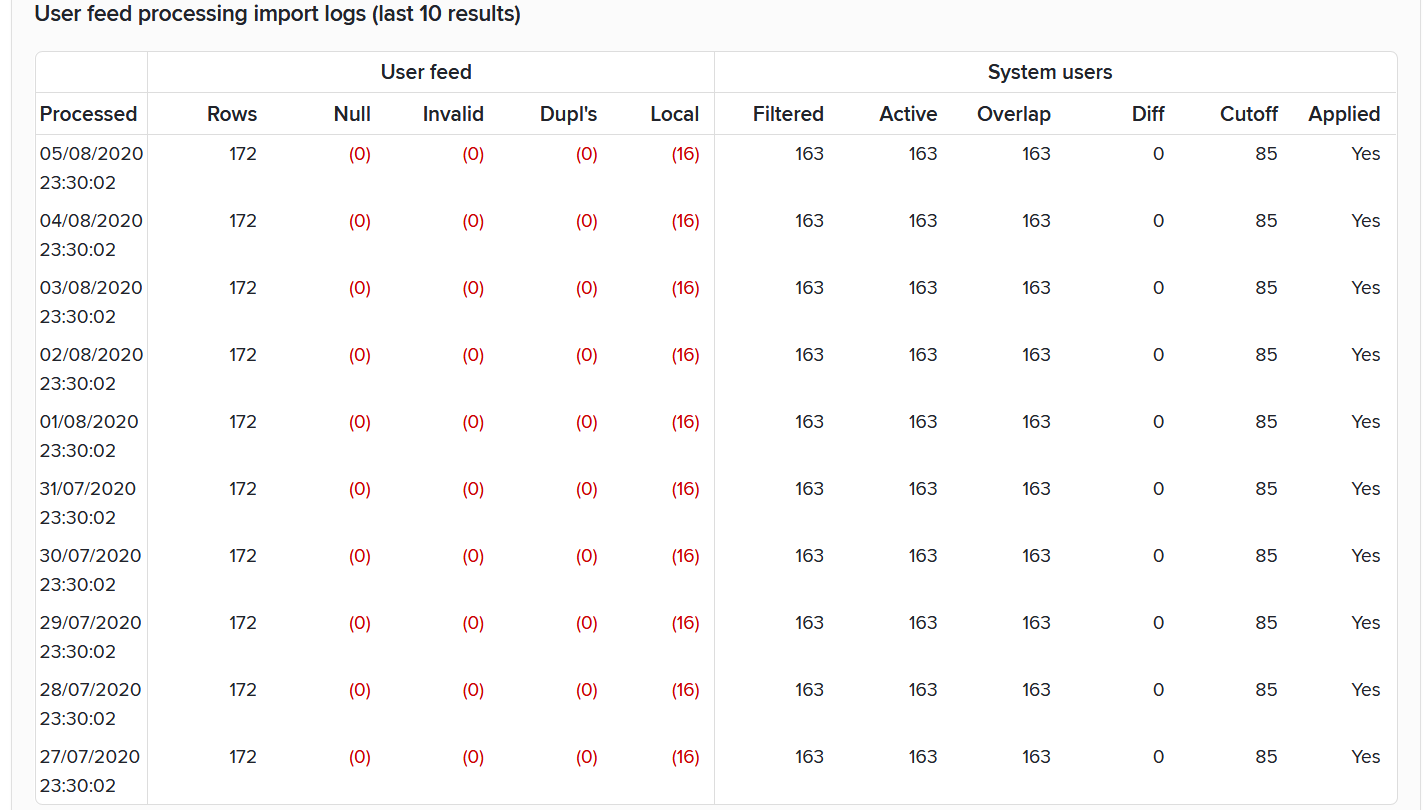
Processed
When the process finished.
Rows
The number of rows in the user feed.
Null
The number of rows in the user feed with critical data missing (either proprietary ID, authentication credentials, email or surname is missing).
Invalid
The number of rows in the user feed with invalid critical data (email address or public URL path fragment).
Dupl's
The number of rows in the user feed with critical data duplicated (one or more of proprietary ID, authentication credentials or public URL path fragments are duplicated).
Local
The number of rows in the user feed with critical data covered by local users (one or more of proprietary ID, authentication credentials or public URL path fragment exist for users which are marked as local and will not be overwritten).
Filtered
The number of active users in the imported file before the Process HR feed has been processed and the changes applied (i.e. updating the User table).
Active
The number of active users already in Elements (in the User table) prior to the process starting.
Overlap
The number of active users that overlap in the user table and the feed.
Diff
The sum of number of users that would be deactivated and activated if the feed were to be applied. Please note: The value of Diff is not equal to 'Filtered minus Active.' Diff is the sum of all changes to the feed, both positive and negative. If 4 users are added and 4 users deleted, the Diff is 8, though the number of Active users would not change.
Cutoff
The global user feed cutoff when the user feed was processed.
Applied
Whether the user feed was applied or not.
User feed processing
At the bottom of this section, a table summarises the results of the last 10 times the user feed was processed. It shows the number of rows that have been processed and filtered by the user feed, any errors that might have occurred and the number of active users present in the system after filtering against what was present previously.
Any rows that have been filtered out by the feed processing can be inspected by downloading the list of users fed to the system report. The first column of this CSV file identifies the import issue attributed to that particular row which prevented it from being processed:
Missing proprietary ID
Missing username
Missing authenticating authority
Missing email
Missing lastname
Duplicate authentication credentials
Duplicate proprietary ID
Locally covered proprietary ID
Locally covered authentication credentials
Invalid email
Unforeseen issue, please contact Symplectic
Once the reason has been identified, you can either adjust the records within Elements (by making the user a ‘local’ user and correcting the data by hand) or arrange for the information in your institution’s HR system to be corrected.
Global user feed cutoff
Occasionally, the re-population of the user feed table will fail in some way, resulting in a table with no users, or a large number of users missing. In these cases, you will not want to use the HR feed data to edit the users in the publications system, as this may mean a large number of users becoming inactive and data being left off other systems within your institution. In order that this does not happen, you can set a cut-off limit to a change in the number of users. If the change in the user feed exceeds this limit, then the feed will not be processed.
This limit is adjustable, as there may be times when you do need to change a large number of users. For example, at the start of a term, a large number of new research students may join your institution. During these periods, you may wish to set a higher limit for a short time. Do remember, however, to change the limit back to a smaller number again after the changes have been applied.
Note: Please be advised that whenever large changes to the user base occur, the Elements Search Indexer will have to process these changes, and it can take a number of hours before it has caught up with the general use of the system. Large changes to the user base should therefore take place in periods with less activity in the system.
Manage organisation-specific fields
Also known as the User Generic Fields, you may be using one or more of them to provide additional user data unique to your institution in your HR Feed, like:
Status codes or Identifier Codes
Research group or Institute
Writing Groups
Previous or future institutions
Eligibility for Assessment Exercises (like REF, HERDC, or PBRF)
Your institution can customise the display names of any of the Generic User Fields 01-50. Follow the System Admin > User Management > Add or Edit User Fields menu option.
Some advantages of using the User Generic Fields include:
To create Auto Groups: ‘WHERE' clauses determine membership see the Managing User Groups for more detail. These groups can be very useful for reporting, to change search settings, and for selecting module access
For populating downstream systems using the API, or the Reporting Database. The first ten of these fields are unrestricted and can thus be viewed by other users of the system and available to any user of the Elements API. The remainder (User Generic Fields 11-50) constitute restricted HR data, and can only be viewed by users with appropriate administrative rights.
Analysis using the Custom Reports, In Product reporting and Dashboards.
Please see the following article for more information:
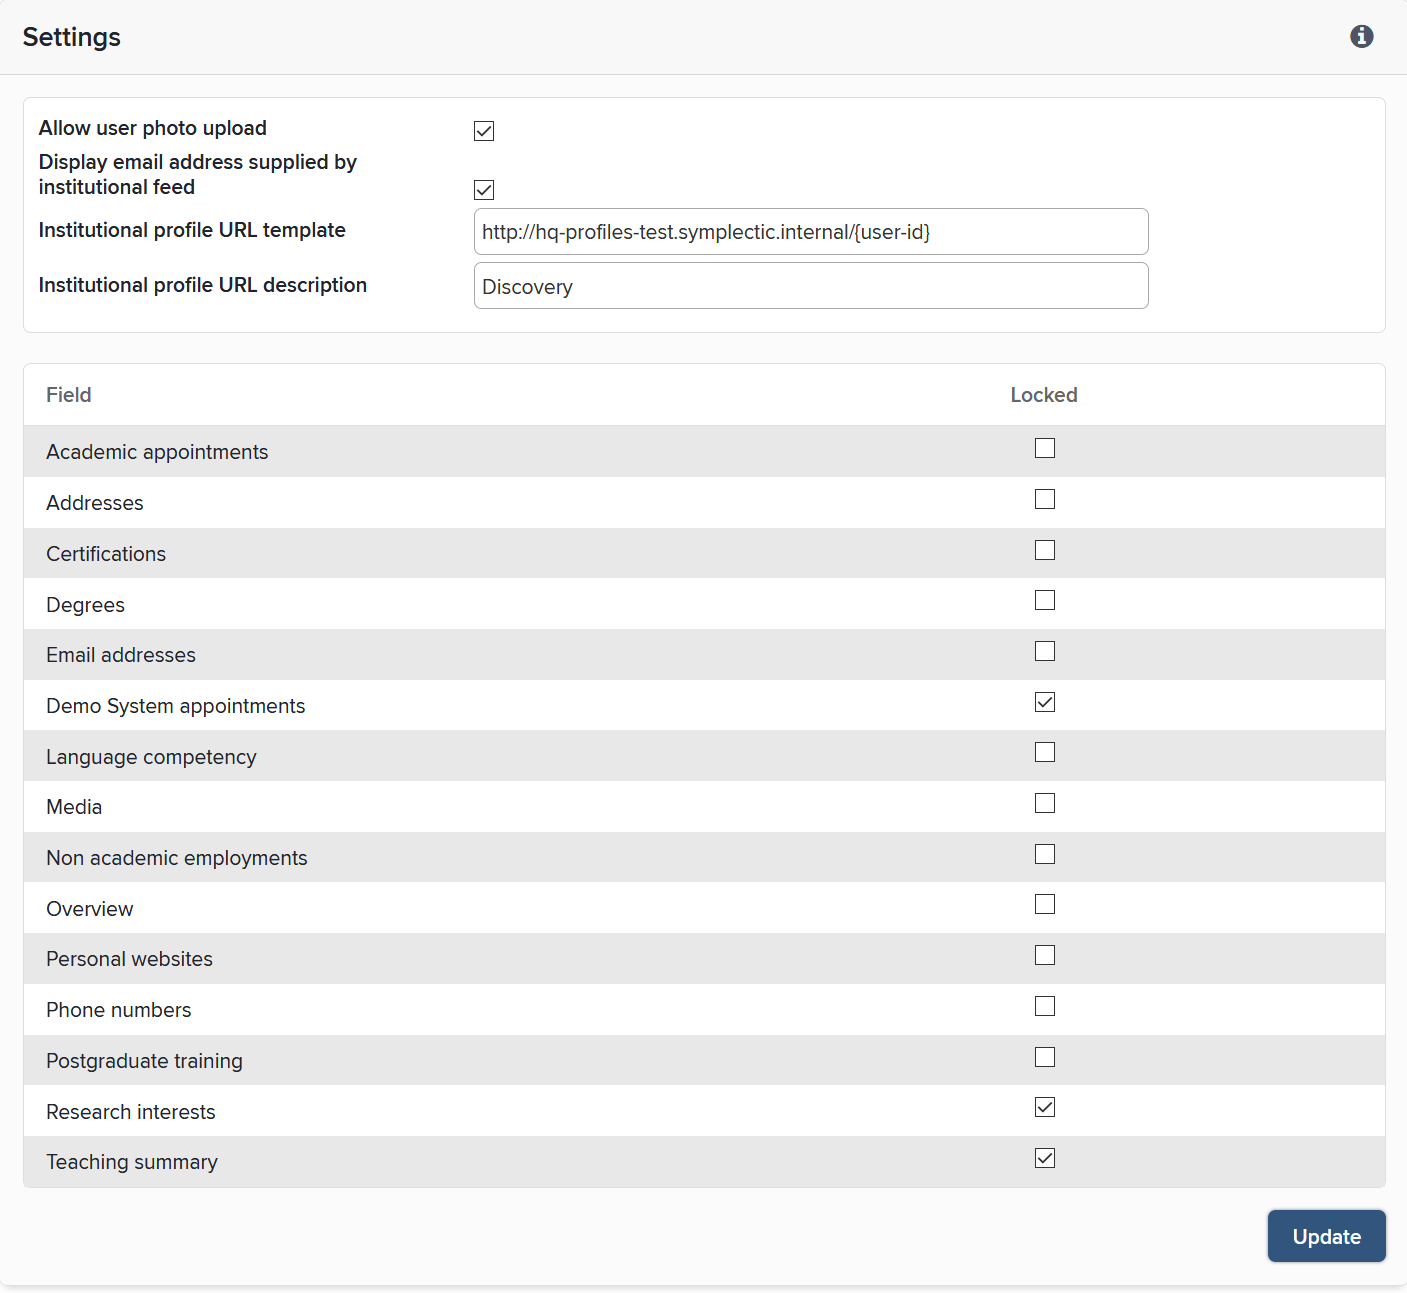
User Profile Field Settings
You can change the settings that will appear on the user profile pages via System admin > Users & groups > User management > User profile field settings.
Customise HR email
The user feed into the system, and the processing of new users, may fail occasionally for a number of reasons. These include:
No contact made with the feed system
Cut-off limit exceeded
Problems processing the information (e.g. if the fields in the feed change).
You can set up an automatic email that is sent whenever the process fails, and which also includes the reason for the failure. Activate this email using the check box at the top of this screen, then make any necessary changes to the settings for the email, including who it is sent to and who it appears to be from.
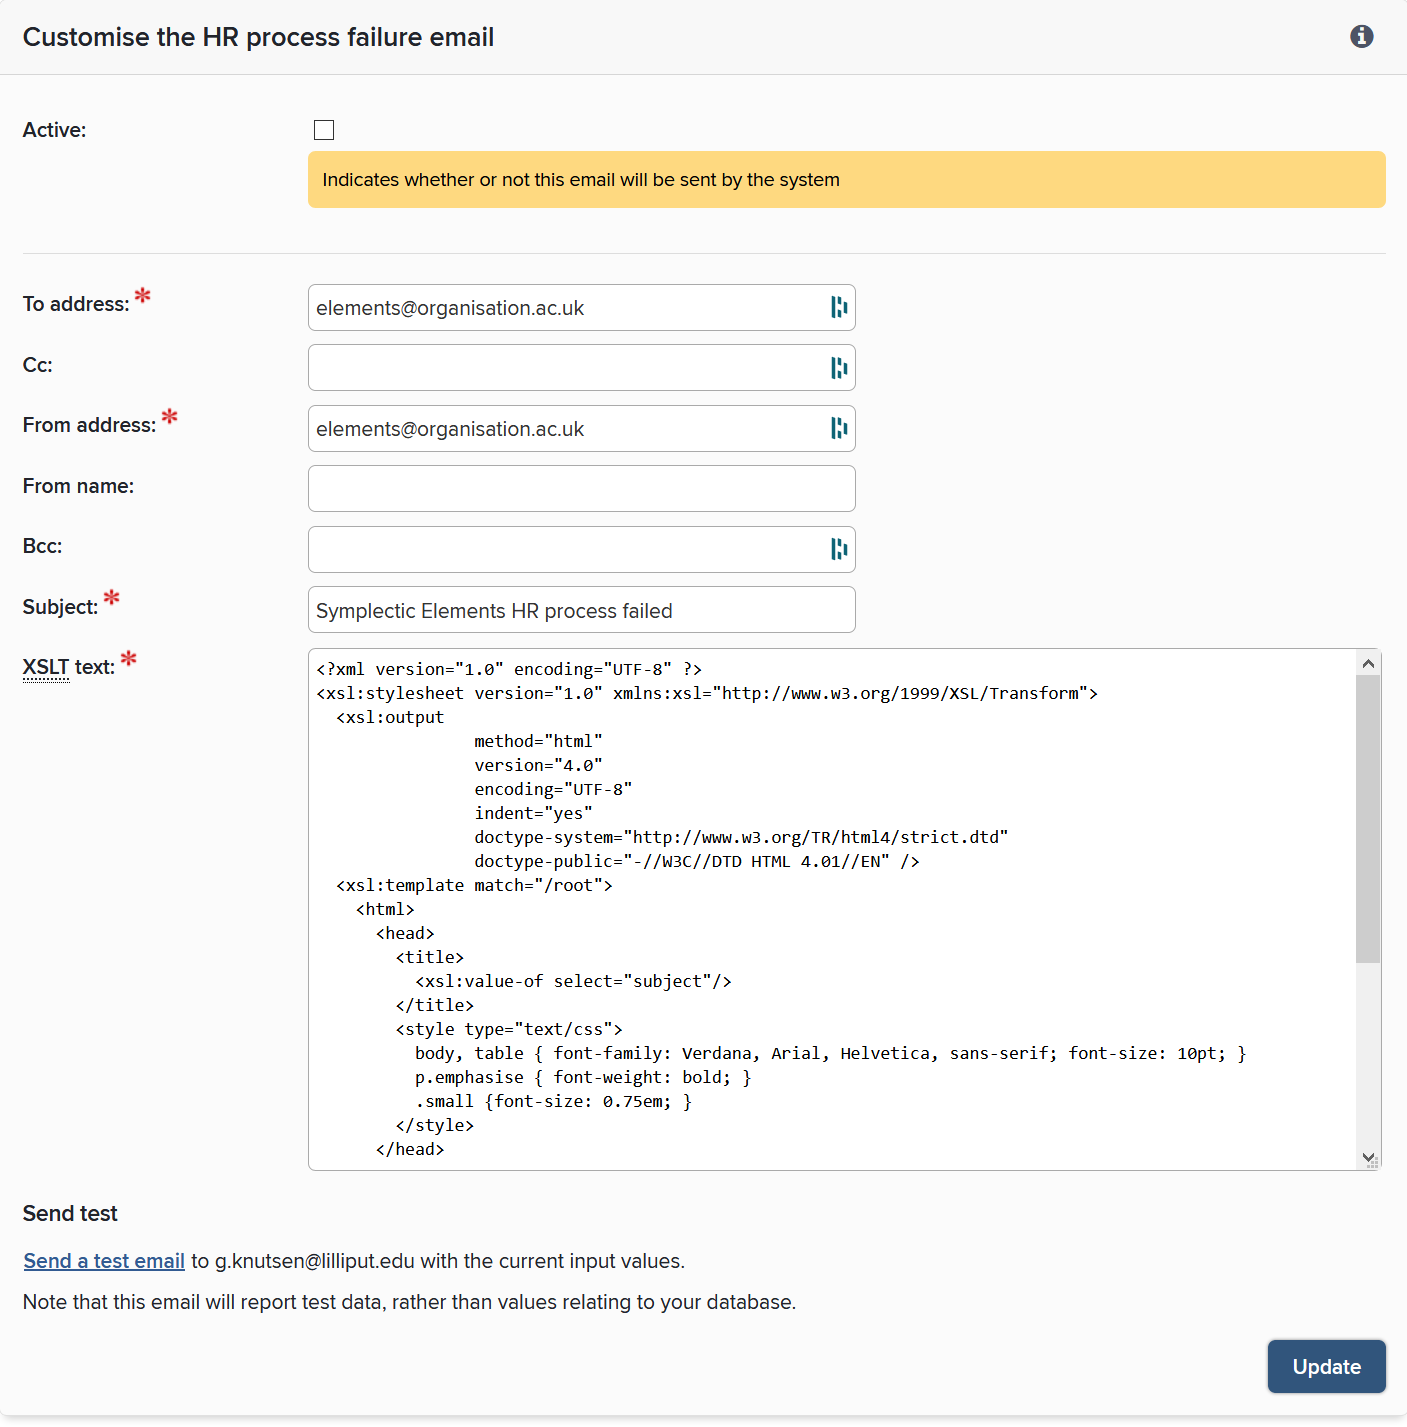
It is not recommended to adjust the contents of the email, as it includes XSL code items that pull information from the system.
FAQs
Why is a user missing from Elements?
A frequent task administrators will face is working out why an expected user is missing from Elements. New members of staff can sometimes find they are not able to gain access to the system and may get in touch with you to ask for help. Usually, identifying the problem can be done by inspecting the report ‘Import feed log’, available via the main ‘users’ screen, which includes a reason for each user in the feed who could not be imported. You can then contact the appropriate HR or technical staff to get the user’s details correctly added to the feed. More details of how the feed is processed are available in the HR Data Import and Elements User Groups article.
How do I delete a user?
As the impact on data relations in Elements can be significant when deleting a user completely, it's not normally advised to do this. Usually, users who have left the organisation are removed from the HR feed. As a result, they are marked as inactive in Elements once the new feed has been processed. As most clients want to keep the information on those users and their relationships to publications, activities, other users, etc., there's usually no need to delete them entirely. If you really want or need to delete individual users, the way to do this via the user interface is this:
Make sure the user has been removed from the HR feed first, or they will be recreated after the next update.
Search for the user in Elements.
Change the user from being managed by the feed to being a local user.
This gives you the option to permanently delete the user.