Assessment Module - Introduction
What this article covers: |
|
Note: In Elements v6.9+ the user interface for assessment users and reviewers changed significantly. In addition, a number of changes were made to configuration options. For more information please see this support article.
The purpose of this article is to give you the central information required to use the Assessment module, and includes two worked examples.
What is the Assessment Module?
What is the Assessment Module for? | Its primary purpose is to provide a space where information can be gathered -- from both inside and outside Elements -- for review and evaluation. The term “Assessment” is frequently used to mean “judgement,” so perhaps an alternative name for this tool might have been “Appraisal Module.” |
What kinds are possible? | Similar to the way you can have different kinds of publication ‘types’ in Elements, you can have different types of assessments. The module can be used to create and issue surveys, manage acknowledgement requests, document review processes, and, yes, perform assessments. Practically speaking, the difference is mostly just about terminology. Choosing the ‘type’ determines how the exercise will be described on the screen, thereby setting a user’s expectations about what the process will be. |
What are some terms I should know?
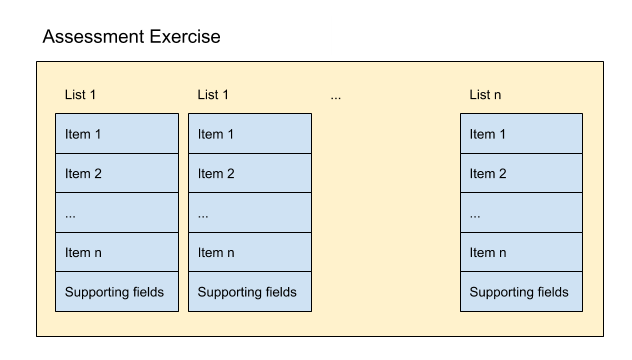
Assessment Exercise | The activity the user will be asked to complete. They are typically made up of a range of fields including lists for making selections and supplementary information. Systematically, an Assessment Exercise might look like this: |
Lists | Collections of items that you select, create, edit, order and manage. Example names of lists includes Research Outputs, Creative Outputs, NROs, and/or Narratives. |
Items | Pieces of evidence that can be included in a list. These can be selected from Elements objects - i.e. individual Publications, Professional Activities, Teaching Activities, Impact and Grants - or created in the Exercise as ‘fields only’ - i.e. content that is private and confidential and should only exist in an Assessment Exercise. Items can be ordered and supplemented with additional information.
|
Supporting fields | Fields which can be manually entered by the researcher (rather than selecting objects already stored in Elements). As this information only exists within an Assessment, it sits within a protected part of Elements only accessible by specific users. |
Stages | Different steps in the exercise process, assigned to different users or roles. Generally speaking, the first stage will be where the academic will select the items they consider valuable in the assessment exercise. The second stage will usually be the first review stage (the academic's supervisor or department head); the third stage the Dean, and so on up through the hierarchy. |
Units | A way of subdividing an assessment into predefined groups & varying some configurations per unit. |
What are the roles associated with Assessment?
Since an exercise might contain sensitive information, it is important that only select users have access.
Users | The people being asked to complete the exercise. They are added on the Users tab of the Exercise definition. |
Reviewers | Elements Users who are being asked to review the submissions during one or more stages of the assessment. |
Assessment Managers | The people who manage the submission and review processes for each exercise. |
Assessment Administrators | The people who can configure exercises and manage roles. |
What steps are needed to create an Assessment Exercise (exercise)?
Step 1: | Before you begin...consider what data you actually need to collect:
|
Step 2: |
|
Step 3: |
|
Step 4: Add one or more ‘supporting fields’ | These can be created for an exercise, a list or an item.
|
Step 5: Create Stages to structure your workflow |
|
Step 6: Assign Users and Managers |
|
Step 7: Configure the optional extras |
|
Use Case #1: Annual performance to assess faculty members at Lilliput University
Step 1: | In this instance, the University’s departments are asked to collect information about:
Most are items that can be entered into Elements and therefore are easily reportable. |
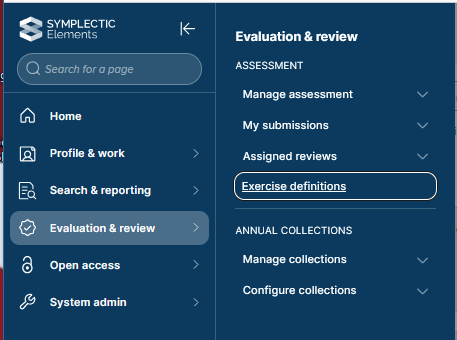
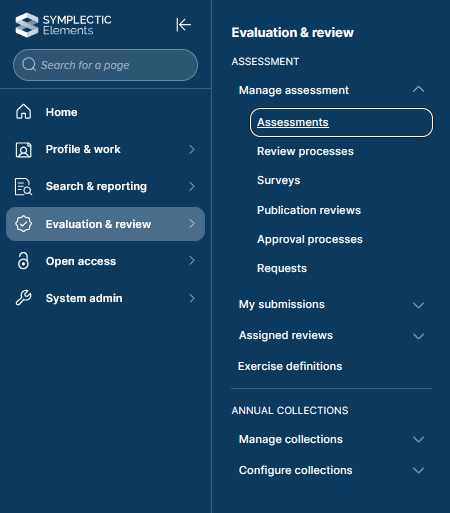
Step 2: | First, go to your instance of Elements and click on Menu > Evaluation & review > {Assessment} > Exercise definitions (V6.n Assessment > Configure Assessments > Exercise Definitions.)
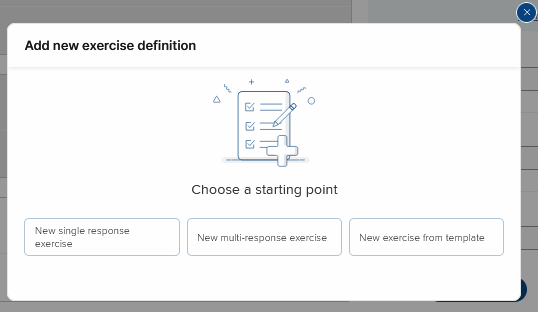
Next, create your exercise definition by selecting the Plus
button (top right) select the exercise starting point definition
Select the "New single response exercise" option.
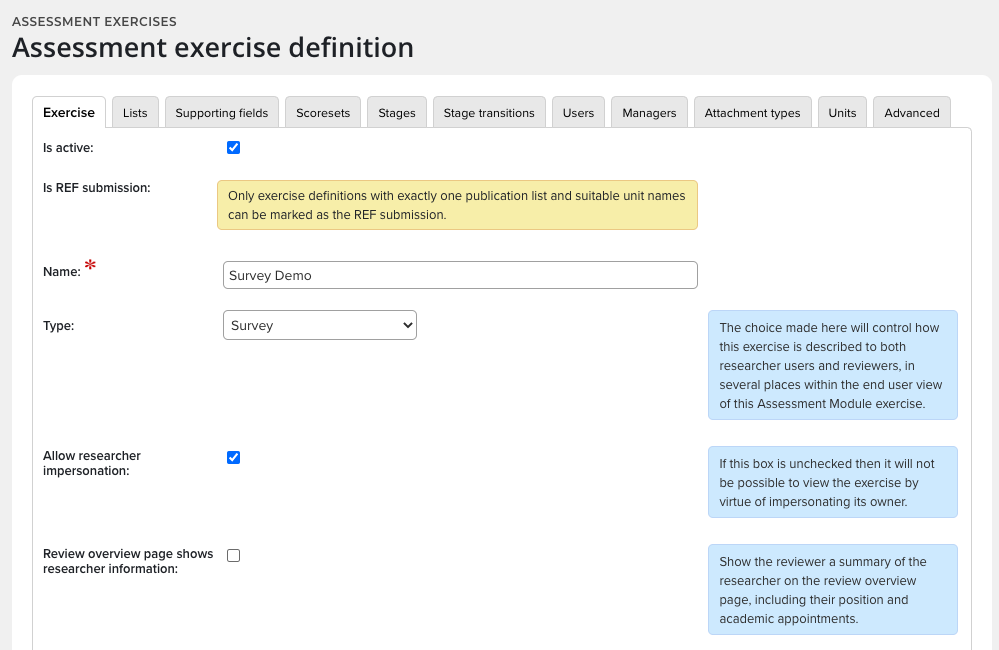
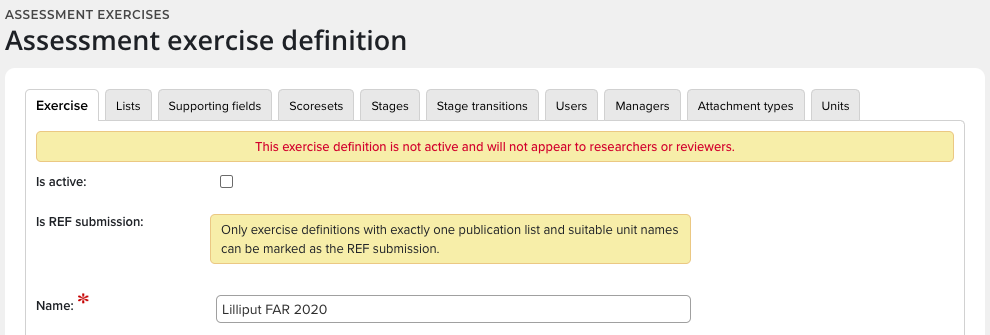
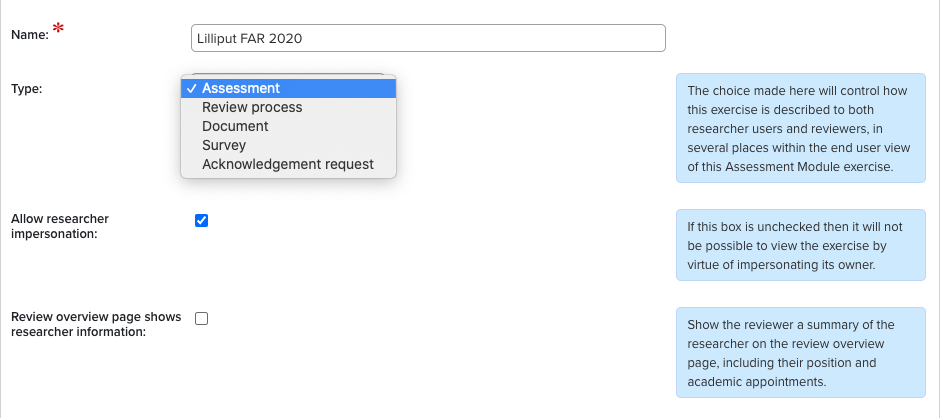
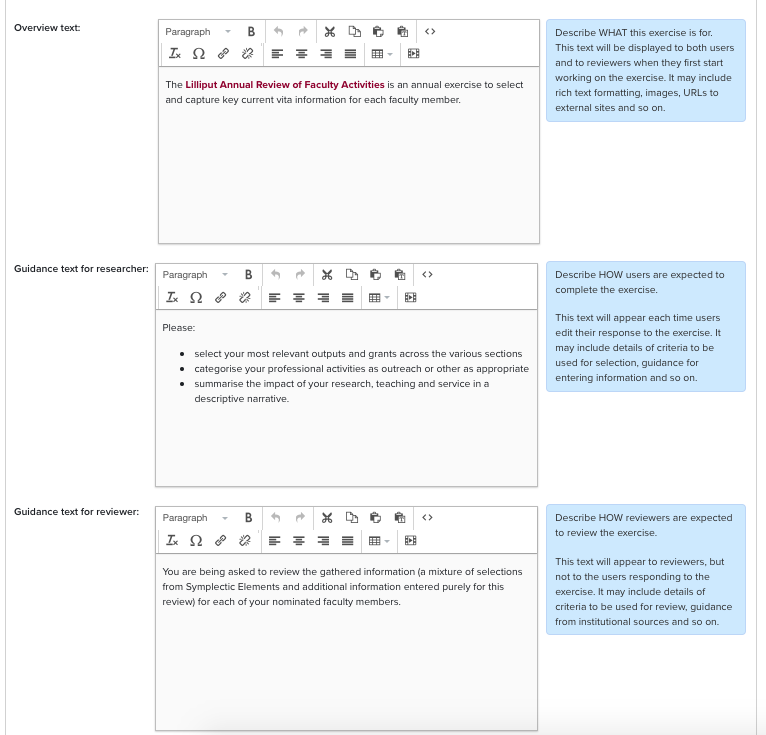
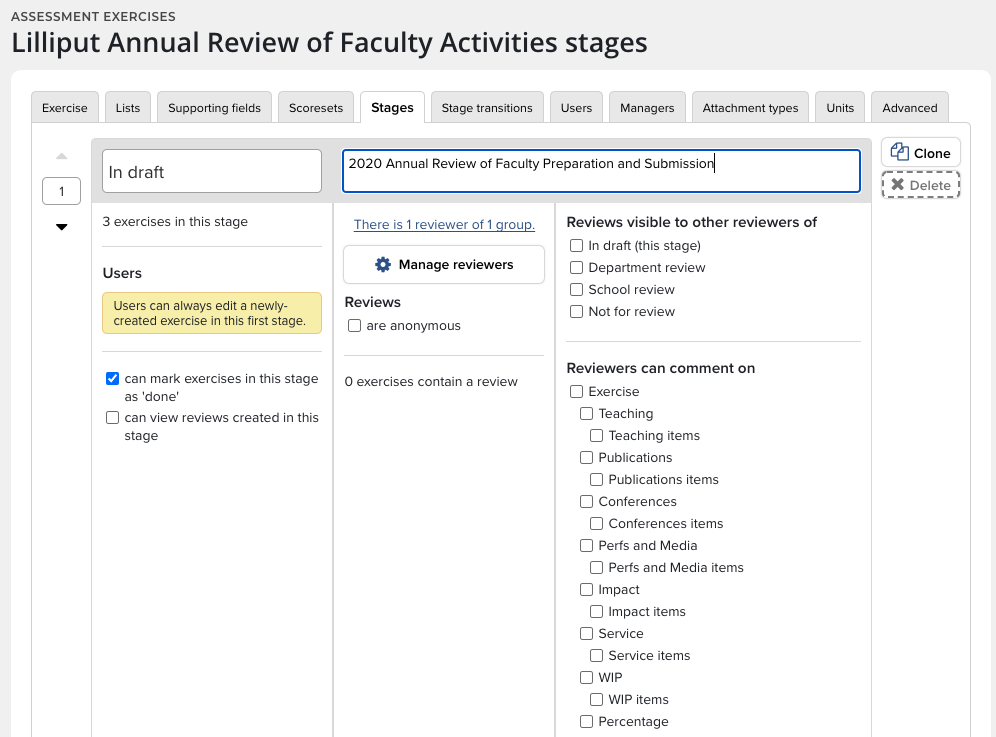
typing the name into the box at the top of the page and select DONE. The first thing you will notice about the Assessment exercise definition page is it has a lot of tabs. These will all be explained, as well as the (slightly eccentric) way they should be addressed. The second thing you will notice is that the exercise definition is not active and will not appear to researchers or reviewers. Likely, this tick-box is the last thing you will do with the exercise, but we thought you would like to know whether it was enabled right up front Also, note you can change the exercise name here if you would like.
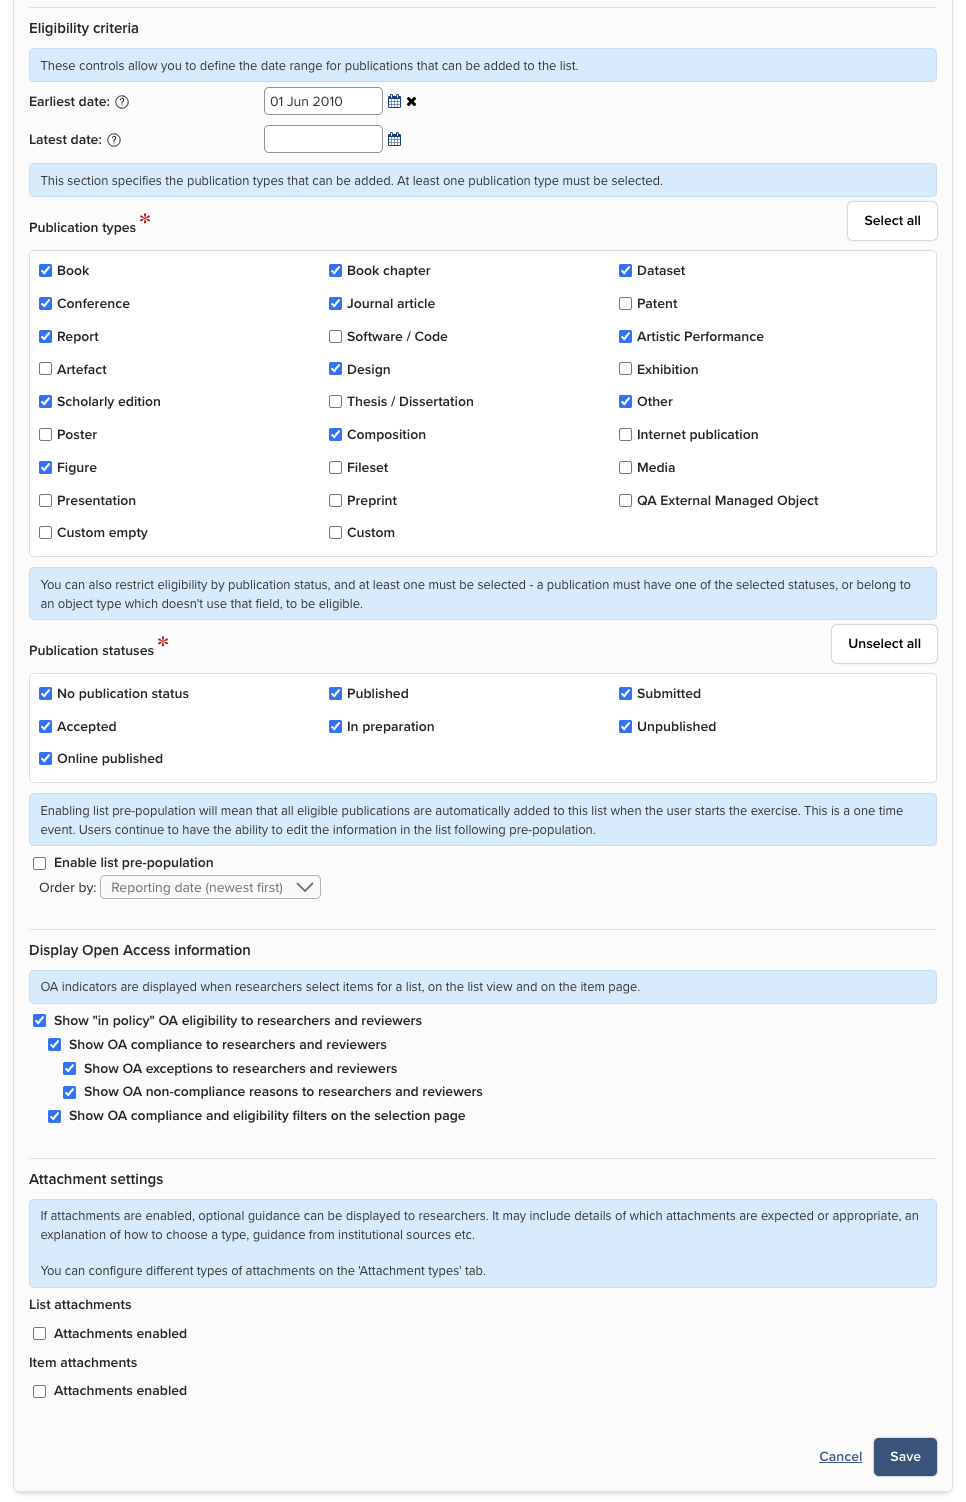
Next, there are several important decisions to make.
|
Step 3: |
|
Step 4: | Units are used to sub-divide an assessment so as to have slightly different configurations per sub-group. We aren't going to use Units in this exercise, but here's a link to Managing Units of Assessment, which explains how they can be used. |
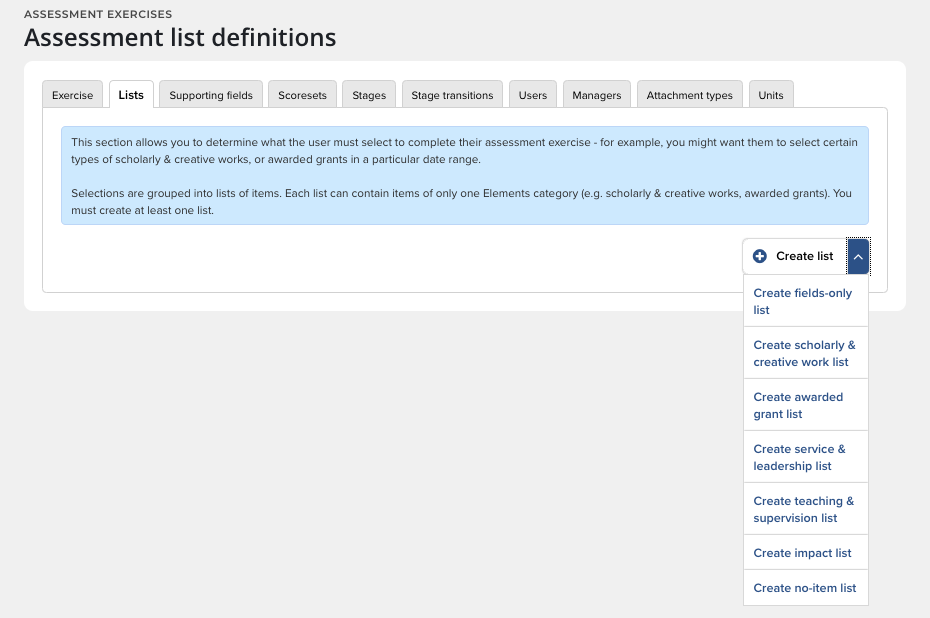
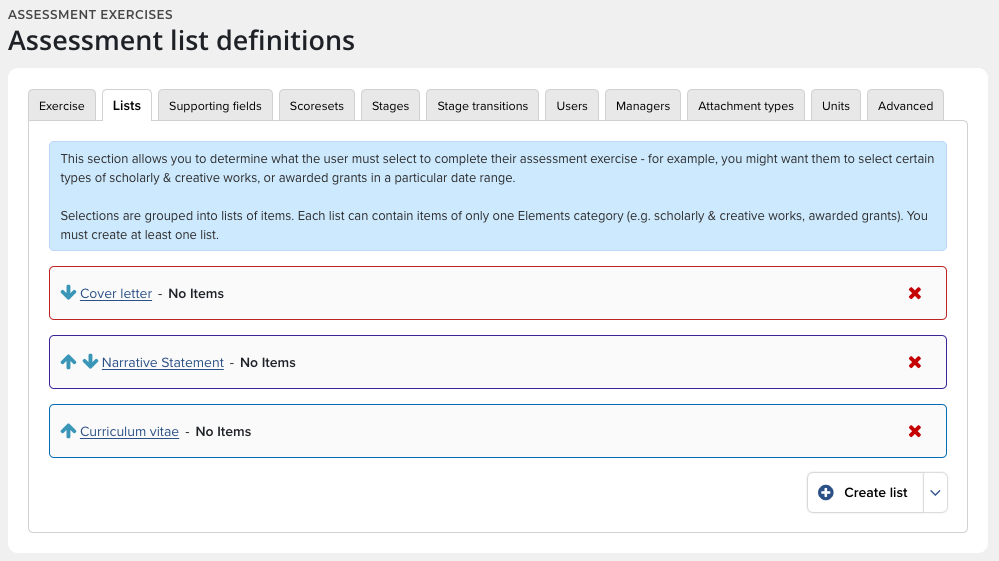
Step 5: |
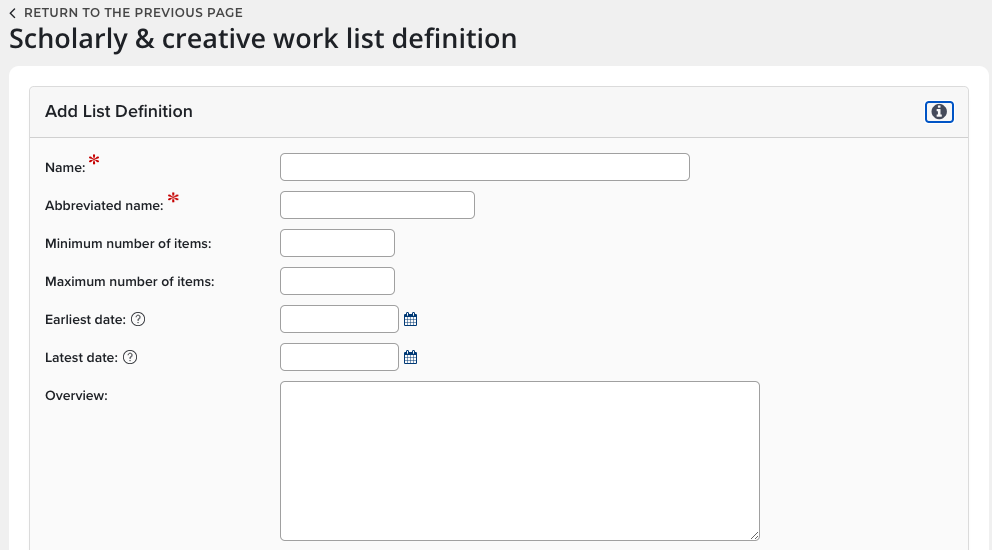
There are several fields that you could fill out for each List, but only a few are required.
|
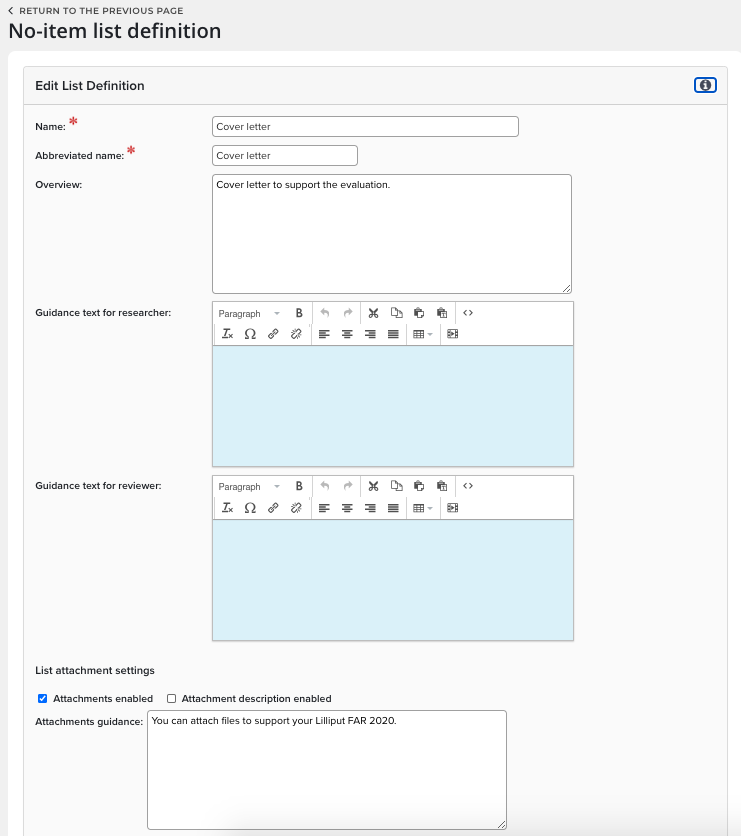
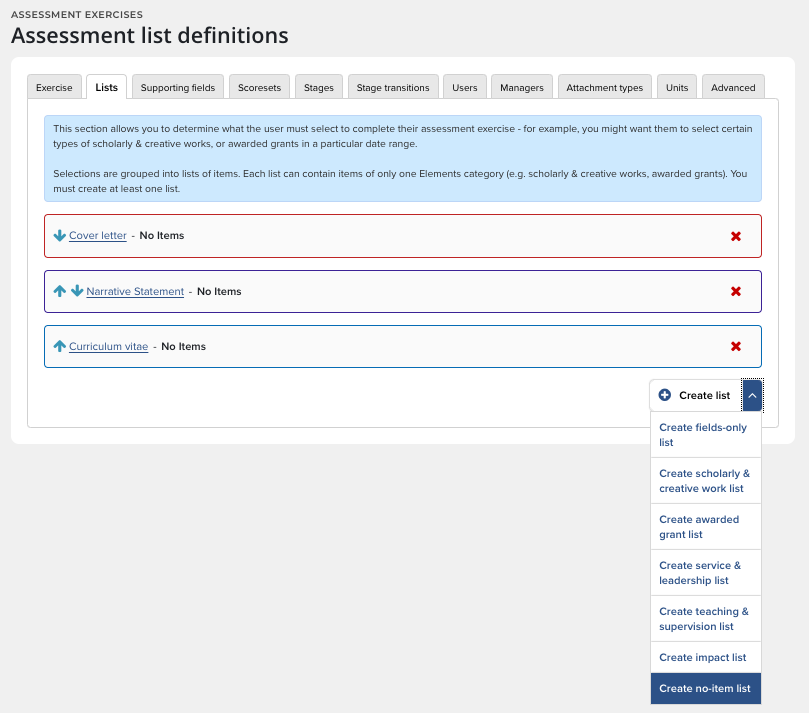
Step 6: | A "no-items list" is made up of Supporting Fields and used to store data that is only entered in an Assessment Exercise. Examples of “no-items lists” are a cover letter, a CV, a Narrative Statement, or an Annual Evaluations and Development Plan.
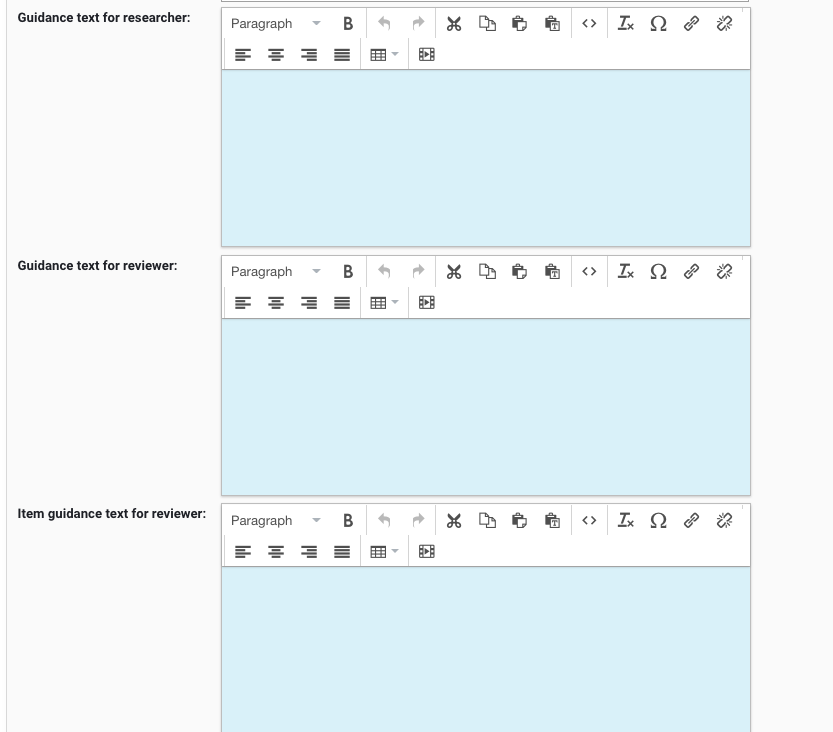
Taking a closer look at Cover Letter shows that it has the same structure as other “List” items -- Name, Abbreviated name, Overview, Guidance text, and Attachment settings…
… with the significant difference that the List does not pull data from Elements. Rather, it is configured with one or more Supporting fields, which house the required data.
|
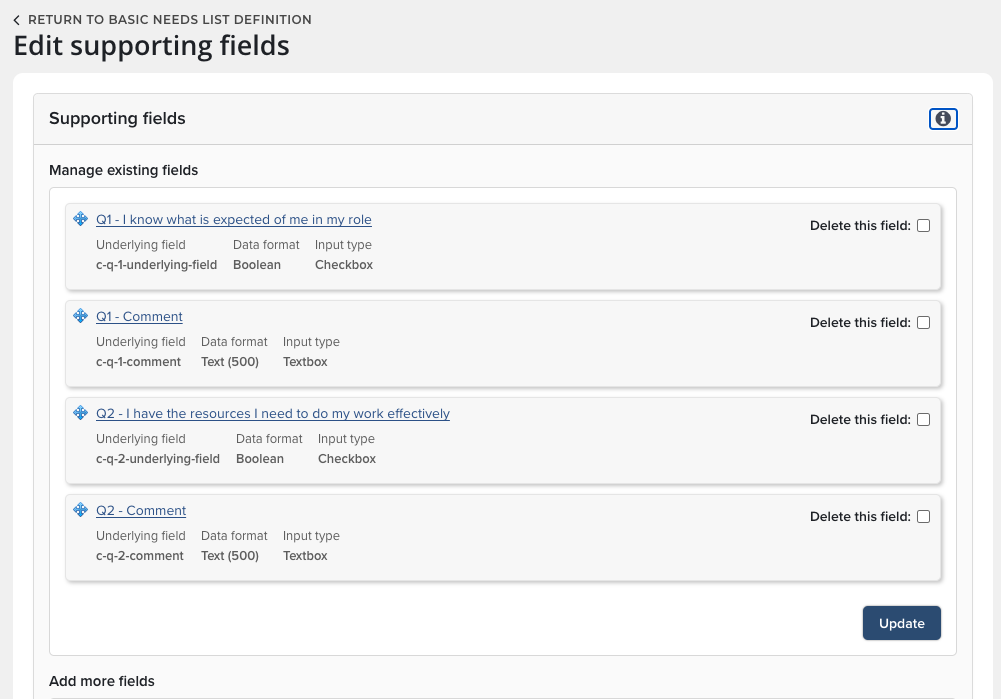
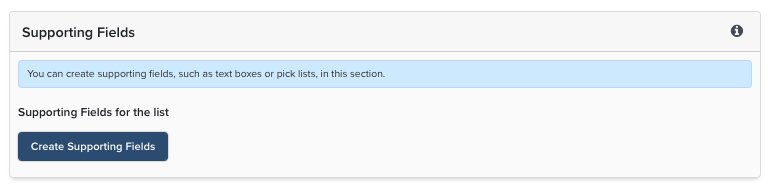
Step 7: | Begin by clicking the Create Supporting Fields button at the bottom of the page.
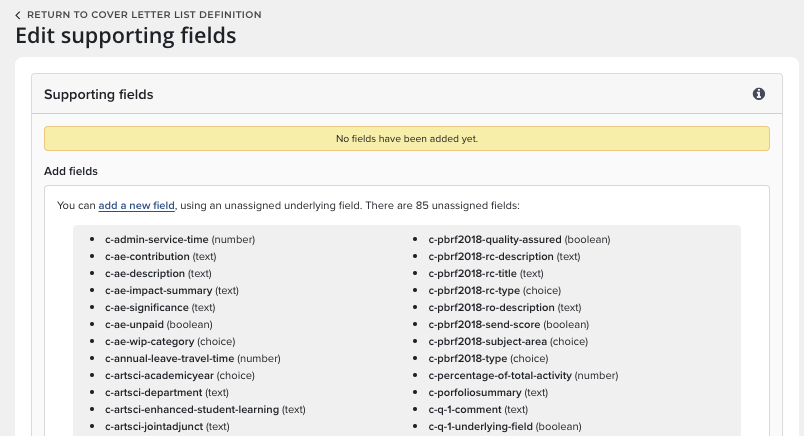
On the Edit support fields page, click the link to add a new field.
Give the new field a Display name and select an existing Underlying field and data format as for any field in Elements. Also, configure Input type and other attributes.
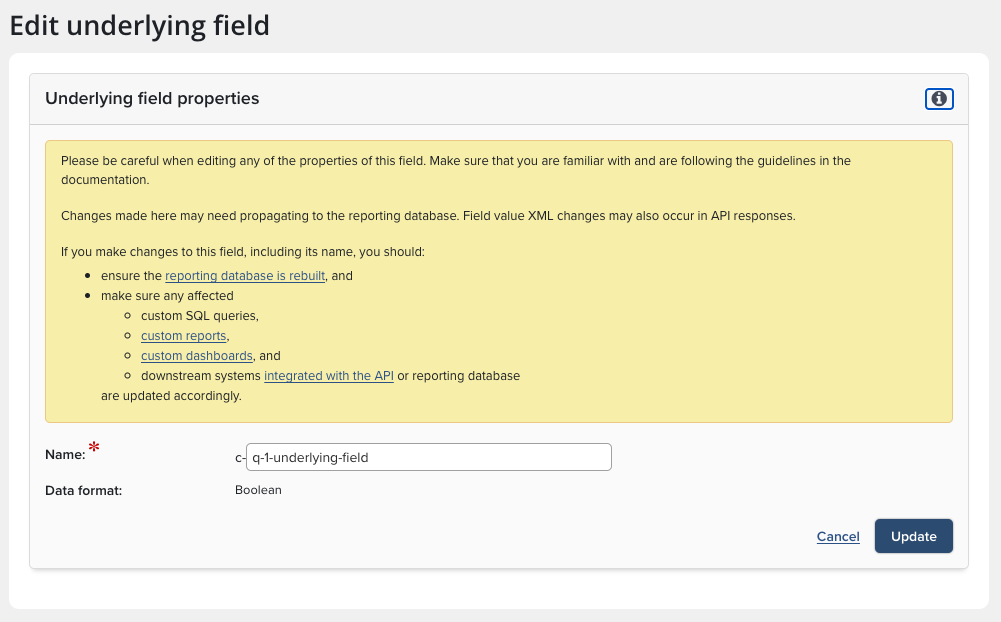
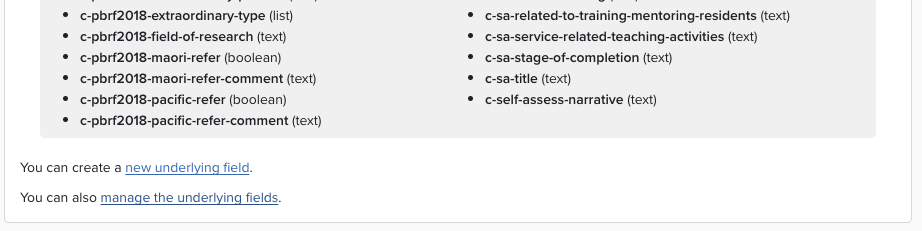
If the Underlying field does not exist, scroll to the bottom of the Edit supporting fields page and add it by clicking the Create a new underlying field link.
|
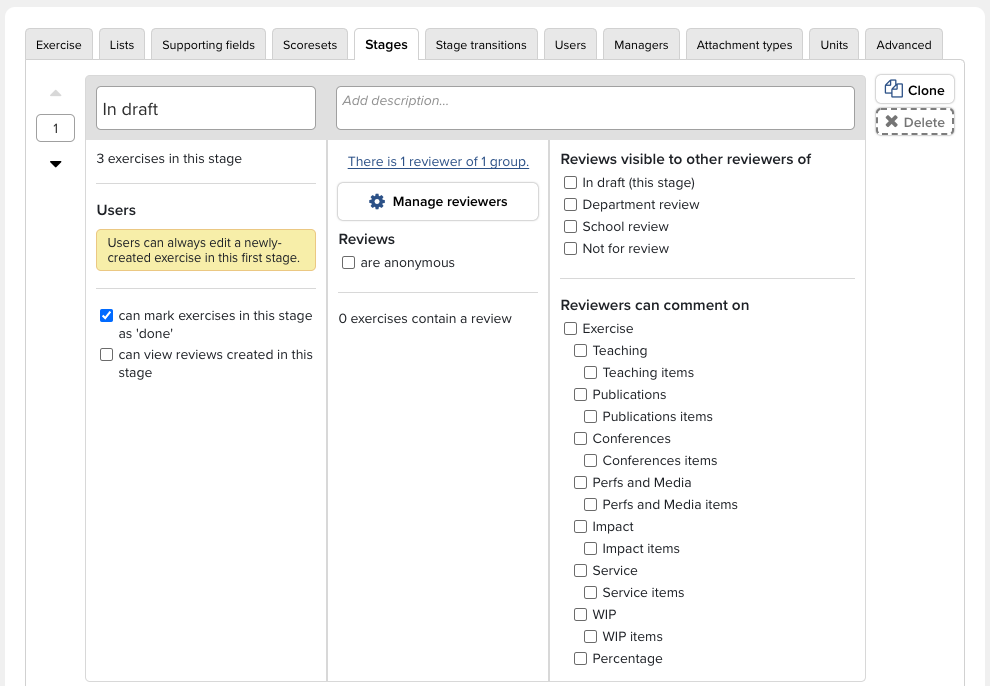
Step 8: | Begin by clicking on the Stages tab.
Here are the decisions that will need to be made:
In this instance, we’ll use these options:
This means Stage 1 would look like this: Continue onto Stage 2 by clicking Create stage.
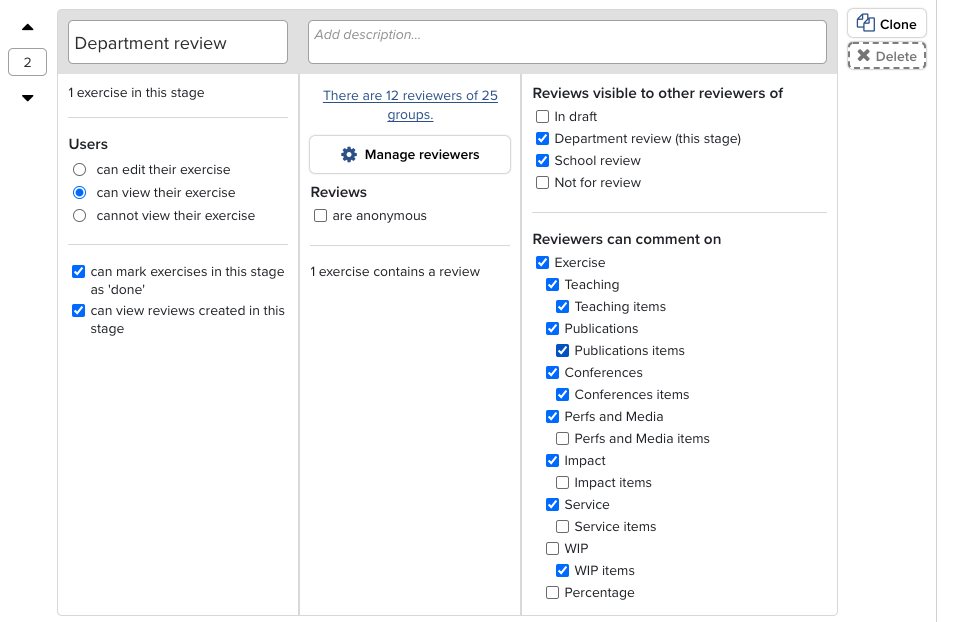
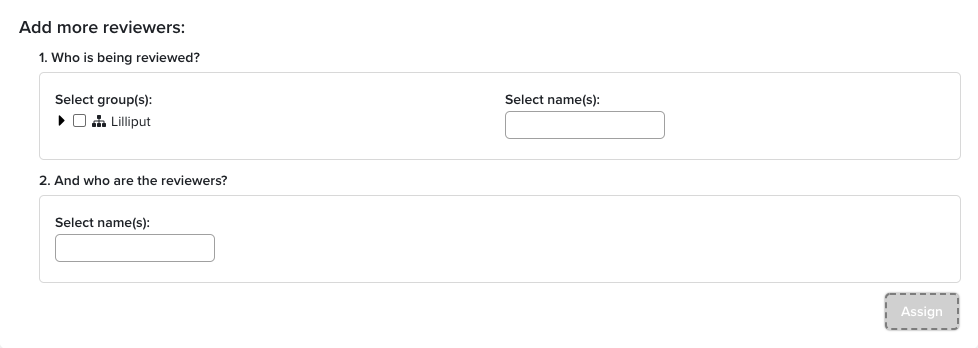
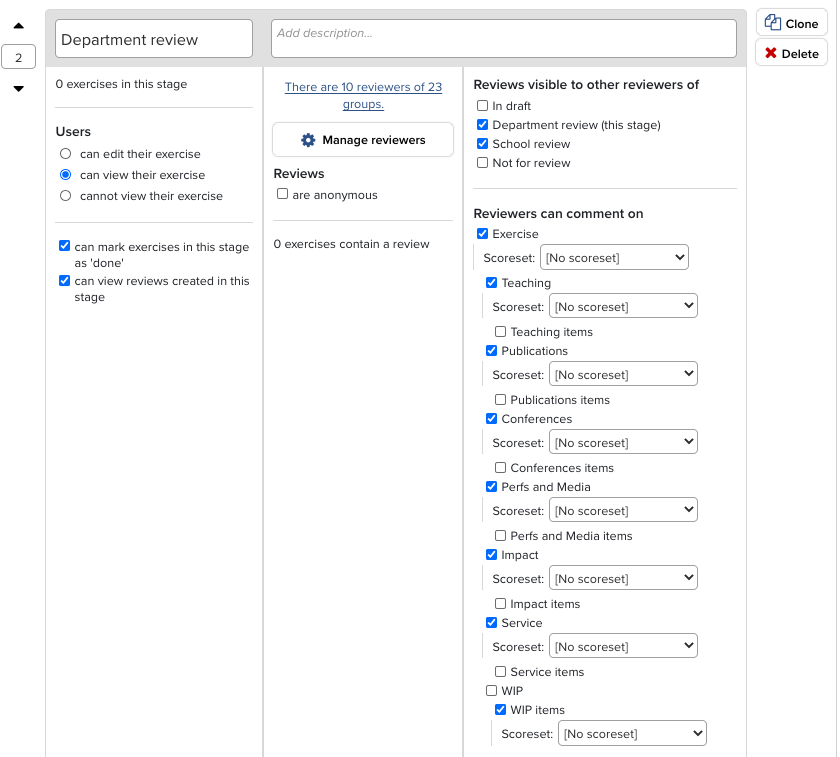
Frequently, the second stage is for review of the submissions in Stage 1, so Reviewers need to be added. This can be accomplished by clicking the Manage reviewers button. Two questions need to be answered:
After Reviewers have been assigned, decide what rights they should have:
|
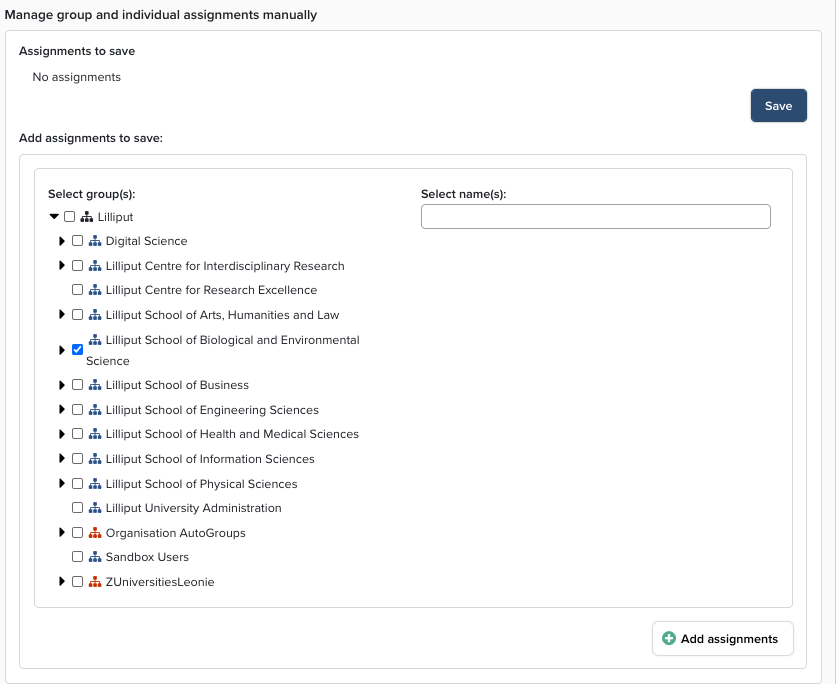
Step 9: | User In this context, “Users” are the people who are being evaluated in the exercise. In Elements, the User must be considered “Current,” which means the account attribute “Is Current” must be True. An Assessment User does not have to have the attribute “Is Academic” equal True. Users are assigned via the User tab and can be added either using the Group structure or individually.
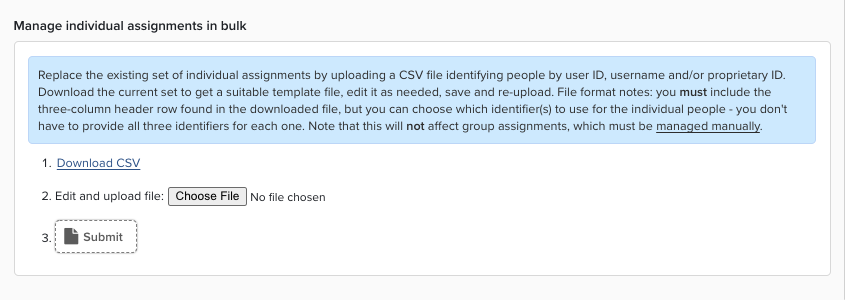
After clicking the Add assignments button, be sure to click the Save button in the section just above. Users can also be added via a CSV file upload.
Assessment Manager This role is distinct from the Assessment Administrator. Managers can be added via the Manager tab. Like Users, Managers can be added individually, in groups, or uploaded via CSV file. The Assessment Manager can monitor assigned exercises, having the ability to move items between stages, lock and unlock individual responses, and download Excel/CSV/PDF/Word reports. To access the Manager dashboard, go to Menu > Evaluation & review [ASSESSMENT] > Manage assessment > Assessments (V6.n Menu> Assessment > Manage Assessment > Manage Assessment).
For more information about what the Assessment Manager can do with the Assessment Dashboard, see Managing an Assessment Exercise. Everything from this point on is optional, but may prove useful. |
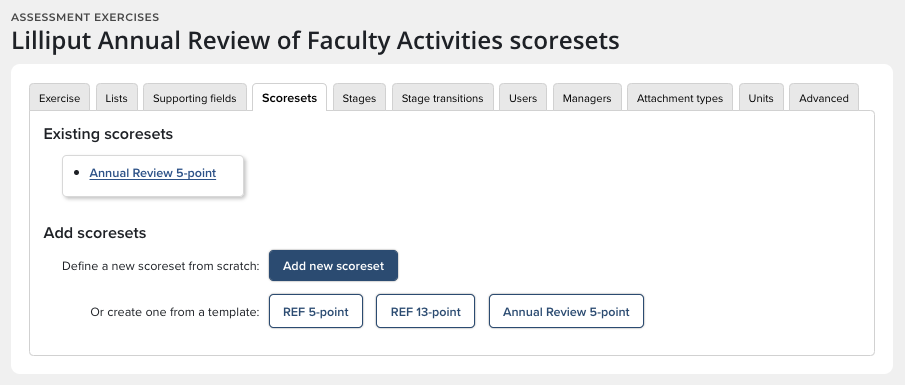
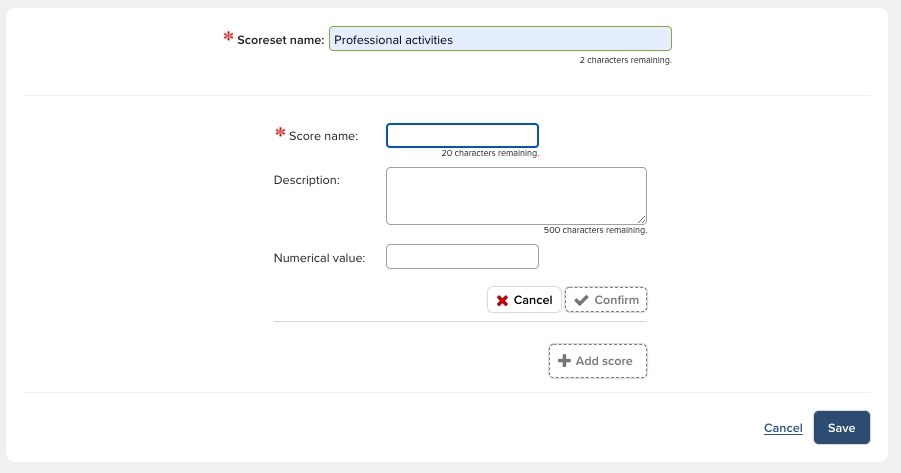
Step 10: Add a Scoring schema | Scoresets can be added using the Scoresets tab.
The Scoreset functionality is very flexible and can accommodate different schema, including numeric scores, text descriptions and Yes/No options.
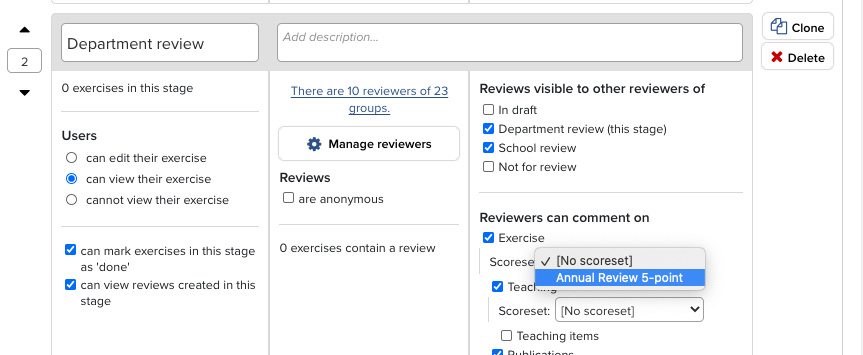
After a Scoreset has been created, it can be added to individual facets by going to the Stages tab, clicking on a List, and selecting an option from the dropdown menu.
|
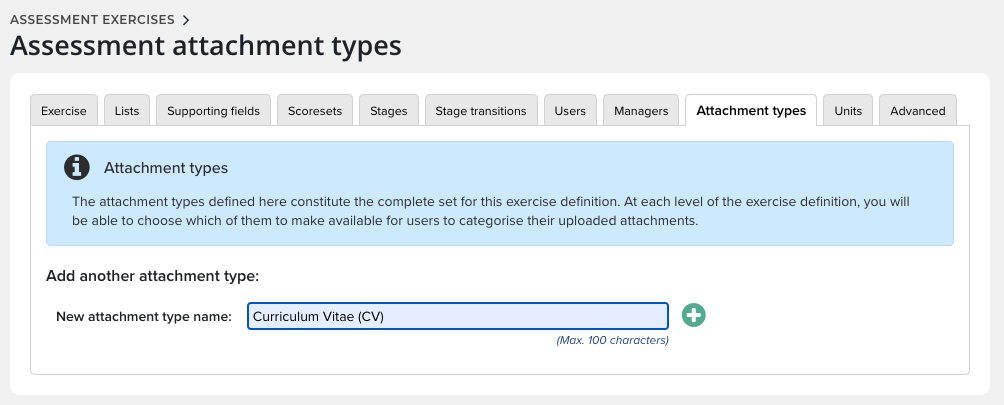
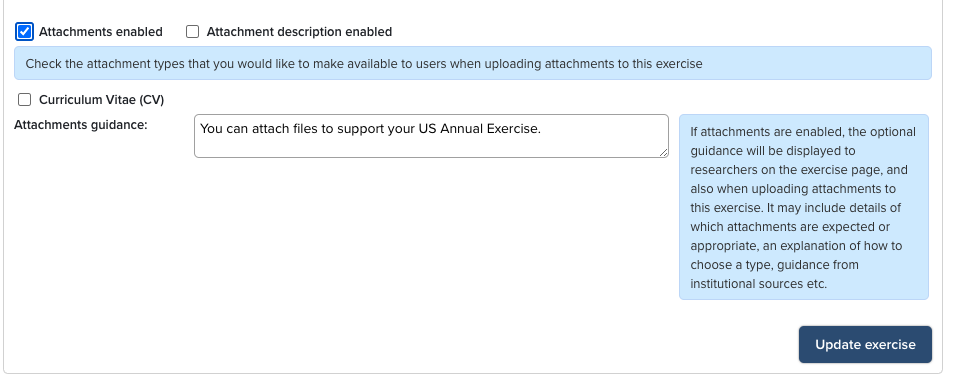
Step 11: Configure permitted attachment types | Start by clicking the tab and enter the name of the new type:
Then, go back to the Exercise tab and scroll to the bottom of the page.
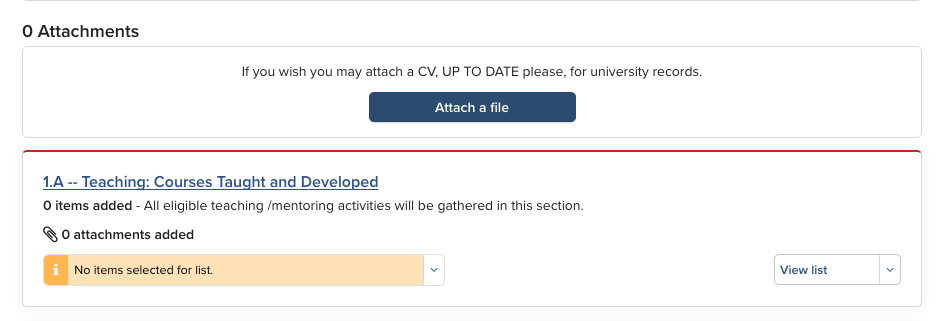
The Attachment menu item will appear at the top of the faculty member’s Assessment Exercise:
|
Step 12: | “Units” is a concept used in national exercises such as REF (Research Excellence Framework) in the United Kingdom. Symplectic has very comprehensive documentation about how to manage every aspect of a REF exercise, including configuring Unit membership. |
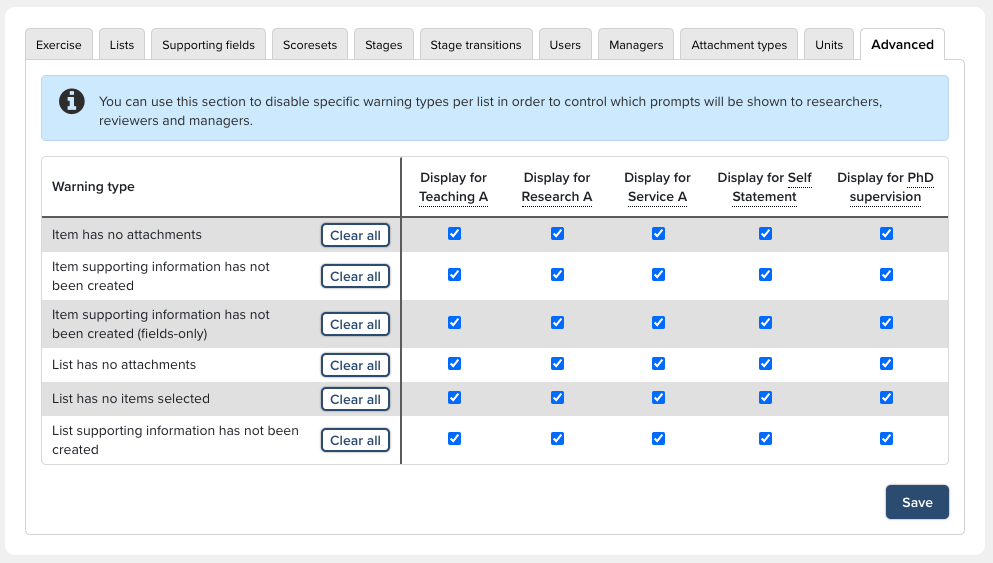
Step 13: Configure warning and prompts | Warnings and prompts are configured under the Advanced tab and are used to guide researchers, reviewers and managers.
|
Step 14: Set up Assessment Reports | Making reports available for users requires that the reports be registered and made available to the appropriate exercise users. Elements comes preconfigured with these canned reports for the Assessment module:
To make a report available, go to Reporting > Configure Reporting > Registered Reports (In 5.x: System Admin > Operations > Registered Reports) and enable the desired report by ticking the checkbox. Then, click the Set availability link and click the exercise upon which reports should be generated. Don't forget to click Save. |


Use Case #2: Creating a Survey
The Assessment Module can also be used to create simple surveys. Many of the basic steps are the same as creating an Assessment.
Step 1: |
|
Step 2: |
|
Step 3: | Remember: if you're not using a canned underlying field, create the underlying field before adding a new field.
And if you make changes to the underlying field, rebuild the reporting database. |
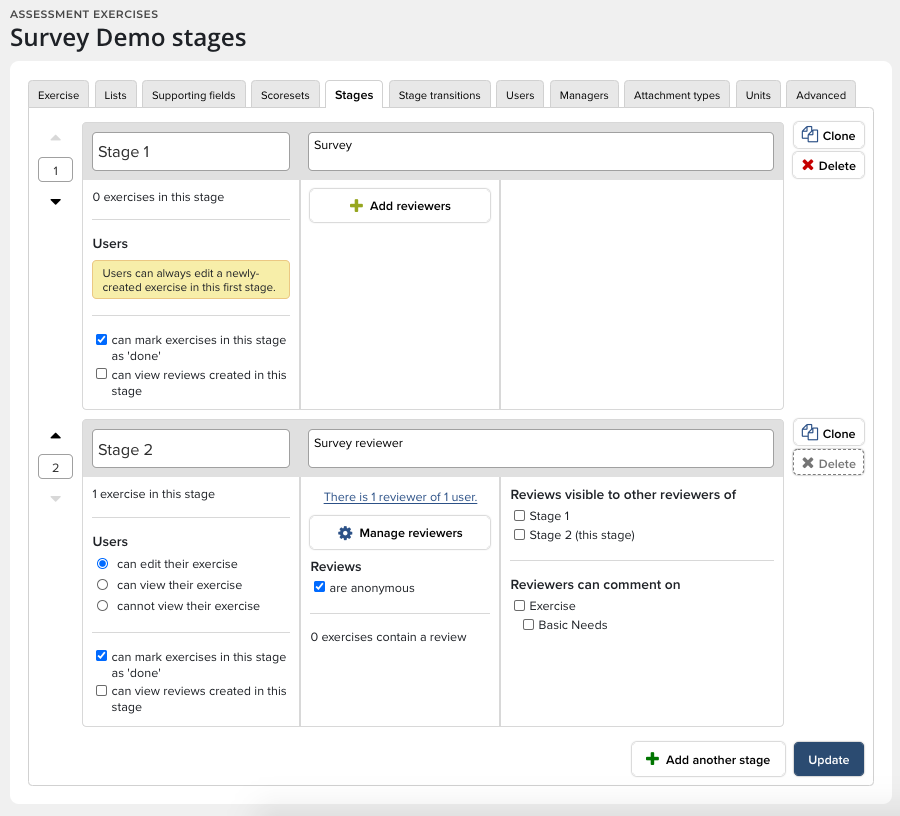
Step 4: Configure the Stages | Only two stages should be needed.
|
Step 5: Add reviewers | Add reviewers to Stage 2 and then configure who you want to receive the Survey under the Users tab. |
Step 6: | When you enable the exercise under the Exercise tab, notification will appear on the user's Home page. |