Project activation
In order to move a Proposal on to a Project, it must first be 'activated'. It is expected that this action is undertaken upon contract execution (where relevant) and only once all pre-award activities are complete.
Activating the Project moves the status from 'Approved' to 'Pending start date' (if the Project start date is in the future) or 'Active' (if the Project start date is in the past).
Project activation functionality is available to authorised users in the Funding Management Console.
Project activation
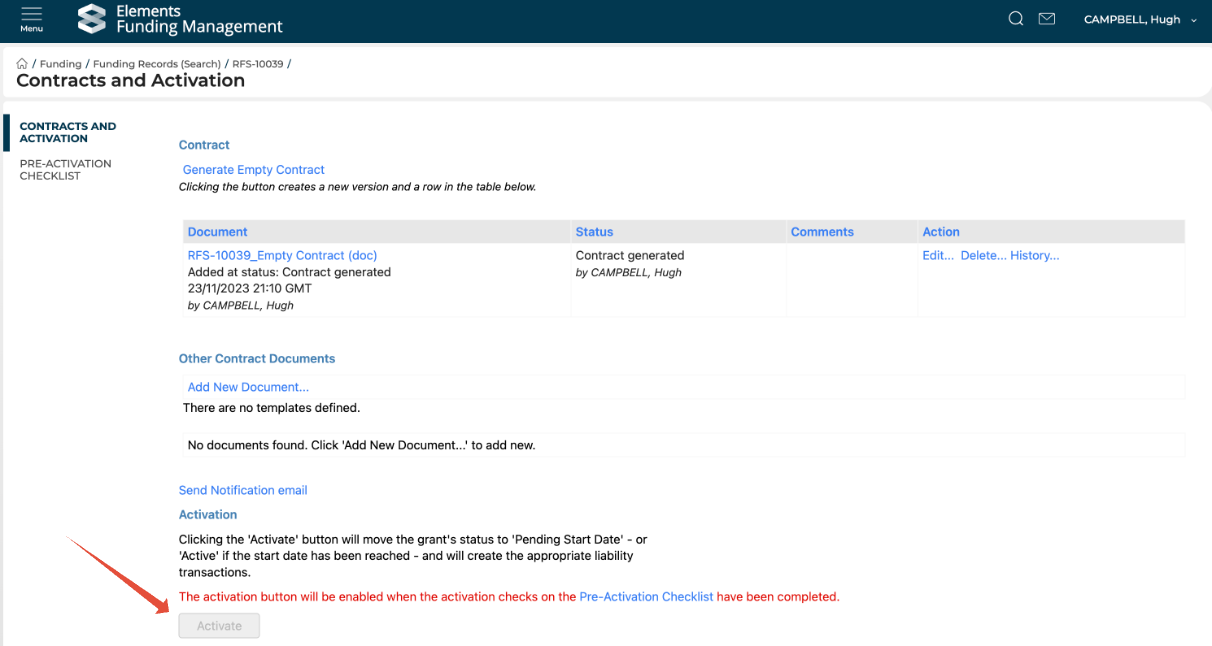
To activate the Project, navigate to the Approved Proposal in the Console, then open the 'Contracts and activation' page from the left-hand navigation.
Once all pre-activation checklist items have been completed the 'Activate' button will be enabled (it is disabled until all of these items are marked as completed).
Project team visibility
Upon Project activation, a Project object will automatically be created and all named internal participants will be able to access it from the 'My Projects' space, accessible from the Funding menu.
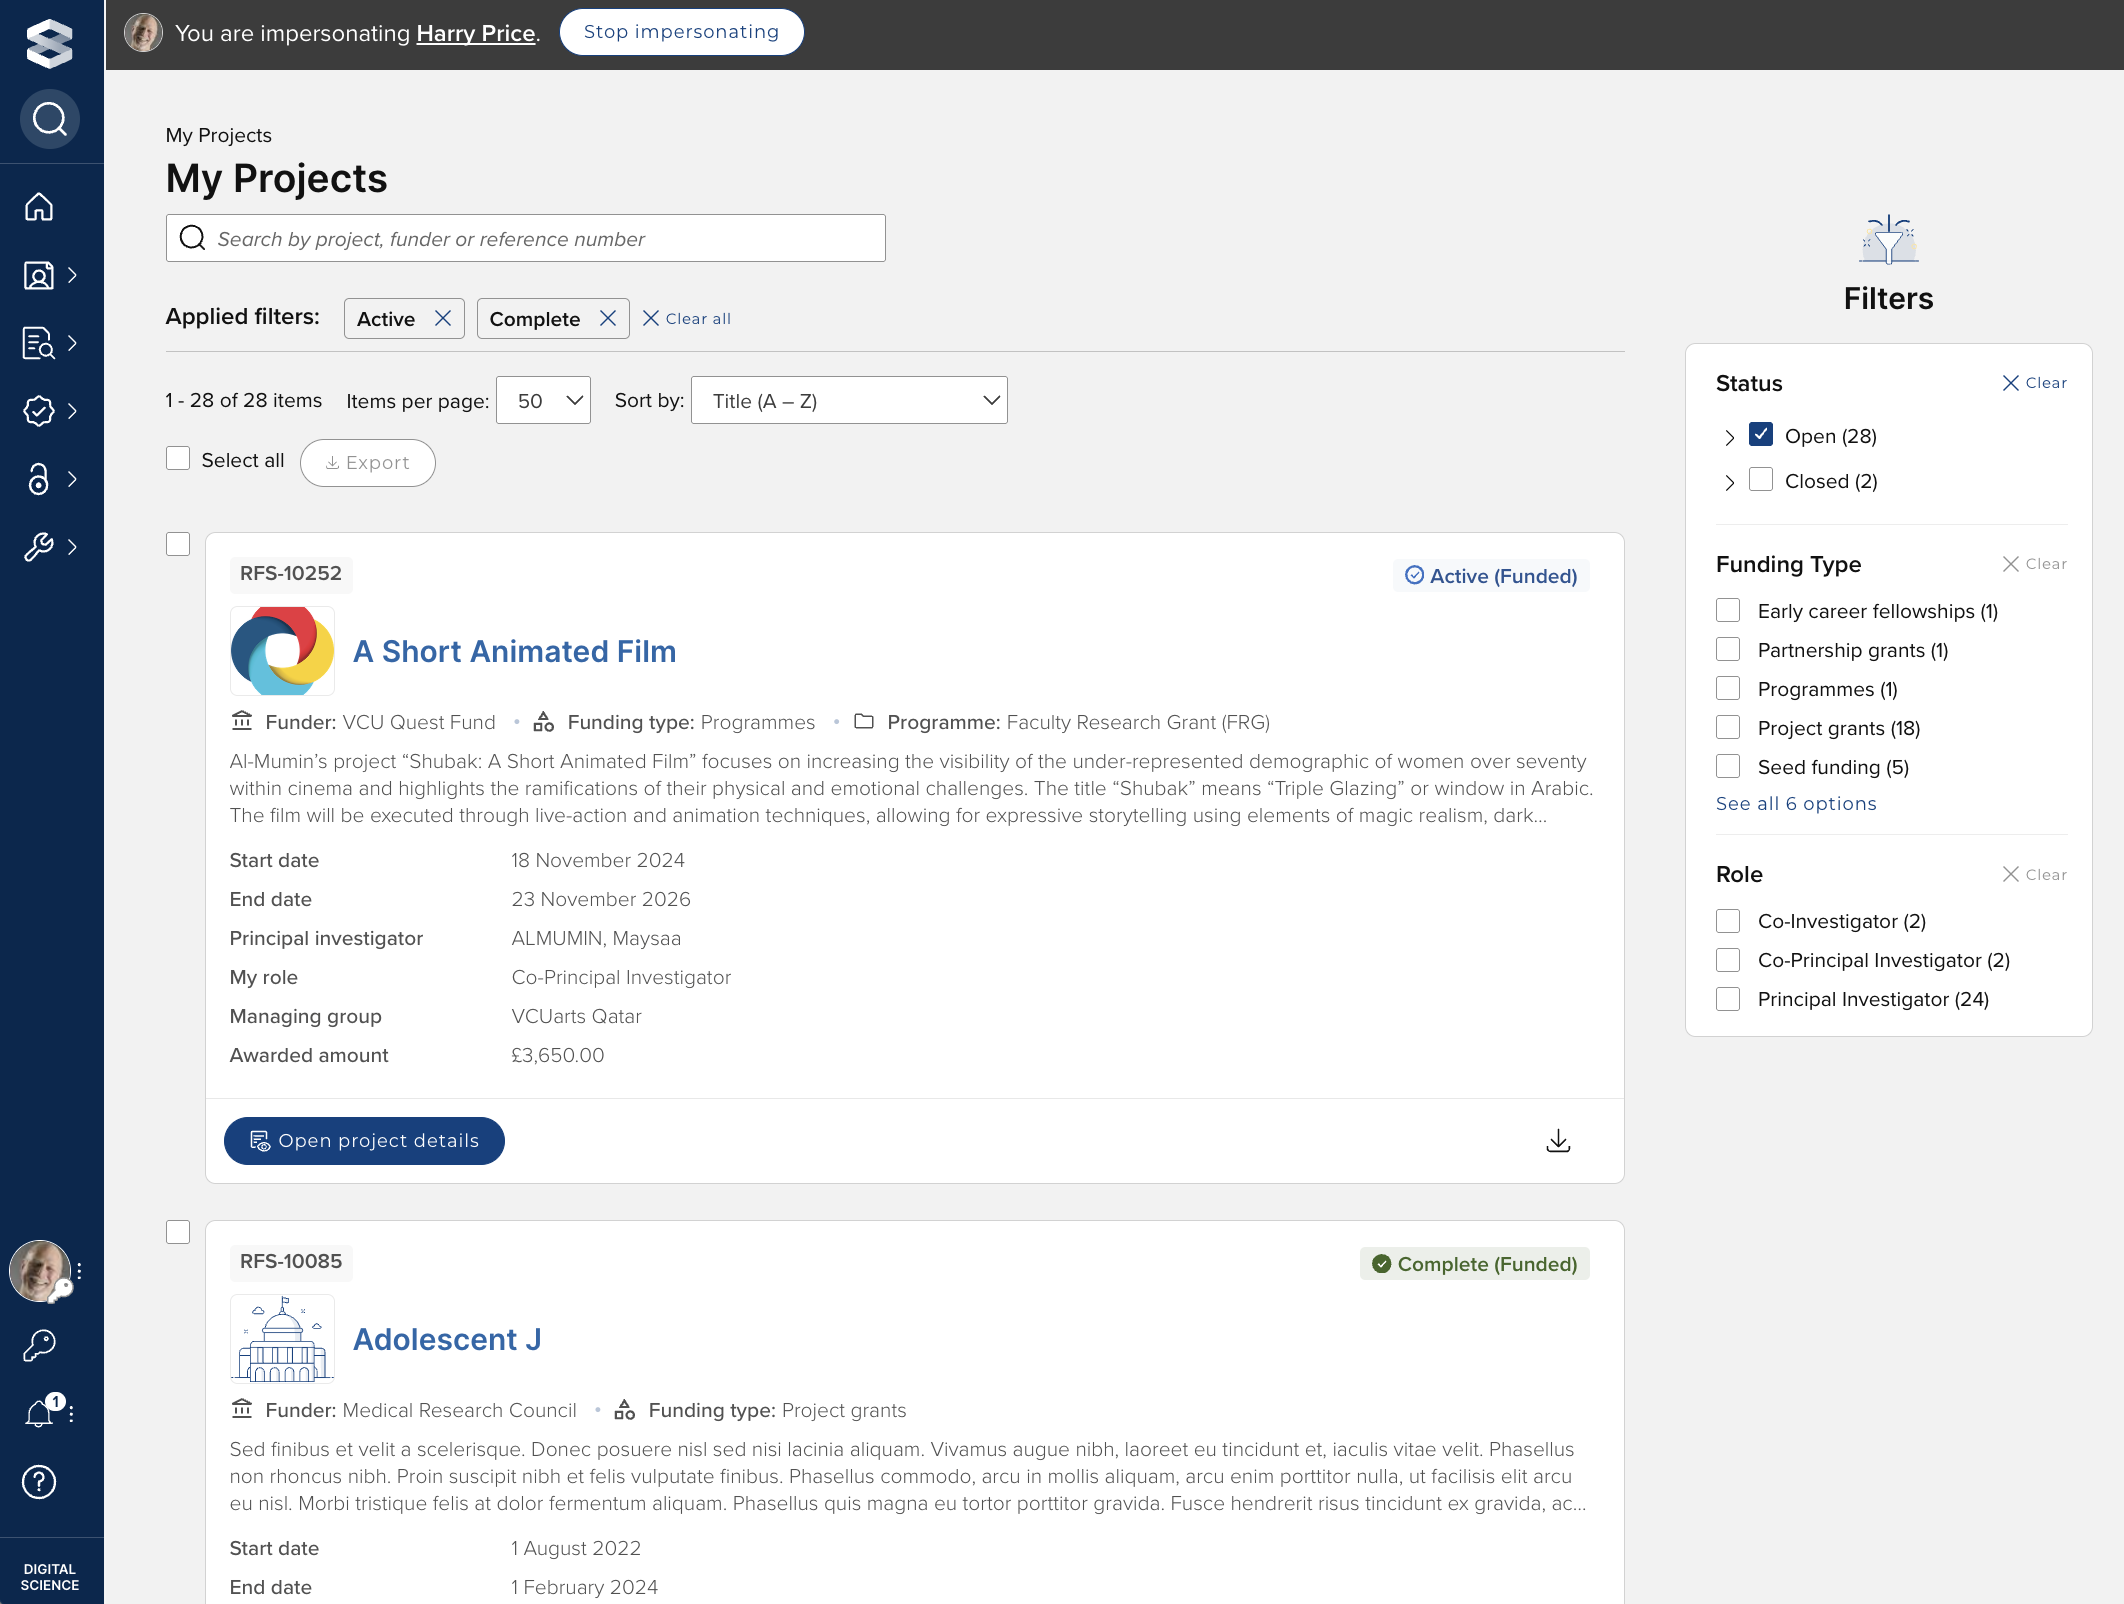
The associated Project details screen currently displays the following information. In upcoming releases, we will be expanding the content and actions available on this screen.
Project summary (Title, dates, awarded amount)
Budget summaryProject status
Budget summary
Project deliverables schedule
Change requests
Contract documentation
Documents
Grant manager contact details
Project team members
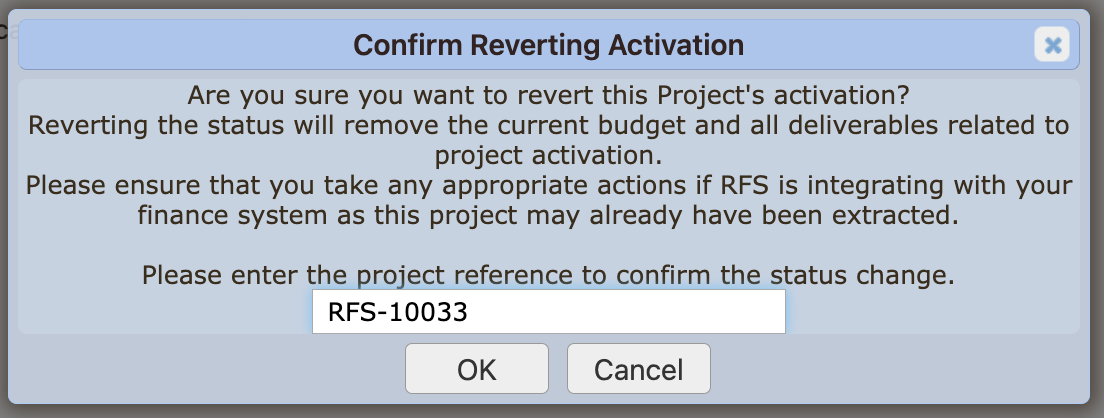
Revert project activation
System Administrators and Research Funding Administrators can revert an individual Project's activation via the Project > Edit screen. This will move the Project back to the Approved state, remove any Deliverables related to Project activation, and remove the 'Active' budget. If Awards Management is configured to integrate with your Finance system, you must ensure that you take any appropriate actions as the Project may already have been extracted to Finance.
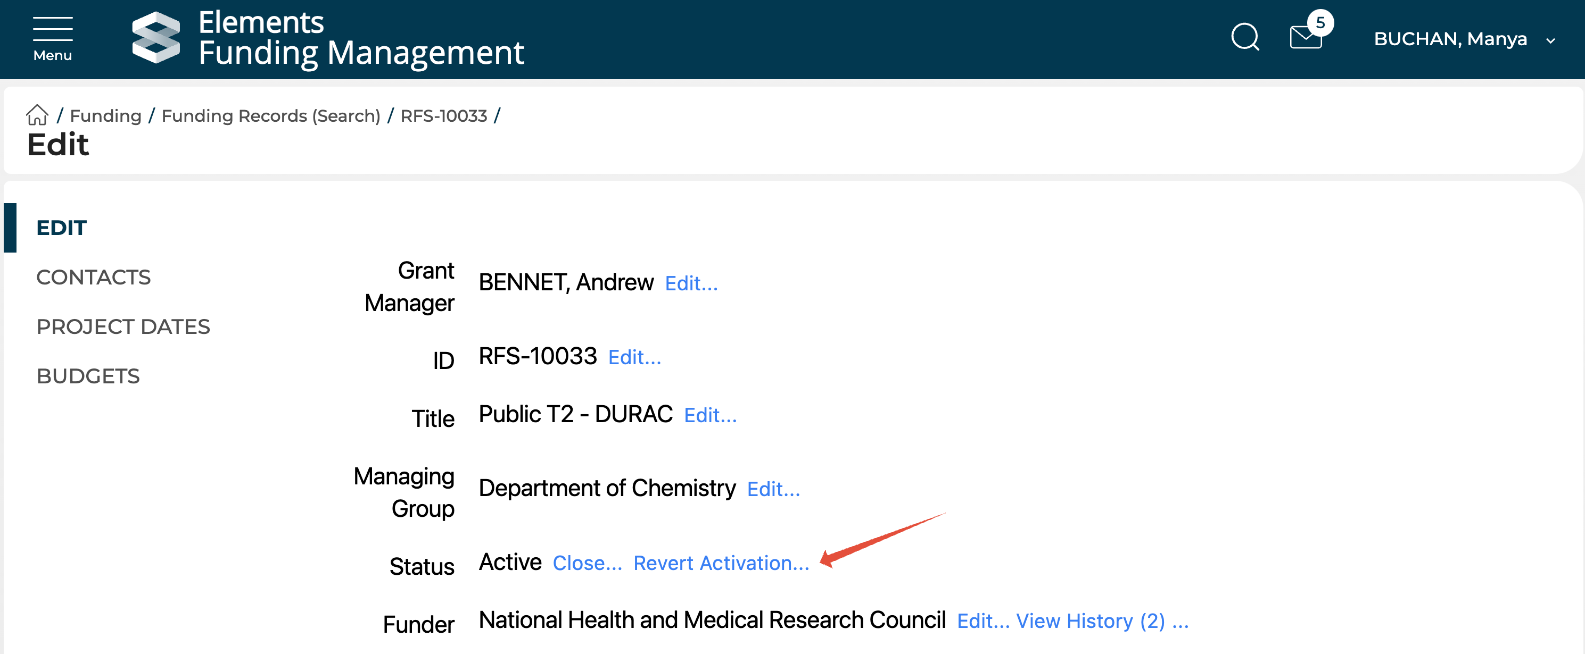
After selecting 'Revert activation', you will be presented with a confirmation message, where you will need to input the Project's reference (or ID) before selecting OK: